Viewing PDF Documents
View PDF documents in Rift, Lunr's browser-based viewer, with tools for navigation, text search, drawing references, and layers, plus keyboard shortcuts, and work with colleagues in real time.
Overview
Rift is Lunr's browser-based PDF viewer and markup tool. It renders each page pixel-for-pixel and opens in your browser, so there is no desktop software to install.
As well as viewing and marking up, Rift lets you work on the same document with your colleagues in real time. Marking up, saving, sharing, and exporting are covered in Markup and Personal Redlines.
Opening a PDF in Rift
How a PDF opens depends on how your administrator has set up the viewer.
- When Rift is the default viewer, PDFs open in Rift everywhere: full documents, the preview dialog, and change request attachments.
- When Rift is available but not the default, open a document and click the View in Rift button to switch to it.
Large documents load a page at a time, so the first pages appear before the whole file has downloaded.
Viewer Overview
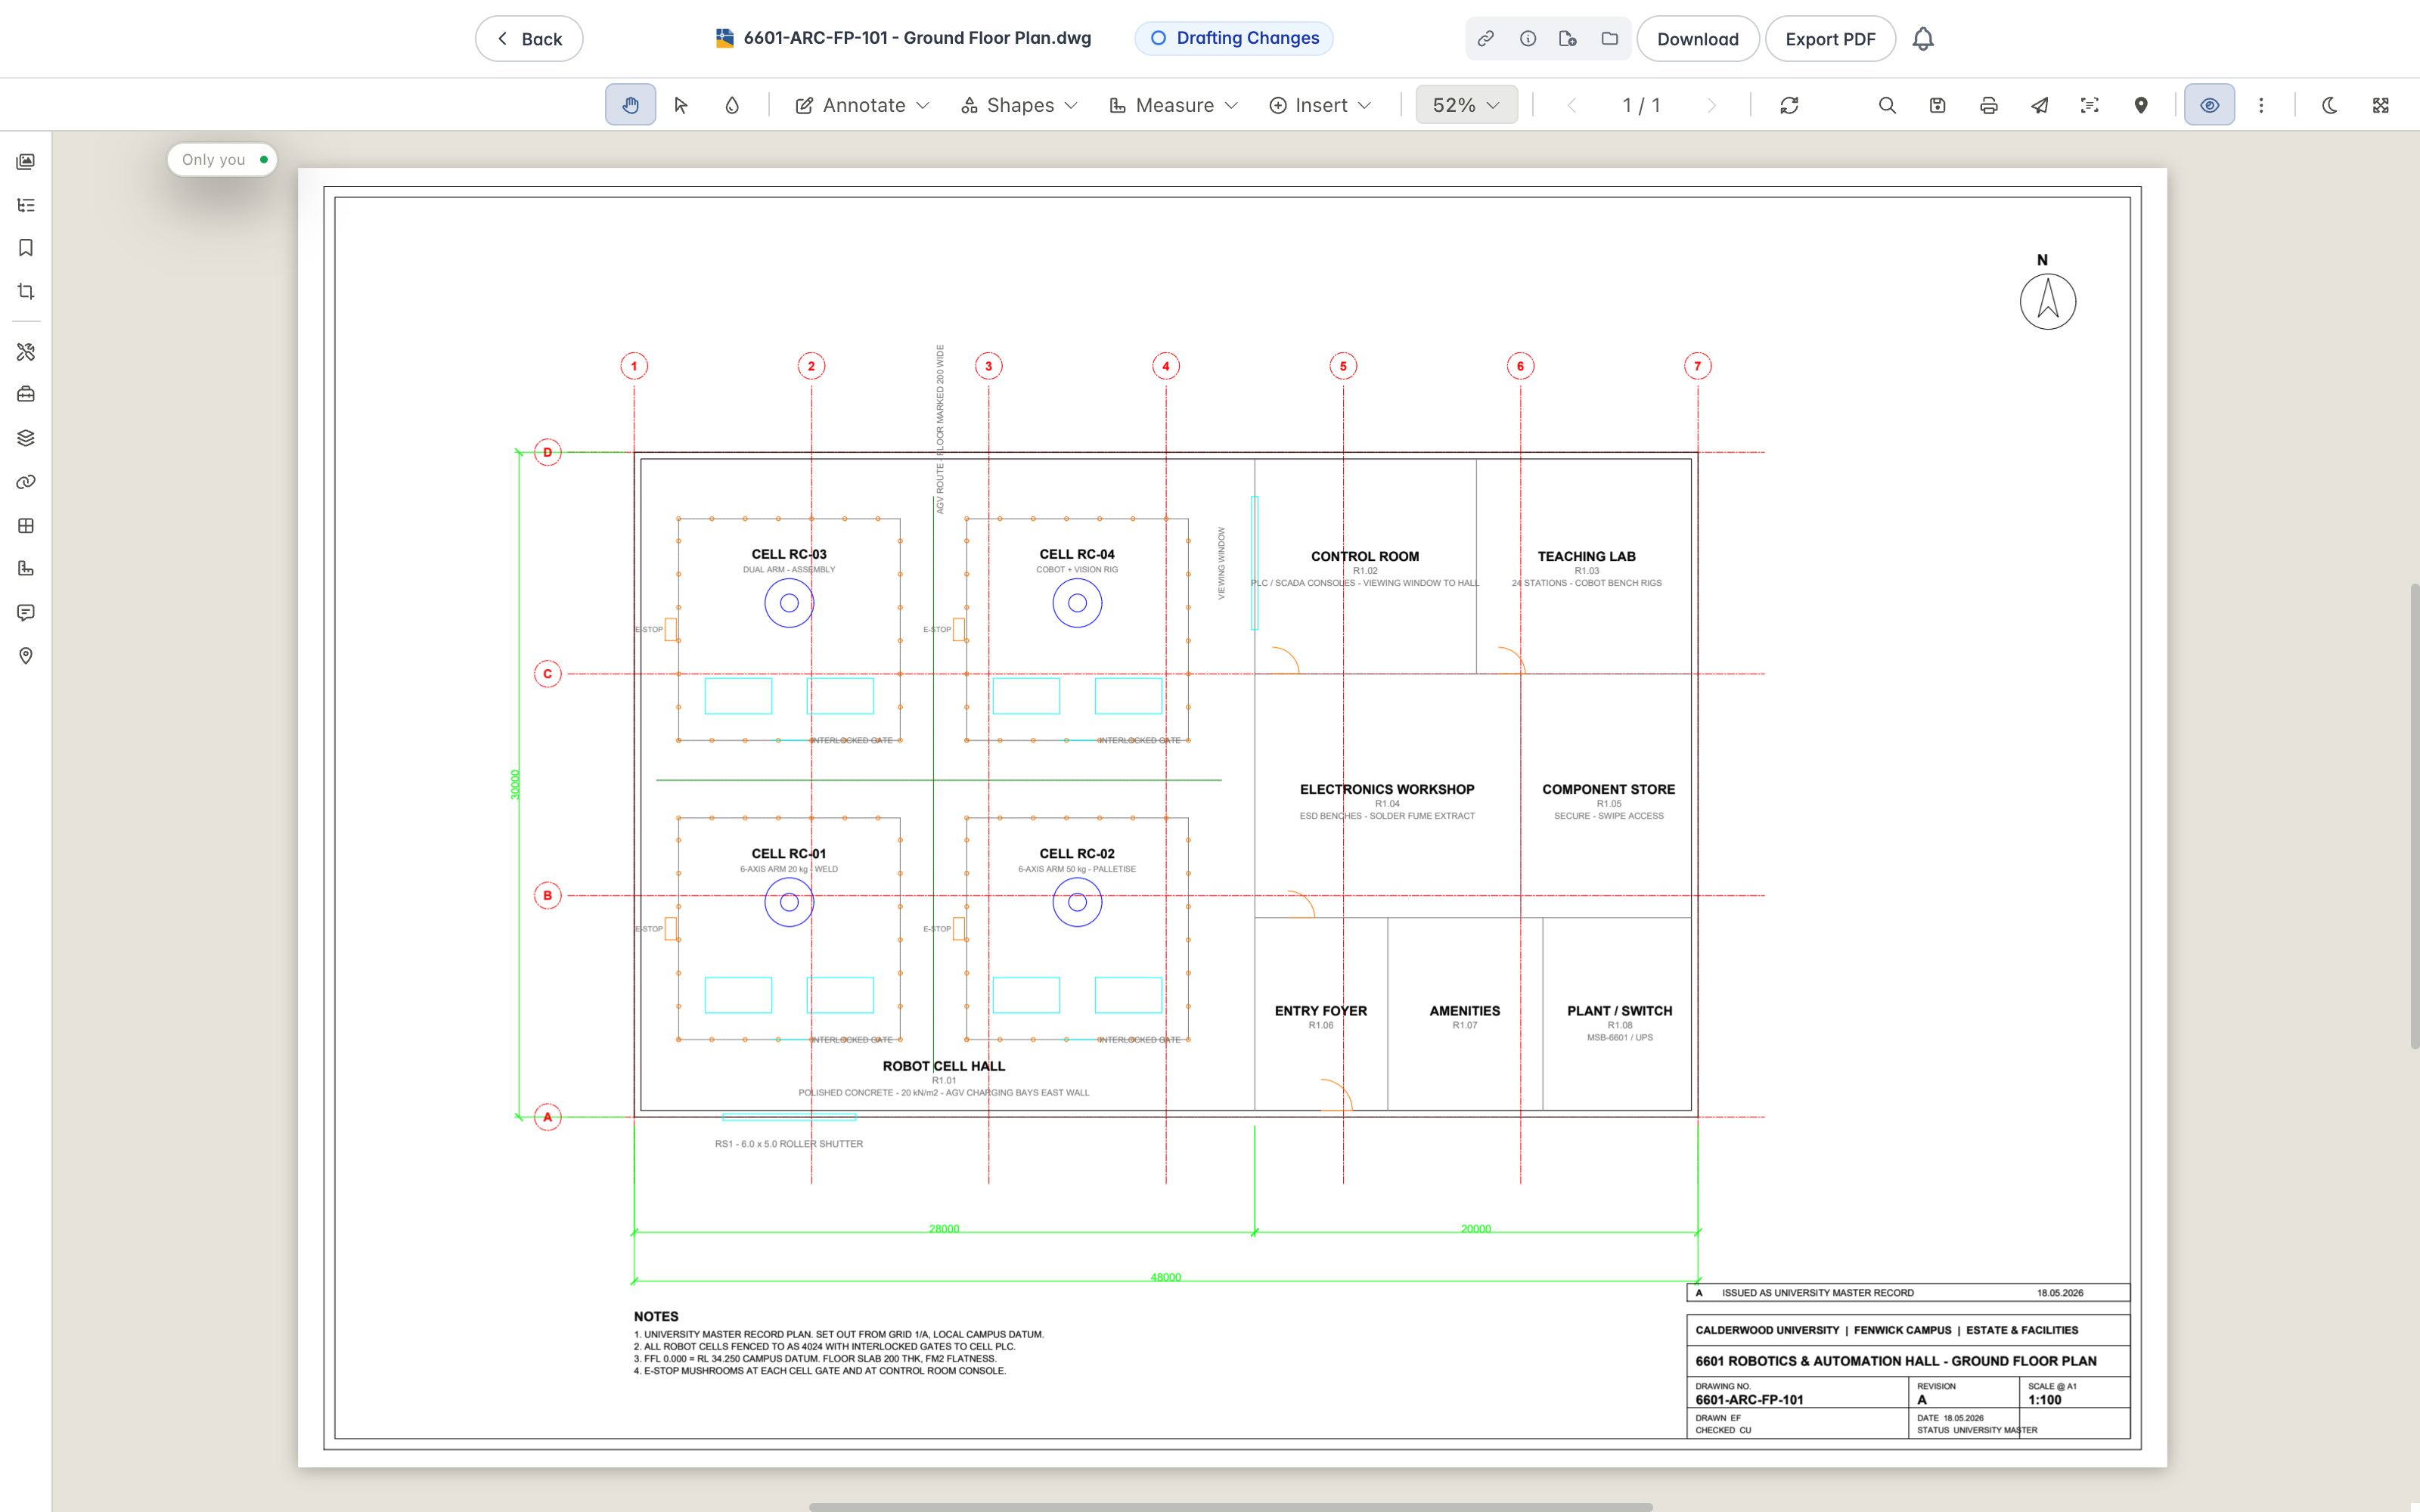
The Rift viewer fills the browser window, with a toolbar across the top and a panel rail down the side.
Toolbar
The toolbar holds the tools you use most often.

- Pan moves the page, and Select picks annotations and text.
- The Annotate, Shapes, Measure, and Insert buttons open ribbons of related tools.
- Match Properties copies the style from one annotation onto another.
- File opens a ribbon with Document tools (Save As and Print) and Markup tools (Import, Export, and Summary), covered in Exporting and Printing.
- View opens a ribbon with Redlines under Markup, Rotate, Fit Page, and Fit Width under Page, and Dark Mode and Full Screen under Display.
- On the right are text search, Submit Redline, and Overlay another version. The View ribbon holds the Issue Pin tool in its Issues group, which raises an issue at a point on the drawing. The issue tool is covered in Raising an Issue. A document with no other versions reads "No other versions." when you select Overlay another version.
Press Ctrl+K at any time to open the command palette and search for any tool or action by name.
Panels
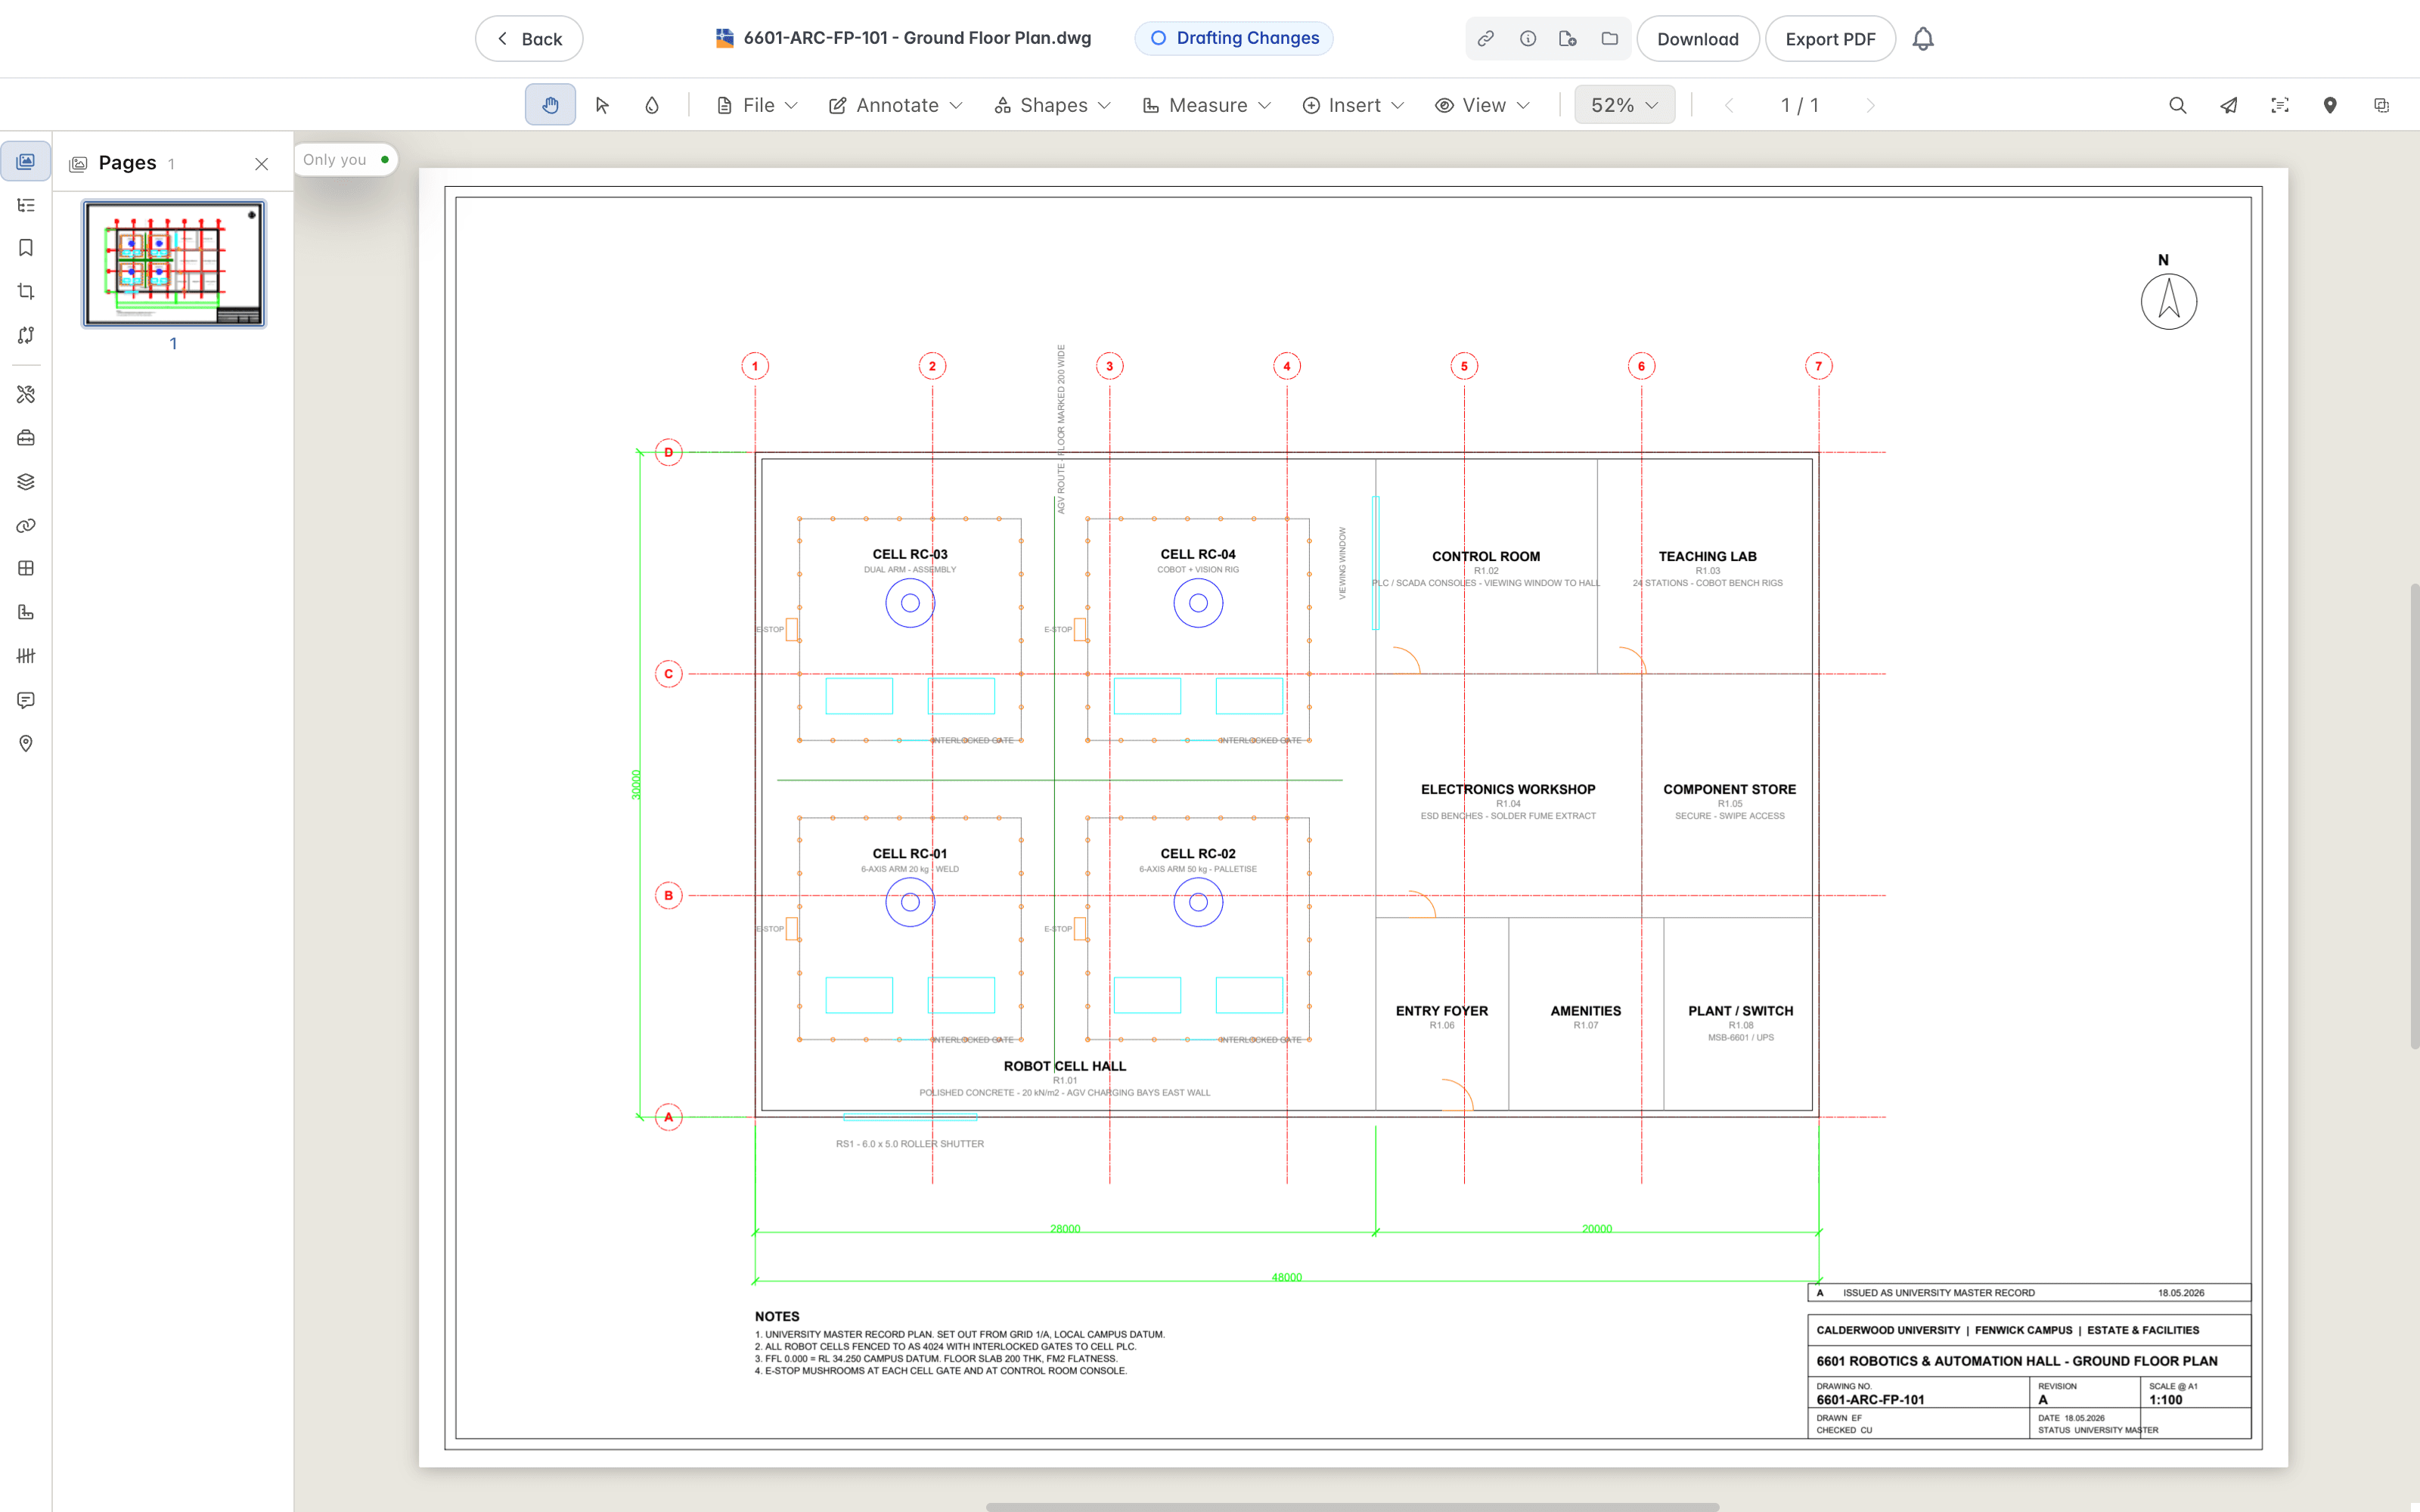
A rail down the side opens the panels. They are grouped into navigation panels and markup panels.
- Navigate and view: Pages, Outline, Saved Views, Title Blocks, Overlays, and References.
- Create and manage markup: Tool Chest, Presets, Layers, Hyperlinks, Spaces, Measurements, Count Assist, Comments, and Issues.
Some panels do more than list items:
- Pages shows page thumbnails, and Outline shows the document's bookmarks.
- Saved Views stores the current page, position, and zoom as a named view you can return to, and can play your views back in order as a presentation.
- Tool Chest holds reusable symbols you can drop onto the page, and Presets stores annotation styles you have saved.
- Layers lets you show and hide parts of a drawing. See Working With Drawing Layers.
Navigation
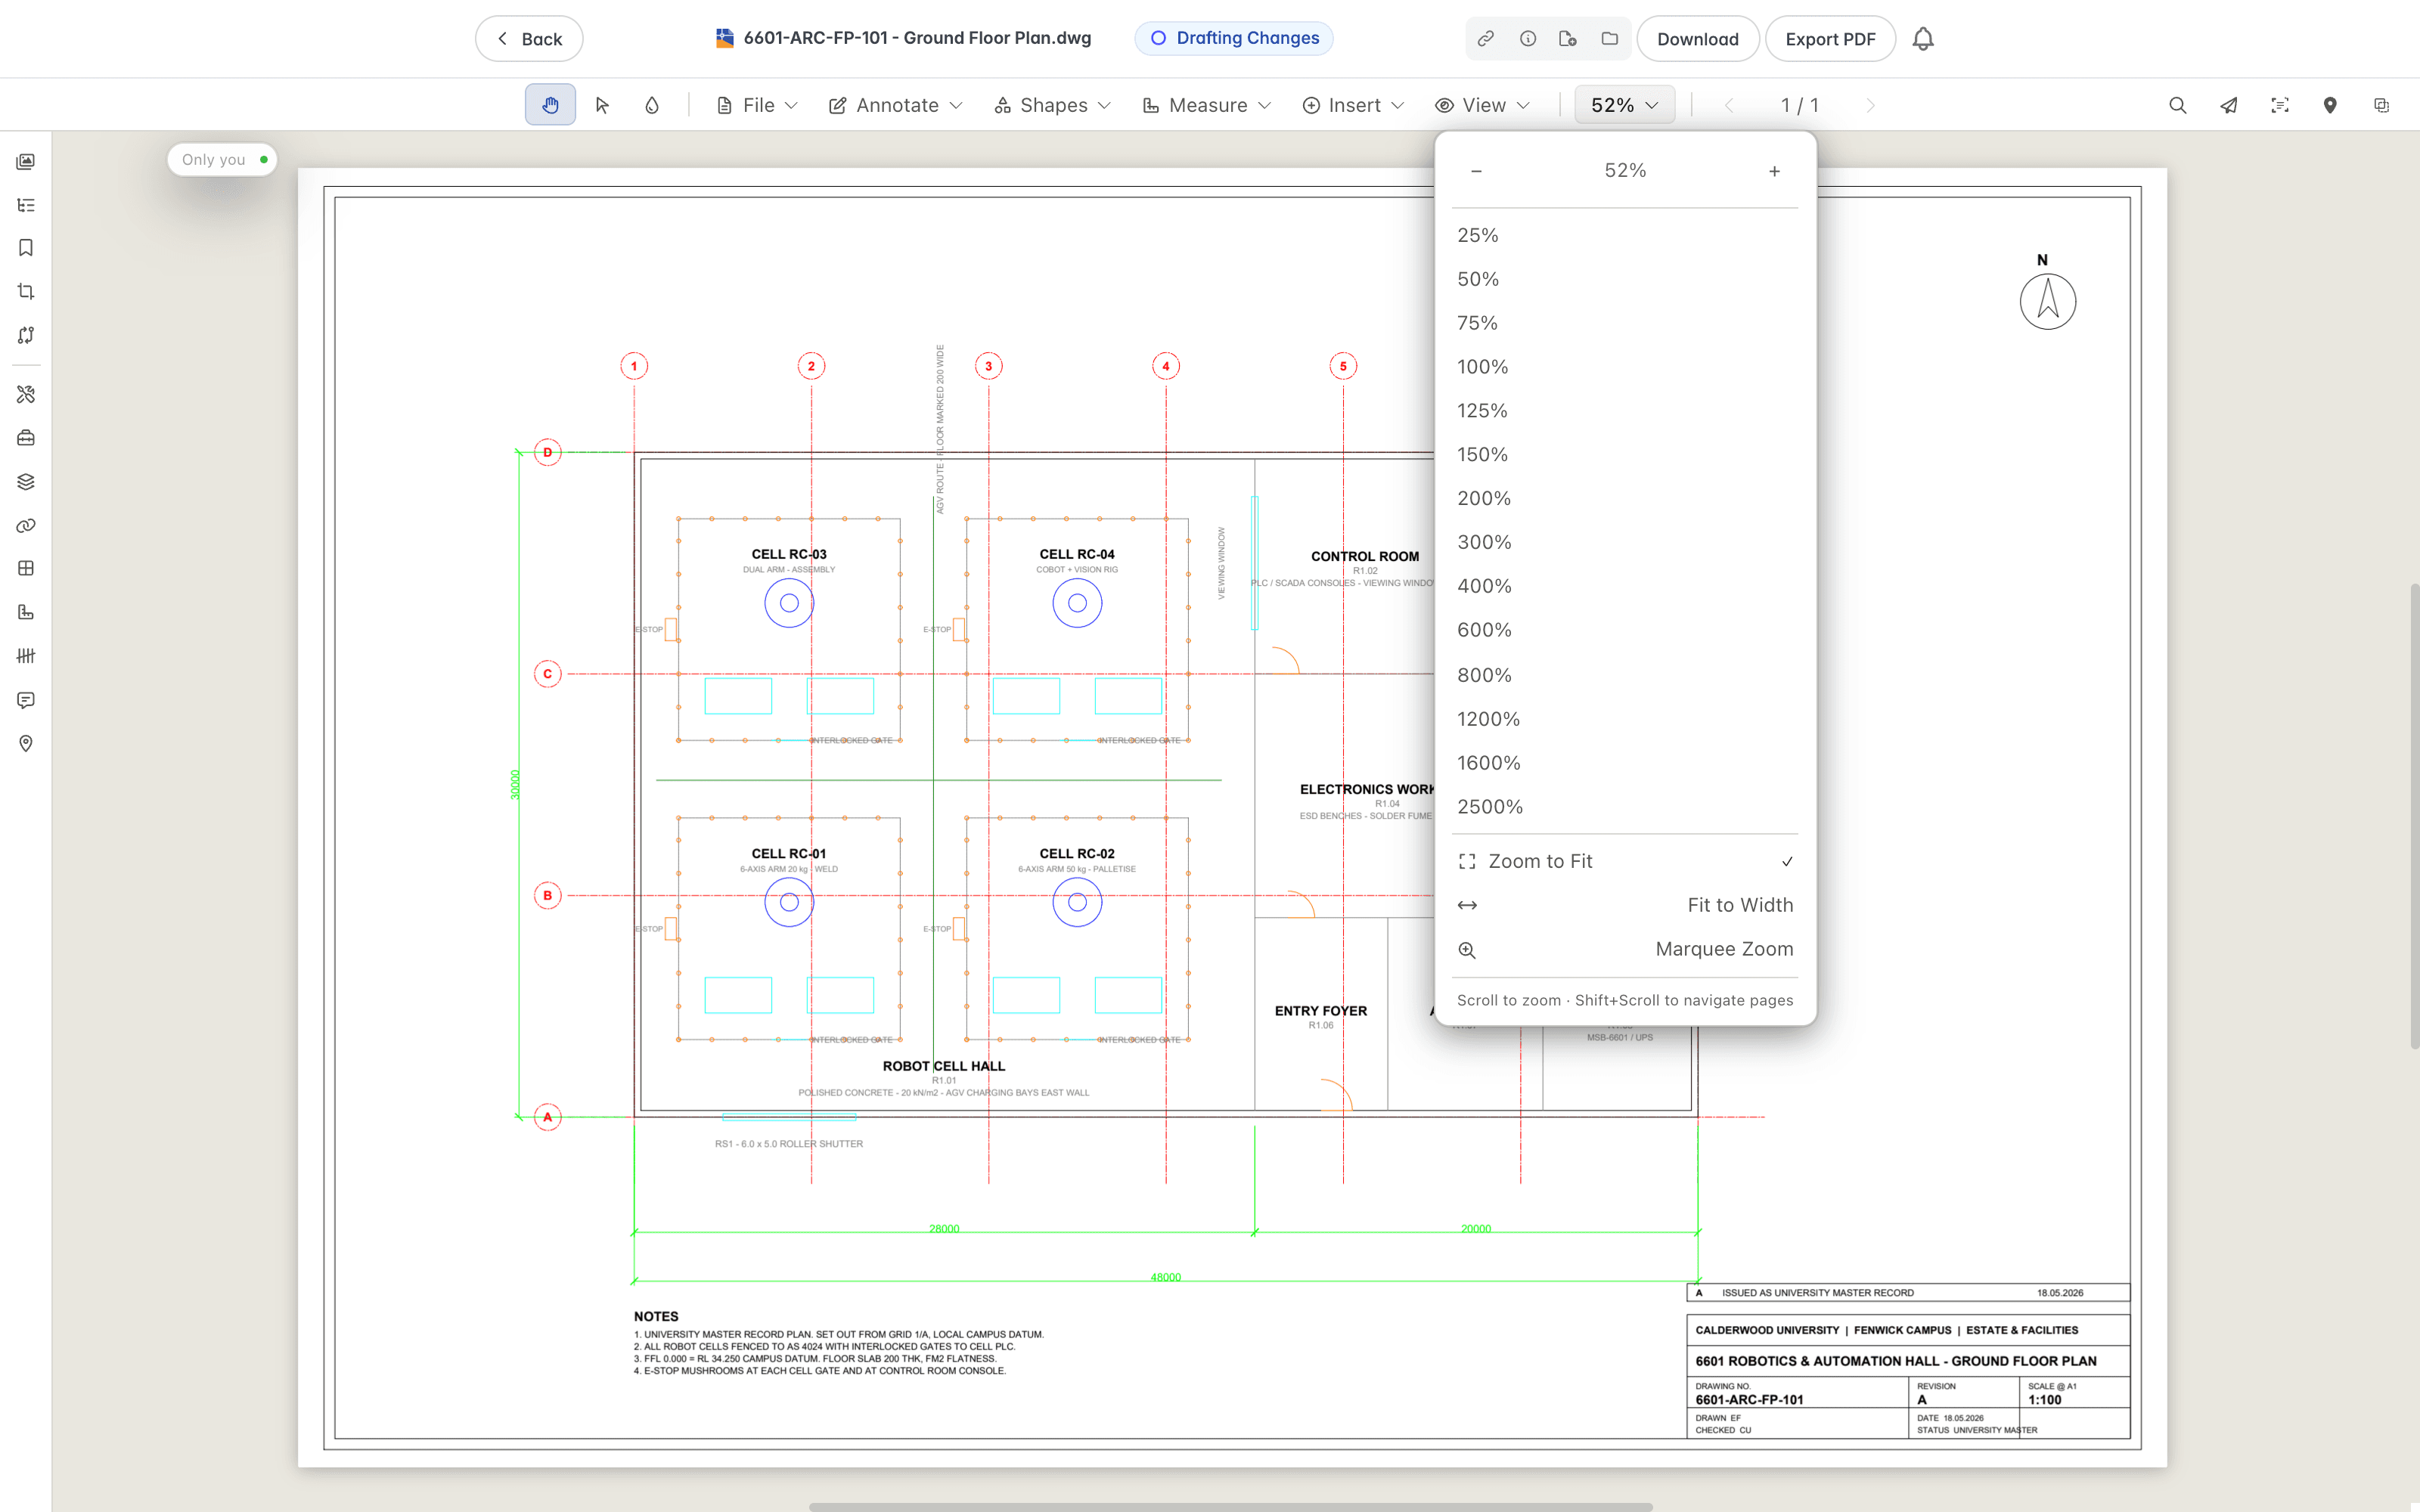
Use Pan to move around the page, and scroll to zoom in and out around the pointer.
Open the Zoom control to set the zoom level or choose Zoom to Fit, Fit to Width, or Marquee Zoom, which zooms to a box you drag.
Move between pages with Previous page and Next page, or click the page number, enter the page you want, and press Enter to jump to it. You can also rotate a page when it has been scanned at an angle. After you rotate a page, a Save Orientation button appears, which keeps the new orientation for all users. For a PDF document, Lunr turns the pages in the file itself without creating a new revision, and annotations and form fields are kept. For any other file type, Lunr saves the rotated PDF as the document's rendition.
Who sees the button depends on the document.
- For a PDF document, people your organisation has allowed to update renditions can save at any status. Anyone else must be the document's assignee or a reviewer while it is under workflow.
- For a document in another file type, the button appears while the document is under workflow, for people allowed to update renditions, assignees, and reviewers.
- The button does not appear on a redline, which keeps the revision it was drawn on.
Finding Text
Click the search icon, or press Ctrl+F, to open the Search panel. Type your text and Rift lists every match, grouped by page.
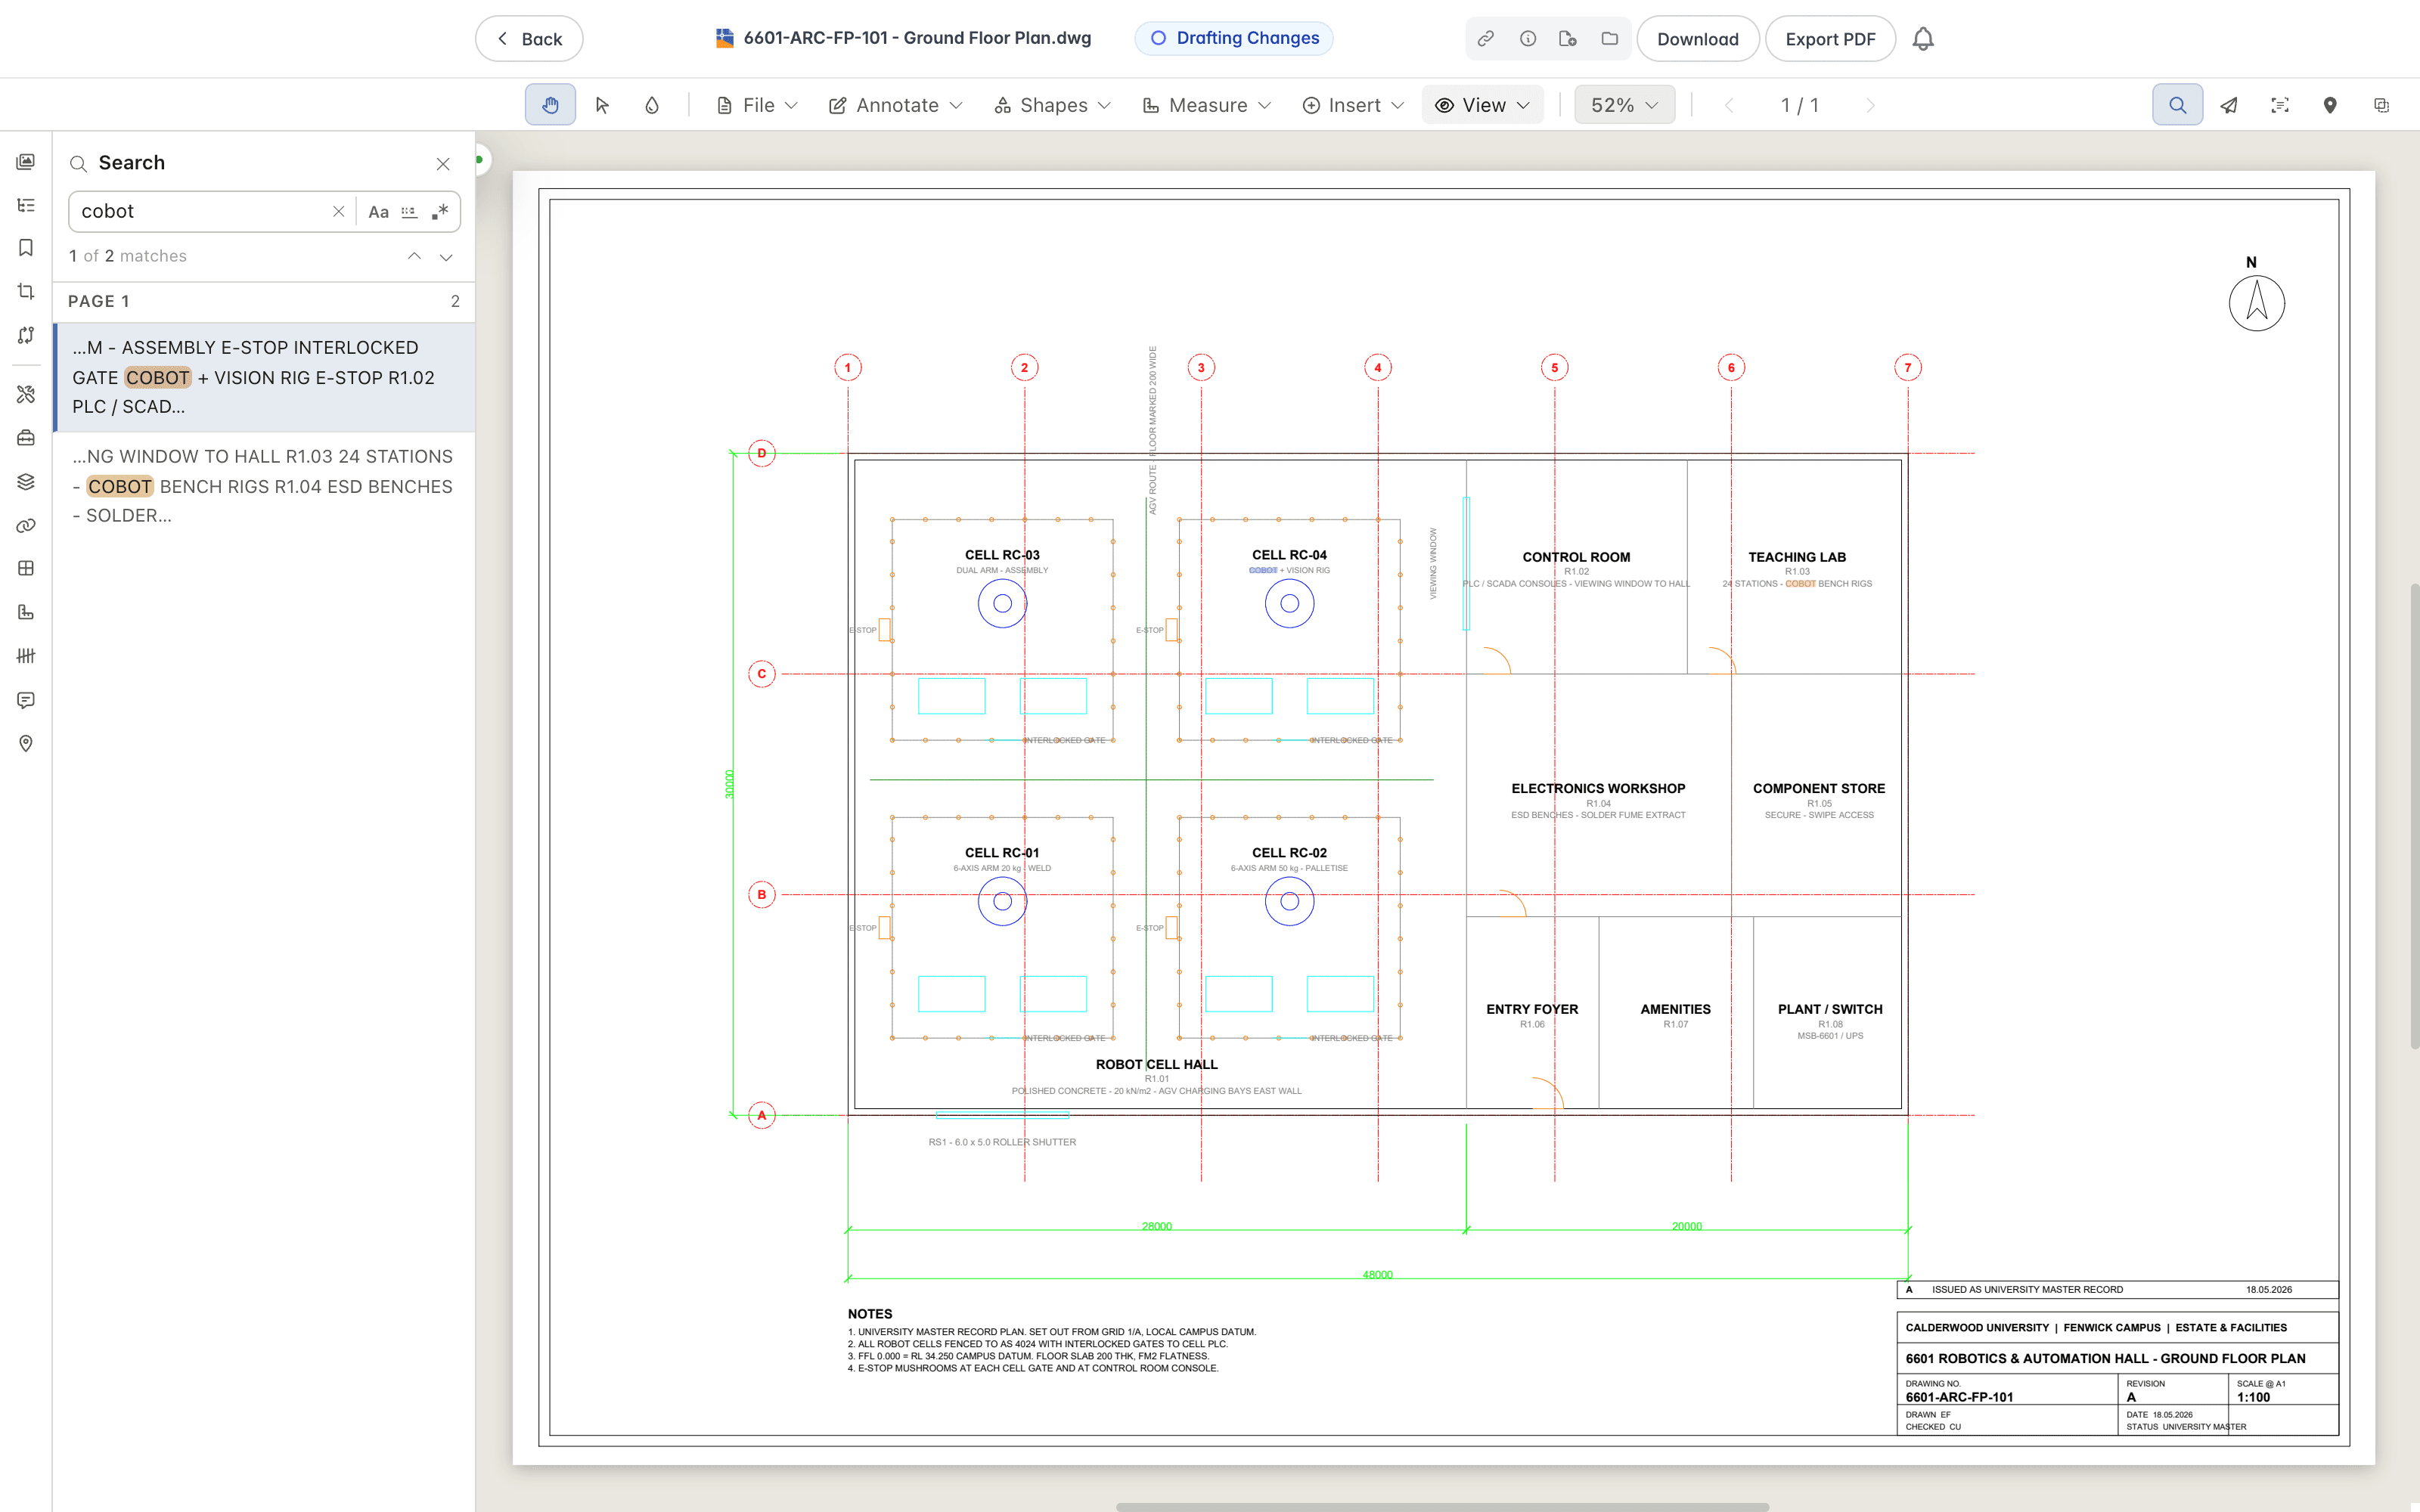
Narrow the search with Match case, Whole word, and Regular expression. Press Enter to go to the next match and Shift+Enter for the previous one.
If you opened the drawing from a search that includes XRAY, the Search panel opens by itself with your search term entered and every match highlighted. See Opening an XRAY Result in the Viewer.
Drawing References
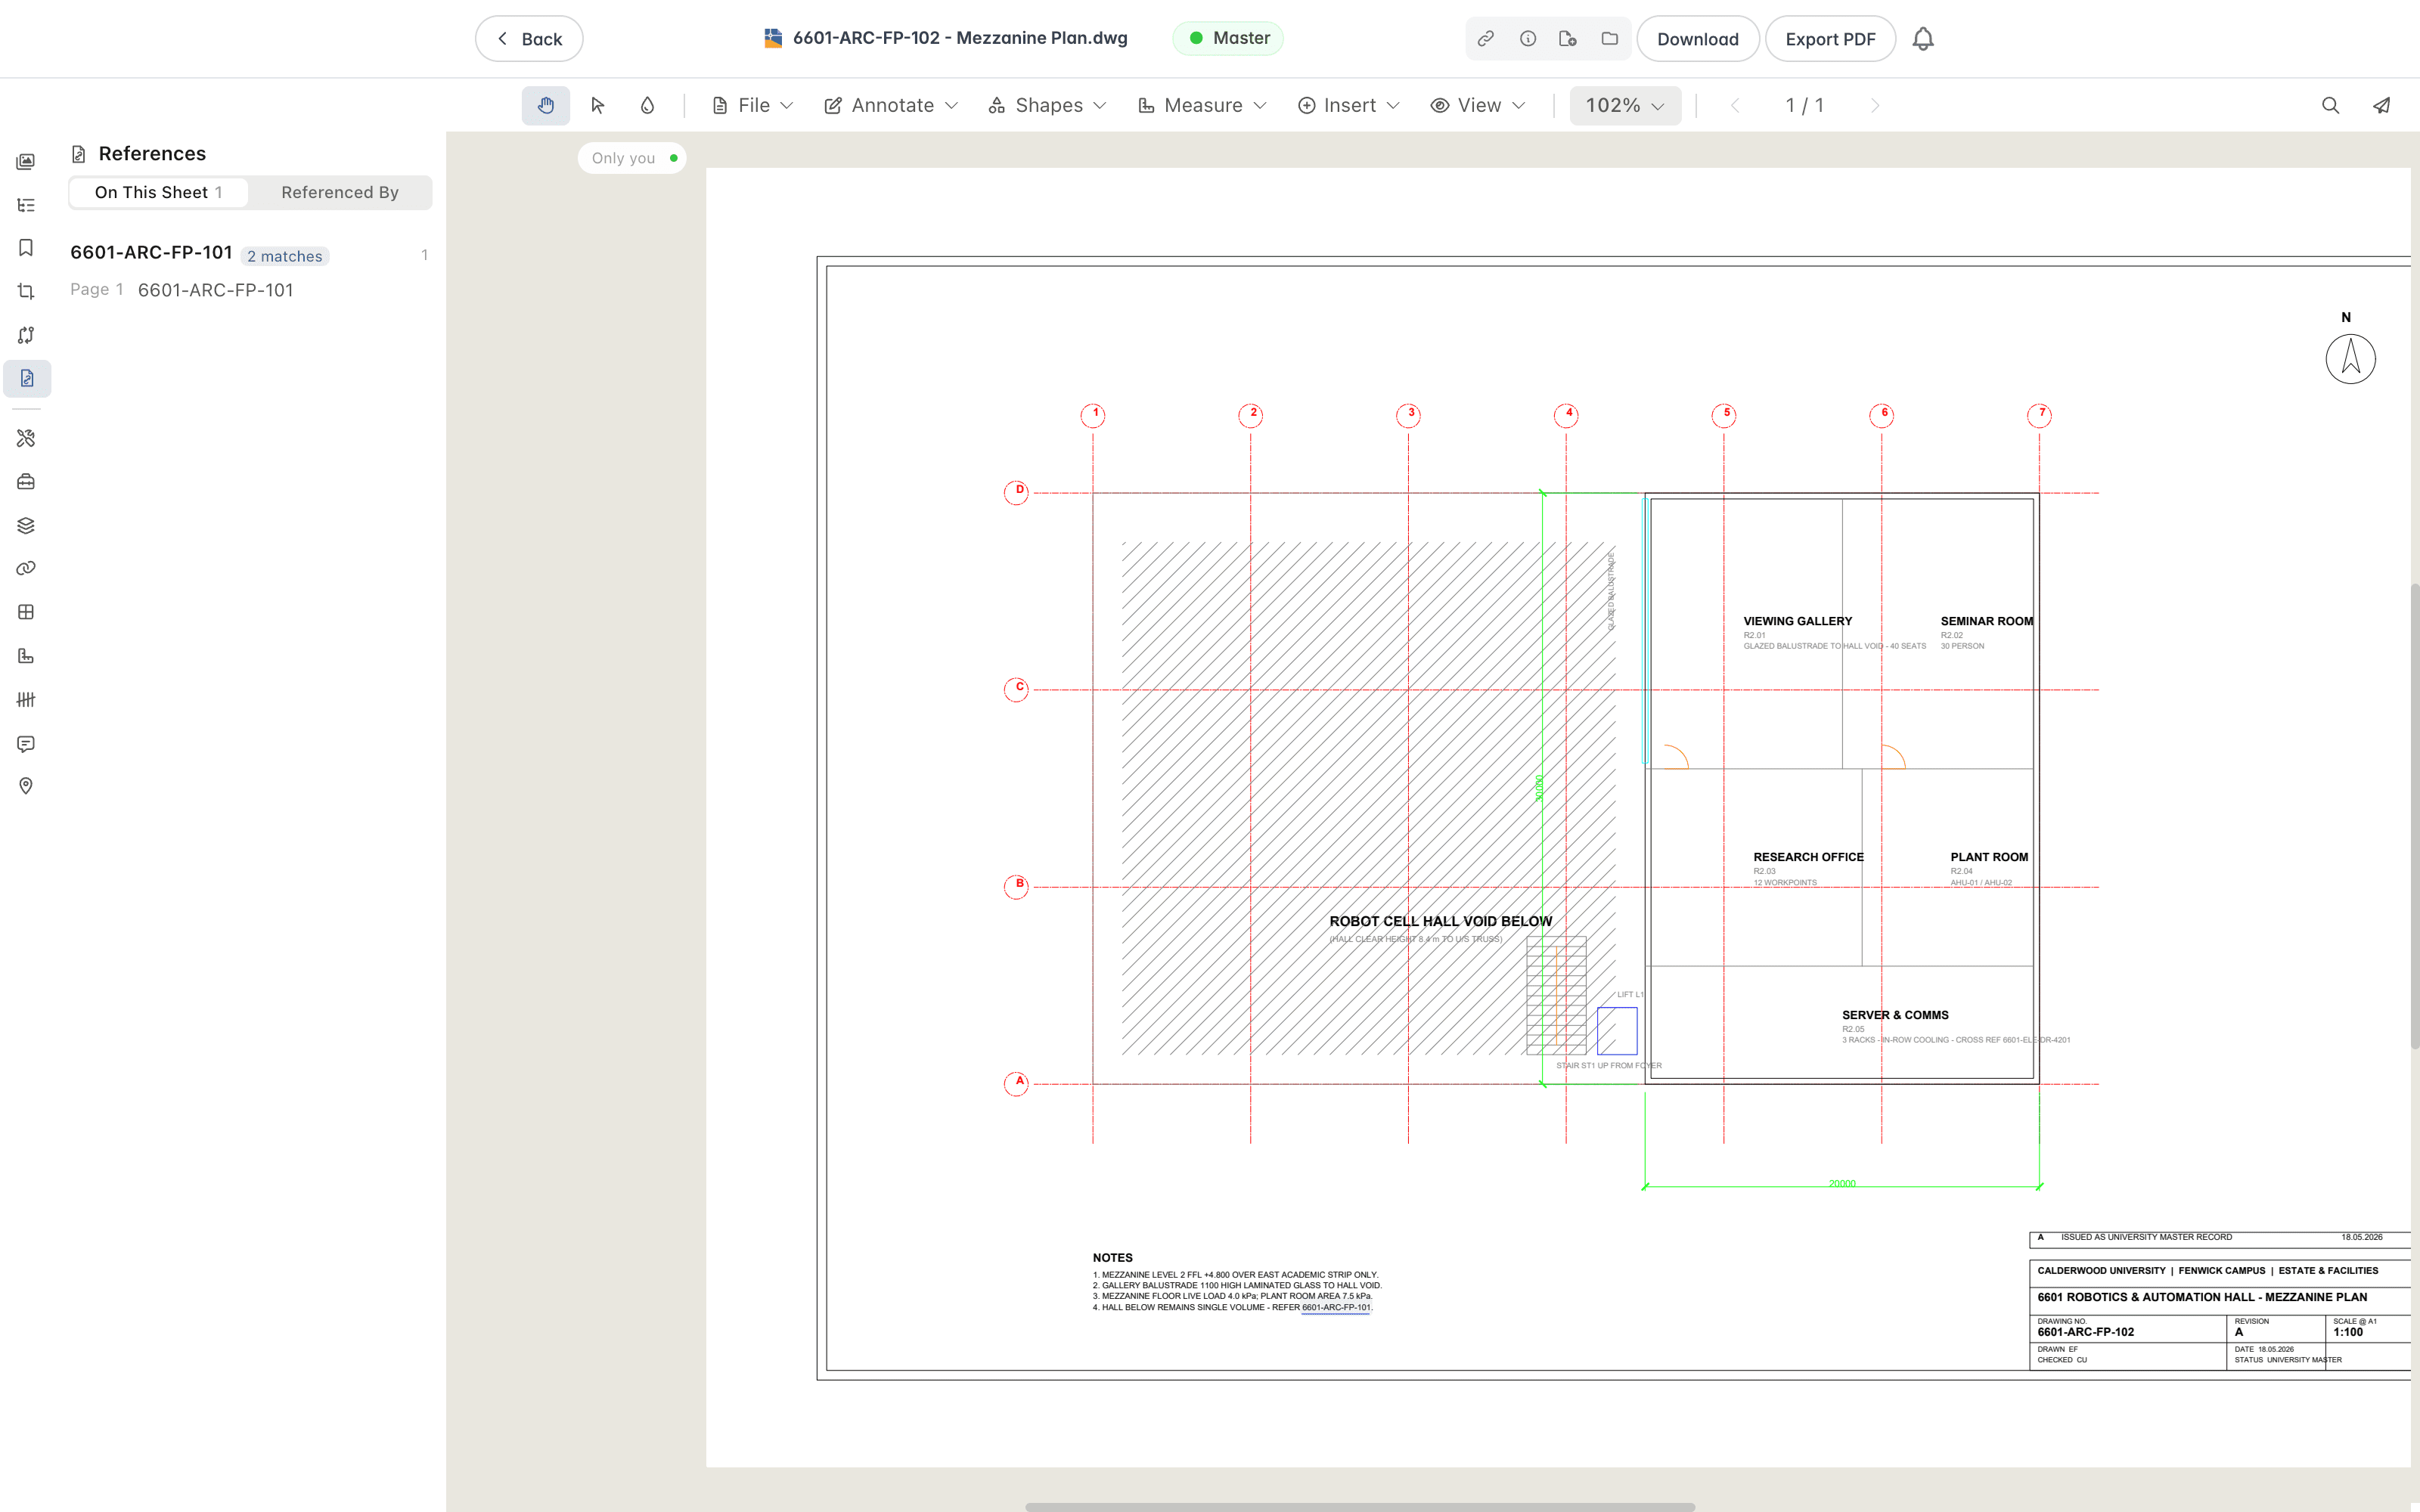
Where your organisation has enabled drawing references, a drawing number printed on a page that matches another drawing in the same repository becomes a hotspot. Select the hotspot to open the drawing it names, then use the way back that the viewer offers to return to where you were.
- If a hotspot opens the wrong drawing, relink it to the correct one, where you are able to edit links. The correction is kept as a link and appears in the Related view.
- The drawings a page names, and the drawings that name it, are listed in the Related view of the document, covered in Viewing Document Metadata.
- Numbers a drawing cites that no drawing holds are listed under Numbers not found.
The References panel lists them beside the page. Its On This Sheet tab lists the drawings the current page cites, and its Referenced By tab lists the drawings that cite this one. Each entry shows the drawing number with how many times it matches, and the page it appears on. Where a sheet has no references, the panel reads "No references found on this drawing."
Scanning a Drawing
Drawings are scanned for references as they are processed. Where you are allowed, Scan This Drawing in the References panel scans the open drawing immediately, ahead of any scan that is running. It is offered in the full viewer, but not in the preview dialog or for Change Request attachments, and it is unavailable for a redline.
While the scan waits or runs, the button reads "Scanning…" and the panel reads "Scan queued. References update when it finishes." and then "Scanning this drawing for references." If it takes longer than a few minutes, a message reads "Still scanning. References will appear when it finishes." The panel then shows "Last scanned" with the date and time. When the scan finishes, the references update and a "Drawing Scanned" message reads, for example, "Found 3 references. 1 number didn't match a drawing." or "No references found." If a scan does not finish, the panel reads "The scan did not finish." and a "Couldn't Scan This Drawing" message suggests you try again.
You can scan up to 10 drawings a minute. If you ask again while a scan of the same drawing is already queued or running, Lunr keeps the scan it has.
Working With Drawing Layers
Drawings that come from CAD keep their layers. When a DWG is opened in Lunr, the layers from the original drawing, such as walls, glazing, gridlines, and dimensions, carry through to the PDF. The Layers panel lists every layer, so you can show and hide parts of the drawing to focus on what matters.
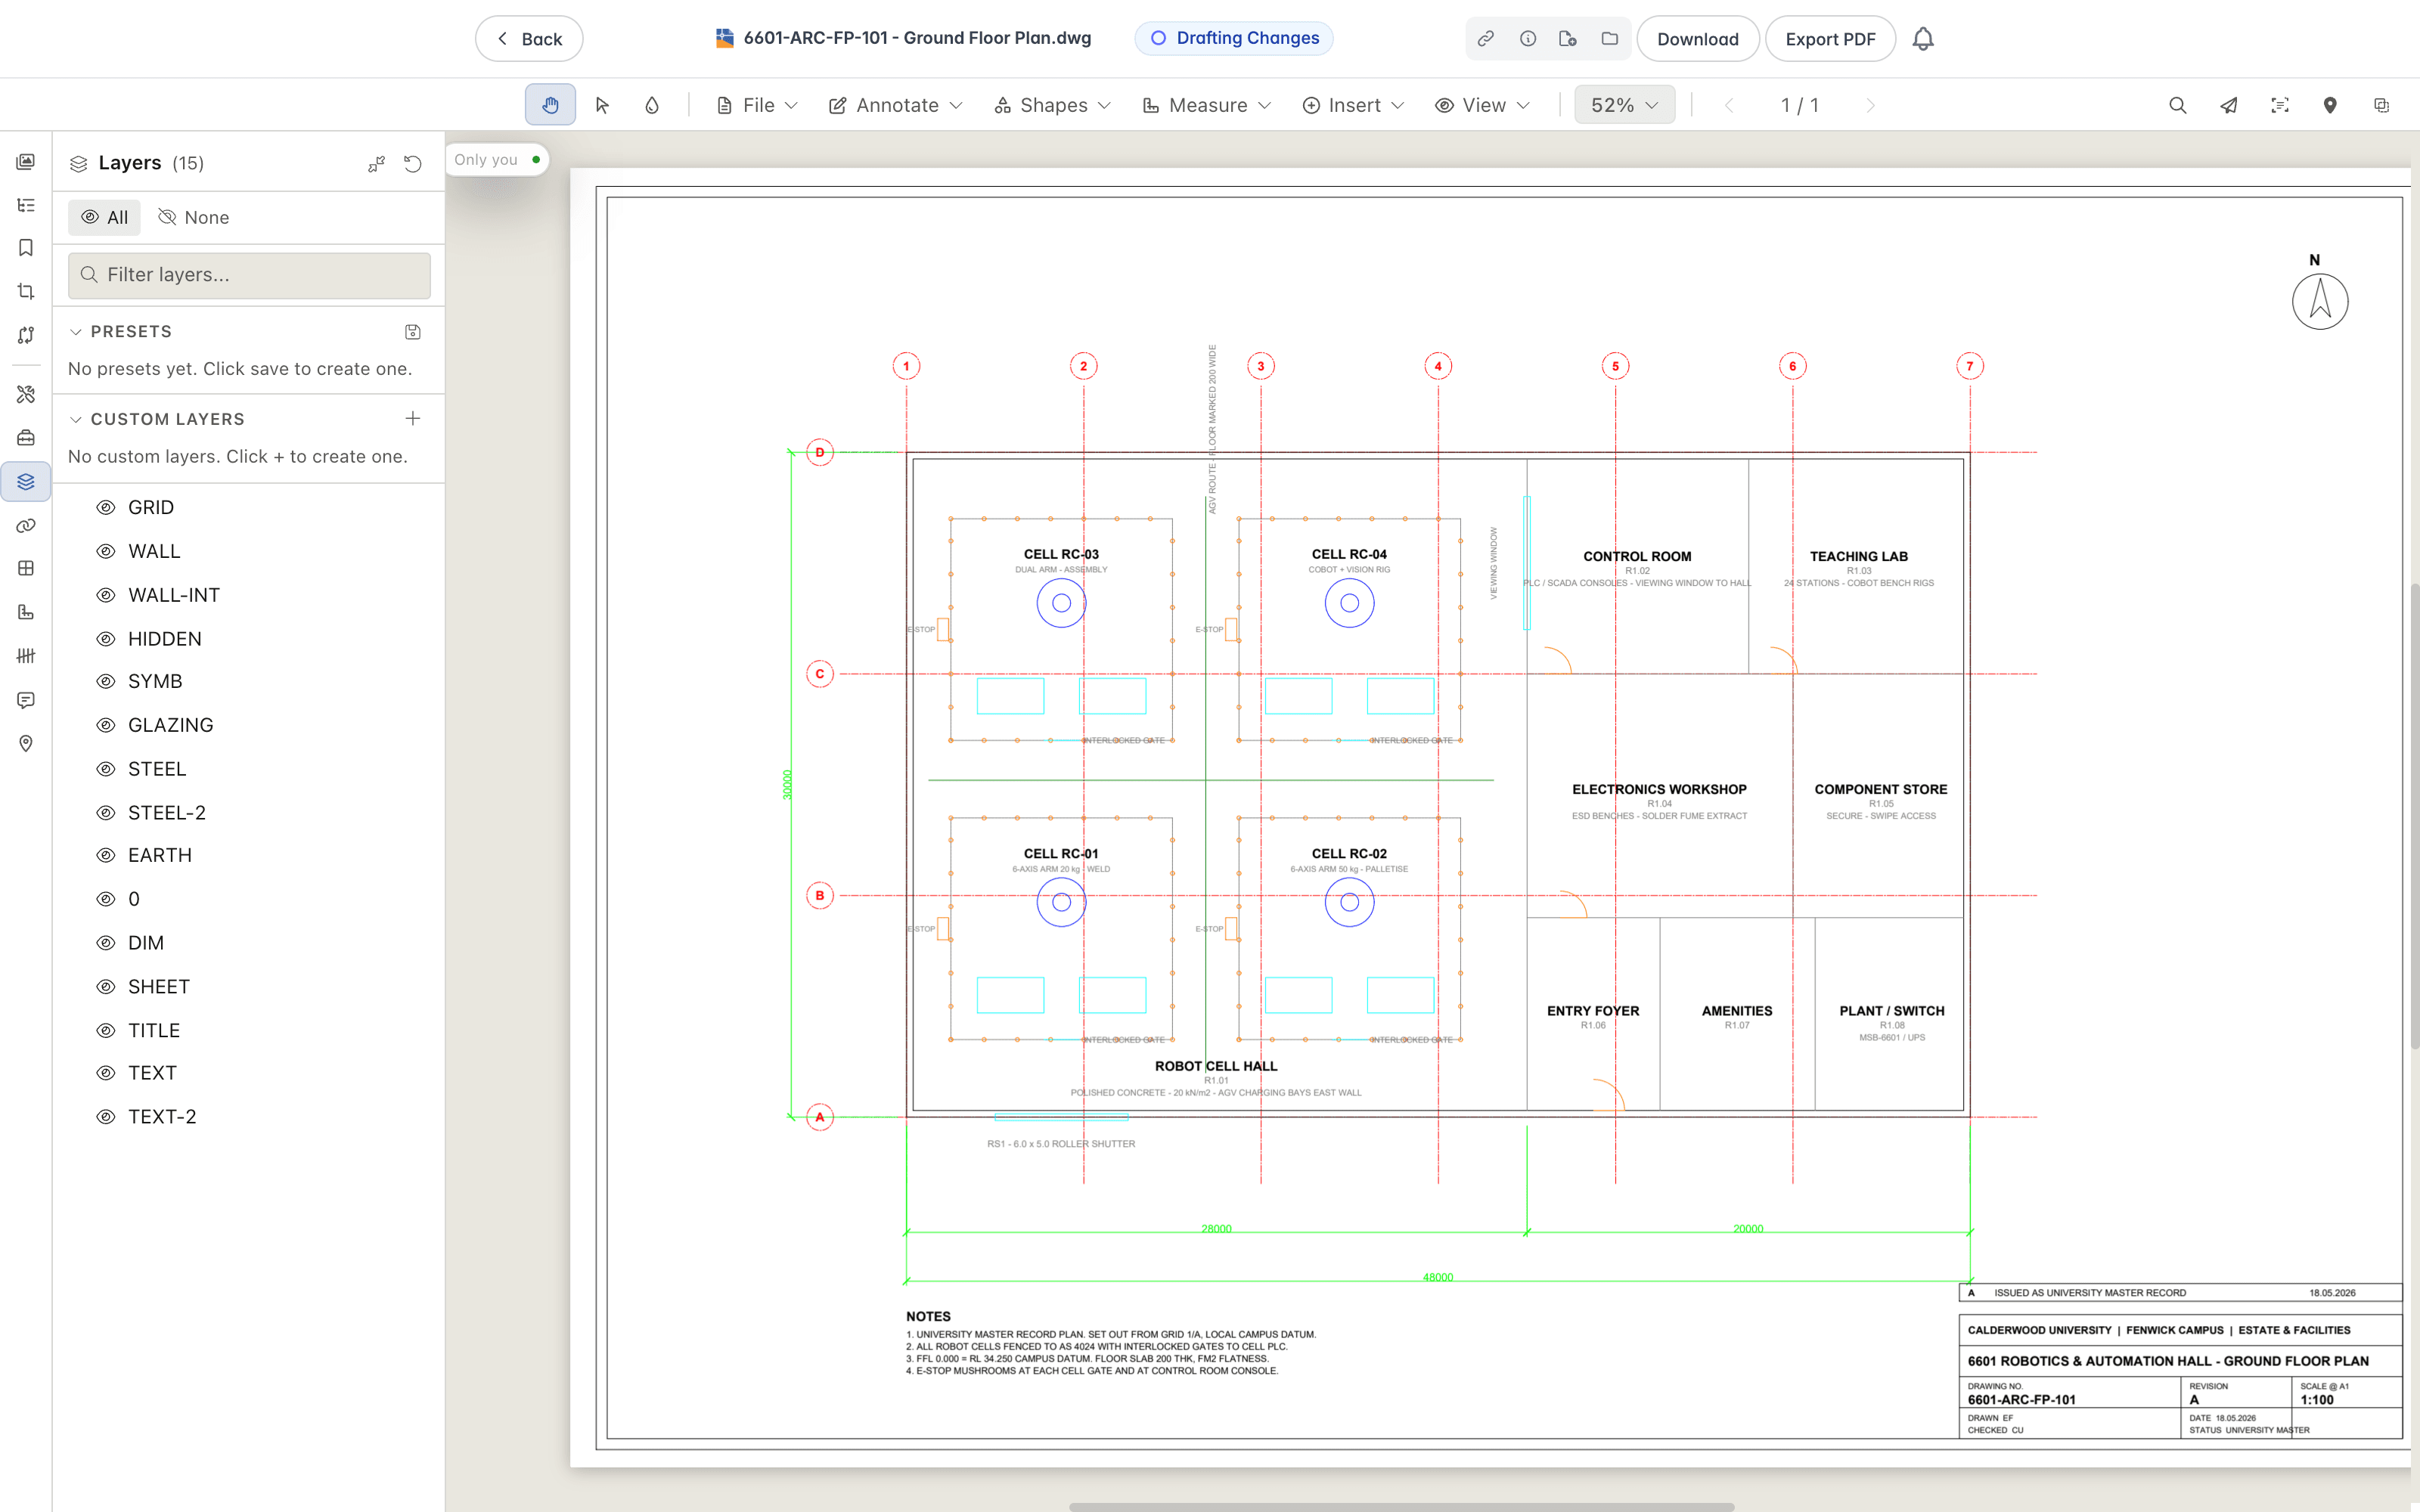
Open the Layers panel from the panel rail. Each layer has its own row with a visibility control, and the panel header shows how many layers are visible.
Showing and Hiding Layers
Click the eye icon beside a layer to hide it, and click it again to show the layer. The drawing updates immediately.
- Click All to show every layer, or None to hide them all.
- Type in the Filter layers field to find a layer by name.
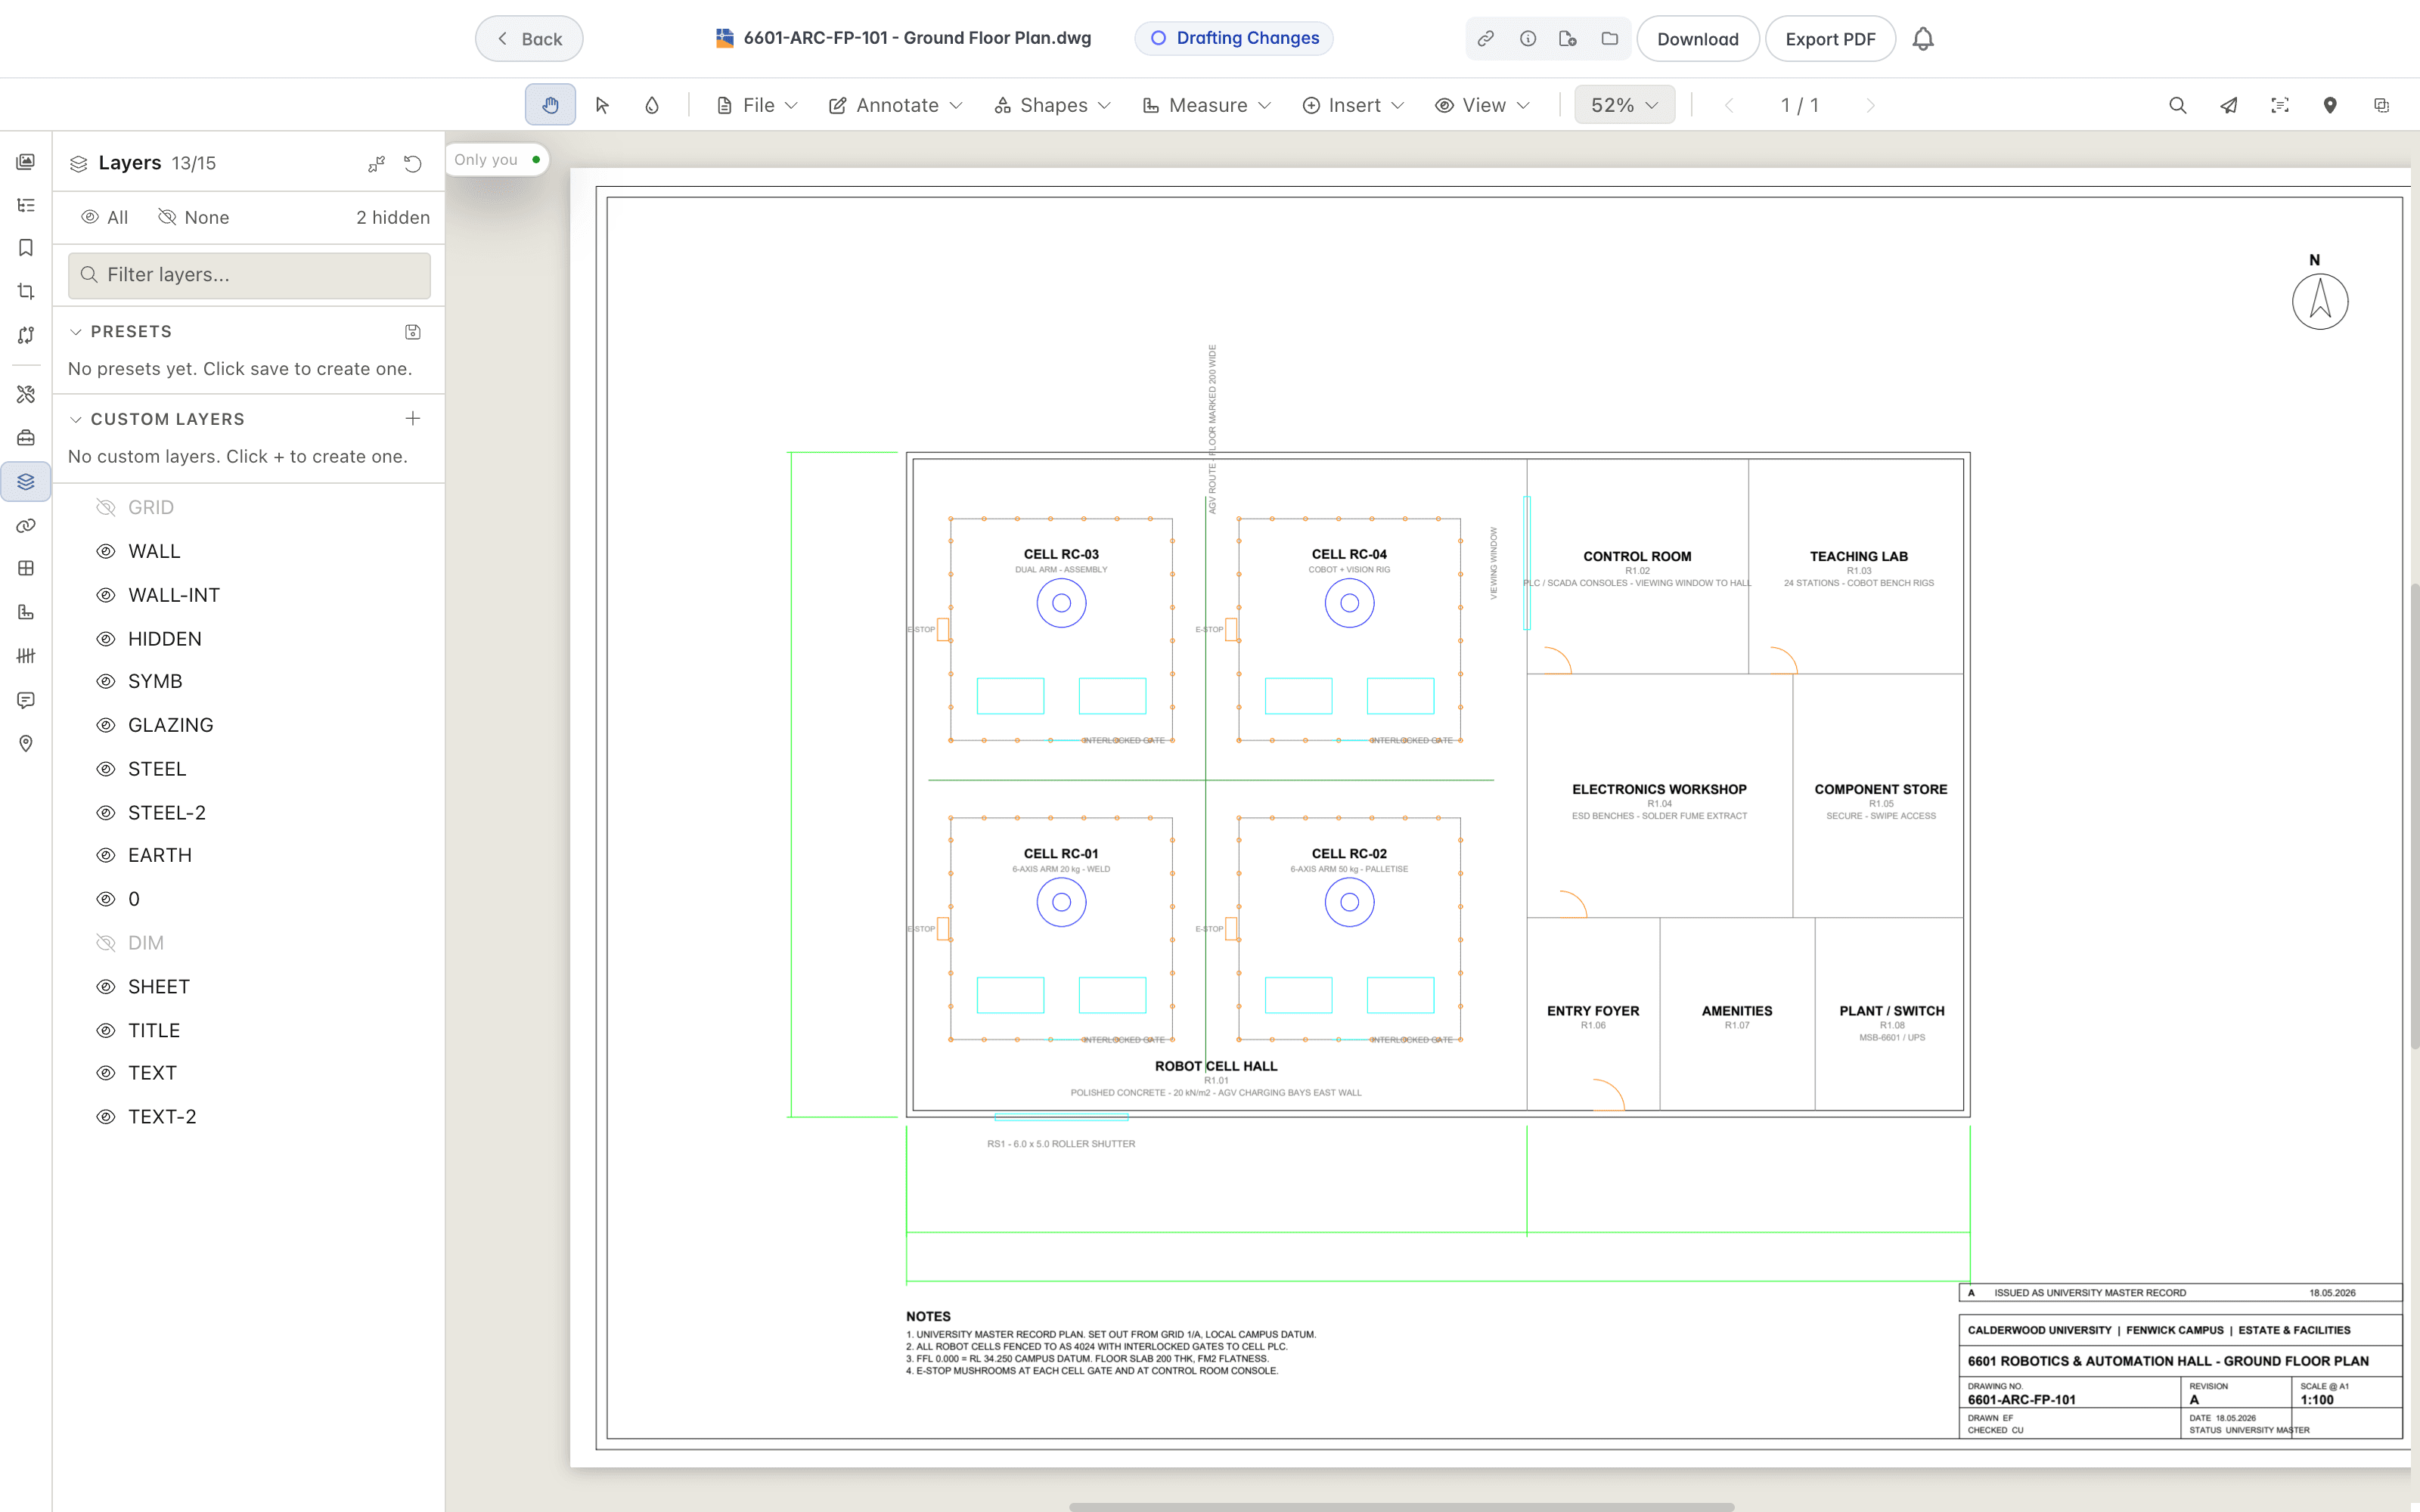
- The header count, such as 13/15, and a hidden badge tell you how many layers are hidden.
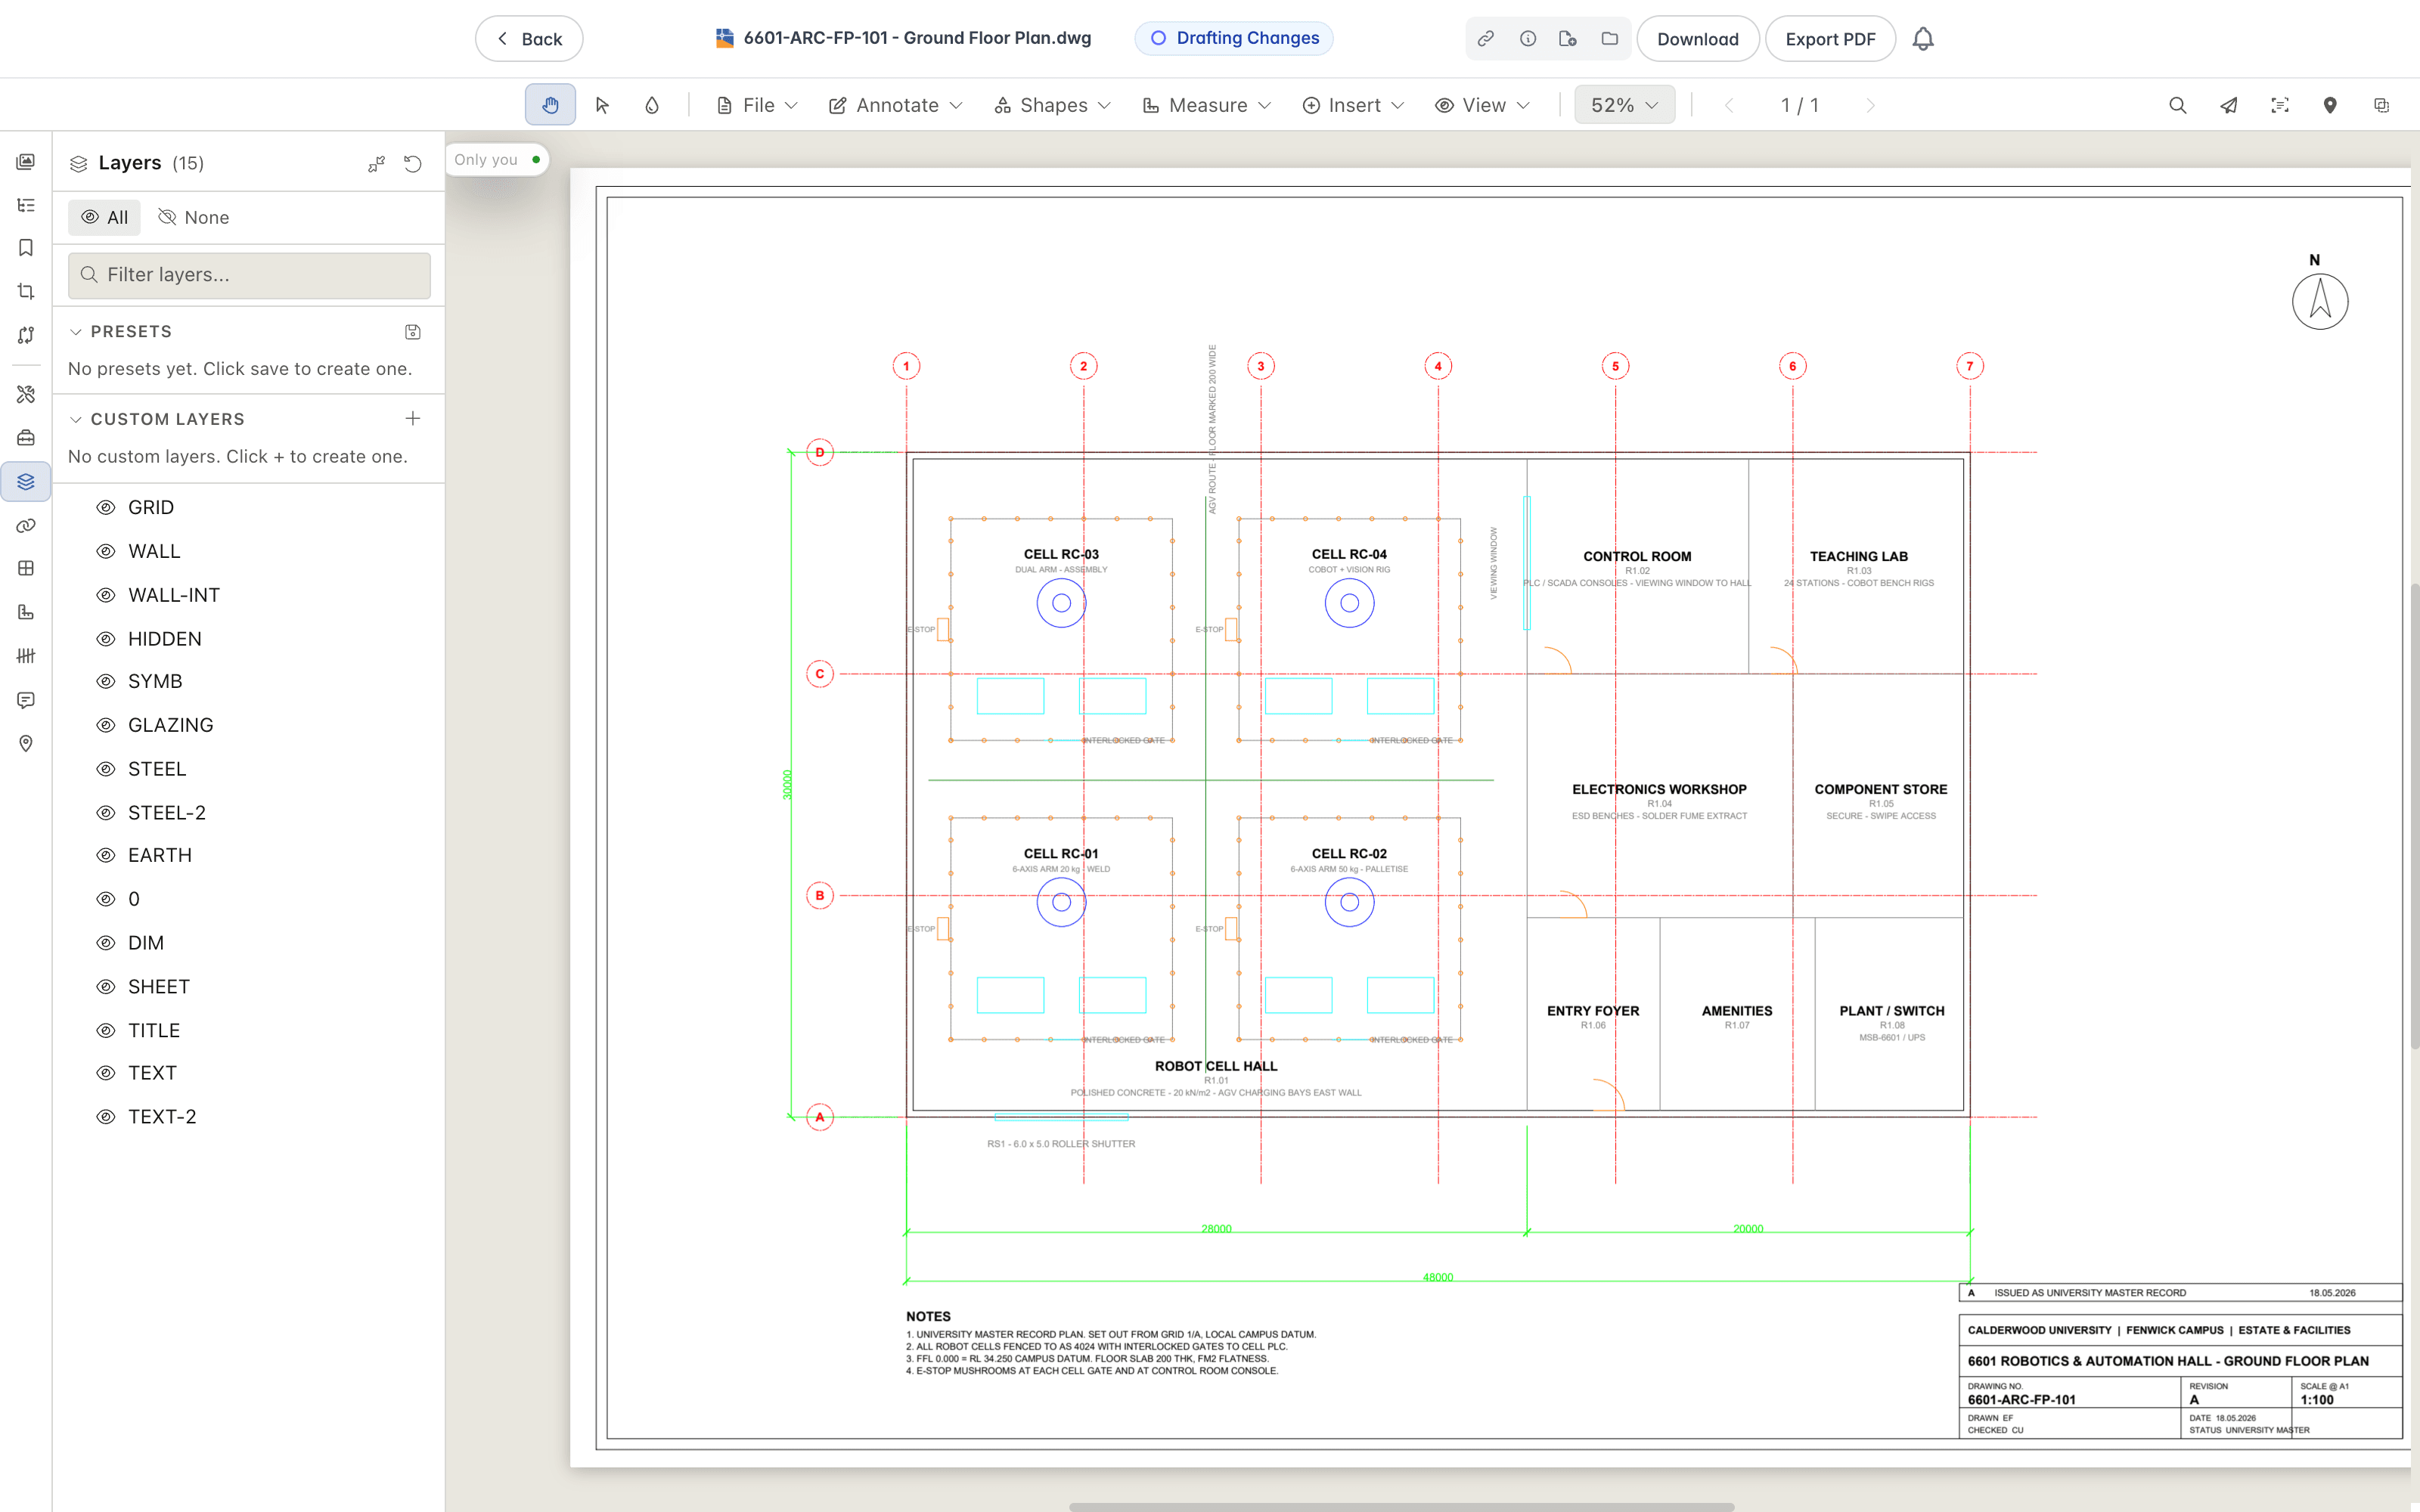
For example, a ground floor plan with every layer visible shows the walls, gridlines, equipment, room labels, and dimensions together.
Hide the GRID and DIM layers to remove the gridlines and dimension text, leaving a cleaner plan of the rooms. The header now reads 13/15 with two layers hidden.
Custom Layers and Presets
Layers also let you:
- Lock a layer so it cannot be changed, set it as the active layer, exclude it from print, or isolate it to hide every other layer.
- Add a custom layer to group your own markup.
- Save the current mix of visible layers as a preset, then return to it later from the Presets section.
- Select the reset icon in the panel header to return every layer to its document defaults.
Keyboard Shortcuts
Quick Shortcuts
Press a single letter to pick a tool:
- P - Pan
- V - Select
- H - Highlight
- U - Underline
- K - Strikeout
- Q - Squiggly
- F - Freehand
- R - Rectangle
- O - Ellipse
- L - Line
- C - Cloud
- T - Text
- A - Arrow
- N - Sticky Note
- G - Callout
- D - Distance
- I - Stamp
- S - Signature
- M - Marquee Zoom
Other Shortcuts
- Space - Pan temporarily while held, then release to return to the previous tool
- Ctrl+F - Search, Enter - Next match, Shift+Enter - Previous match
- Ctrl+C - Copy selected text, Delete - Remove the selected markup
- Ctrl+G - Group, Ctrl+Shift+G - Ungroup
- Ctrl+Z - Undo, Ctrl+Y - Redo
- Ctrl+D - Bookmark the document
- Ctrl+K - Command palette
- Ctrl+P - Print
- Ctrl+Shift+S - Save As
- F3 - Toggle the OSNAP object snap
Comparing Documents
Compare two documents, or two revisions of one document, in Lunr to see what changed, with side by side, overlay, and pixel diff views in the Rift viewer, a Changes panel, and downloadable comparisons and summaries.
Markup and Personal Redlines
Mark up drawings and PDFs in Lunr's Rift viewer with annotations, shapes, measurements, stamps, and comments, save your markup as a private redline, then share it, submit it for review, promote it, or export it.