Viewing BIM Models
View and explore IFC, Navisworks, and Revit building models in Lunr's browser-based 3D viewer, with tools for navigation, measurement, sectioning, model inspection, clash detection, and scene management.
Overview
Lunr's browser-based 3D viewer opens models directly in your browser, so there is no desktop software to install. It reads IFC, Navisworks, and Revit building models. Inventor and SolidWorks parts and assemblies, and STEP mechanical parts, are covered in Viewing CAD Models and Assemblies.
The first time a model is opened it is processed for viewing, and you may see it downloading and processing before it appears. The processed model is then cached, so opening it again is fast.
Opening a Model
To view an IFC, Navisworks, or Revit model, open the document from the repository in the same way as any other document, and it opens in the 3D viewer.
While the model is being prepared, you may see Downloading 3D model..., Processing IFC file..., and Rendering model... before the model appears. A notice reading Waiting for IFC processing... means another conversion of the same model is already running in your browser. A notice reading Waiting for the server to generate the 3D model... means the server is still converting the file, and if it takes too long a message asks you to try again shortly.
Navisworks and Revit models are converted to a form the viewer can read before they can be opened, which is available only where your organisation has set it up. Very large files are not converted, so a very large model stays unavailable in the viewer. If a Revit or Navisworks model has not been generated, or could not be generated, a Model not ready message appears, and there is no fallback in your browser.
Regenerating a Model
For an IFC model that has not loaded, Regenerate model appears at the bottom right of the viewer, above Set as thumbnail. Select it to process the model again in your browser. The button reads "Processing…" while it runs, and is unavailable while a regeneration is already in progress, including one running on the server.
Opening Several Models Together
A Scene is a collection of 3D documents that open together as layers you can show or hide in one view, letting you read several models against each other rather than one at a time. Create and convert scenes from the Collections page, covered in Scenes. With more than one model loaded, the viewer also reports where their geometry overlaps, covered in Clash Detection.
Viewer Overview
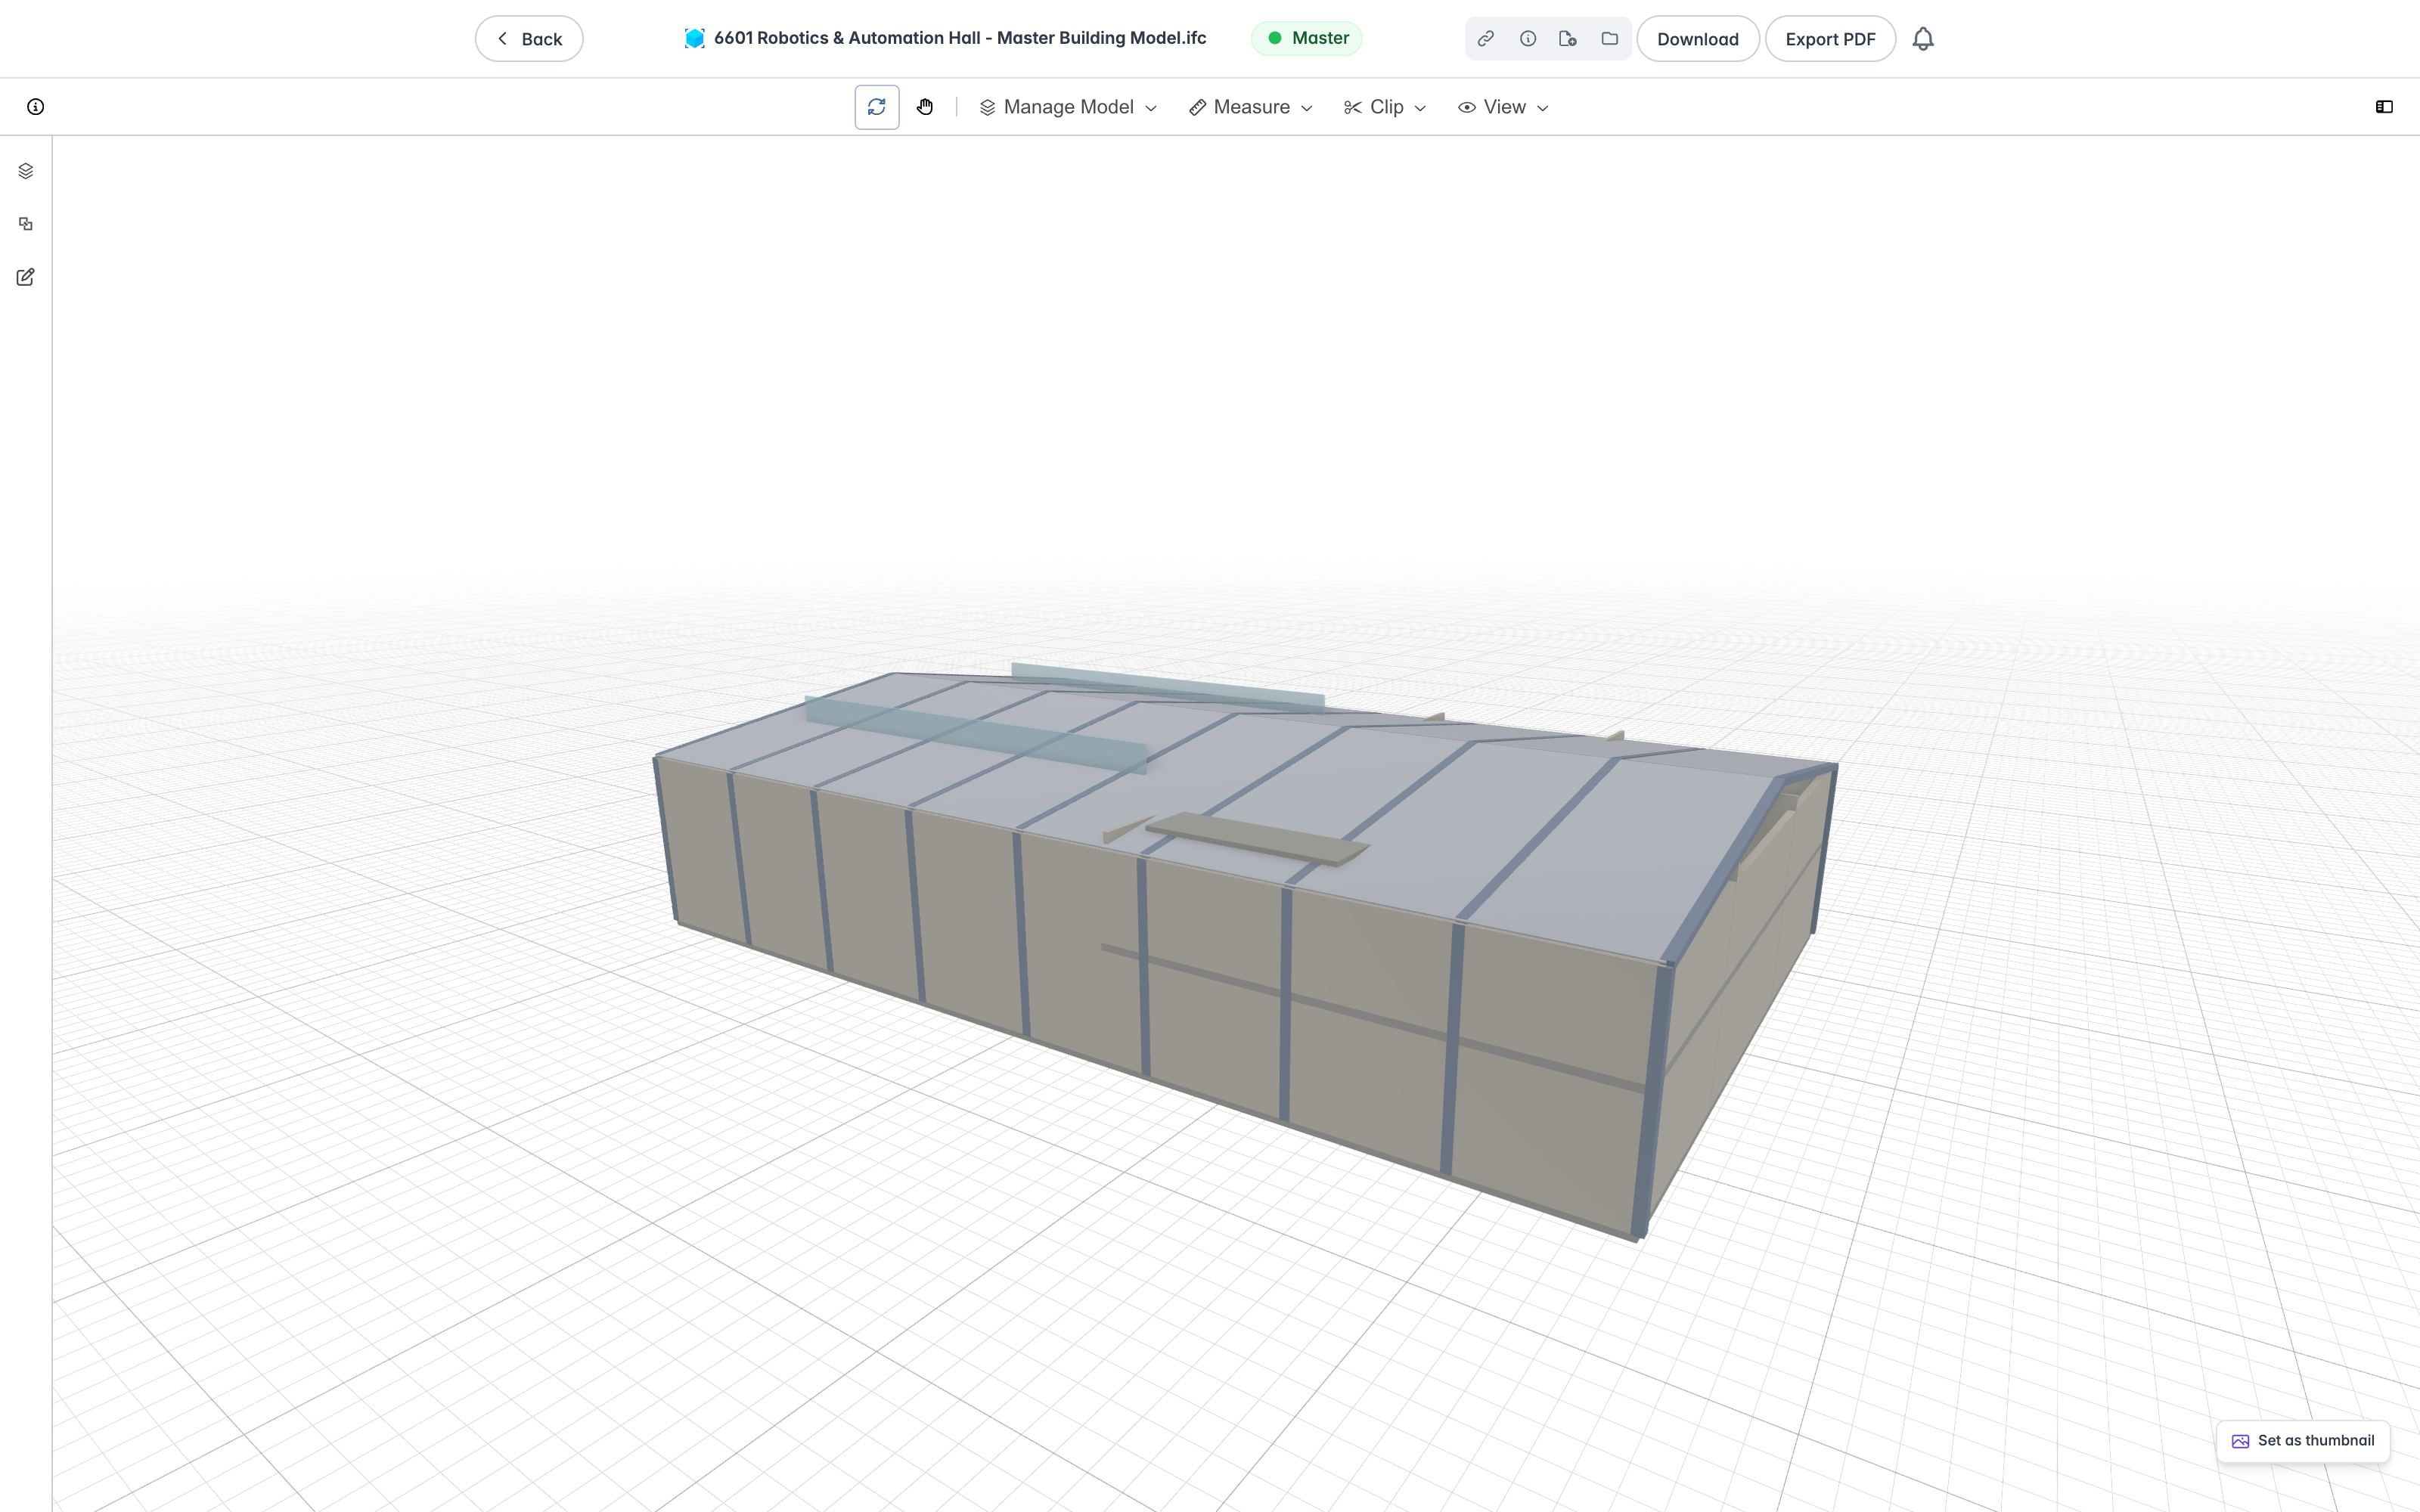
The viewer fills the browser window, with a toolbar across the top and panels that open down the sides.
Toolbar
The toolbar holds a help button, the camera controls, and the tool ribbons.
- The Orbit and Pan controls set how the mouse moves the camera.
- The Manage Model, Measure, and View buttons open ribbons of related tools, and Clip opens the Clipper panel. Inventor, SolidWorks, and STEP models also get an Inspect ribbon.
- Settings changes how the scene is drawn, covered under Scene Drawing Settings. Switch the scene between light and dark with Dark Mode in the View ribbon.
- For Inventor, SolidWorks, and STEP models, Copy link above the toolbar copies a link to the current view, and for assemblies Model state and Compare sit beside it, covered in Viewing CAD Models and Assemblies. It is not offered for building models.
- The Info button at the left opens the Info dialog, which lists the keyboard shortcuts below.
Press and hold the right mouse button to pan the camera at any time.
Scene Drawing Settings
Open Settings to change how the scene is drawn. The panel opens down the right of the viewer, and you can:
- Show or hide shadows with Shadow visible.
- Show or hide the grid with Grids visible, and choose the Grid level. A model with no storeys reads "No storeys in this model" beside Grid level.
- Enable Ghost Mode to make the model transparent.
- Show or hide edge lines with Edge lines.
- Enable or disable Highlight on hover.
- Drag the Navigation speed and Brightness sliders. Both start at 100%.
Navigation
Use Orbit to rotate around the model and Pan to move around the scene.
Open the View ribbon to jump to a preset view or change the camera.
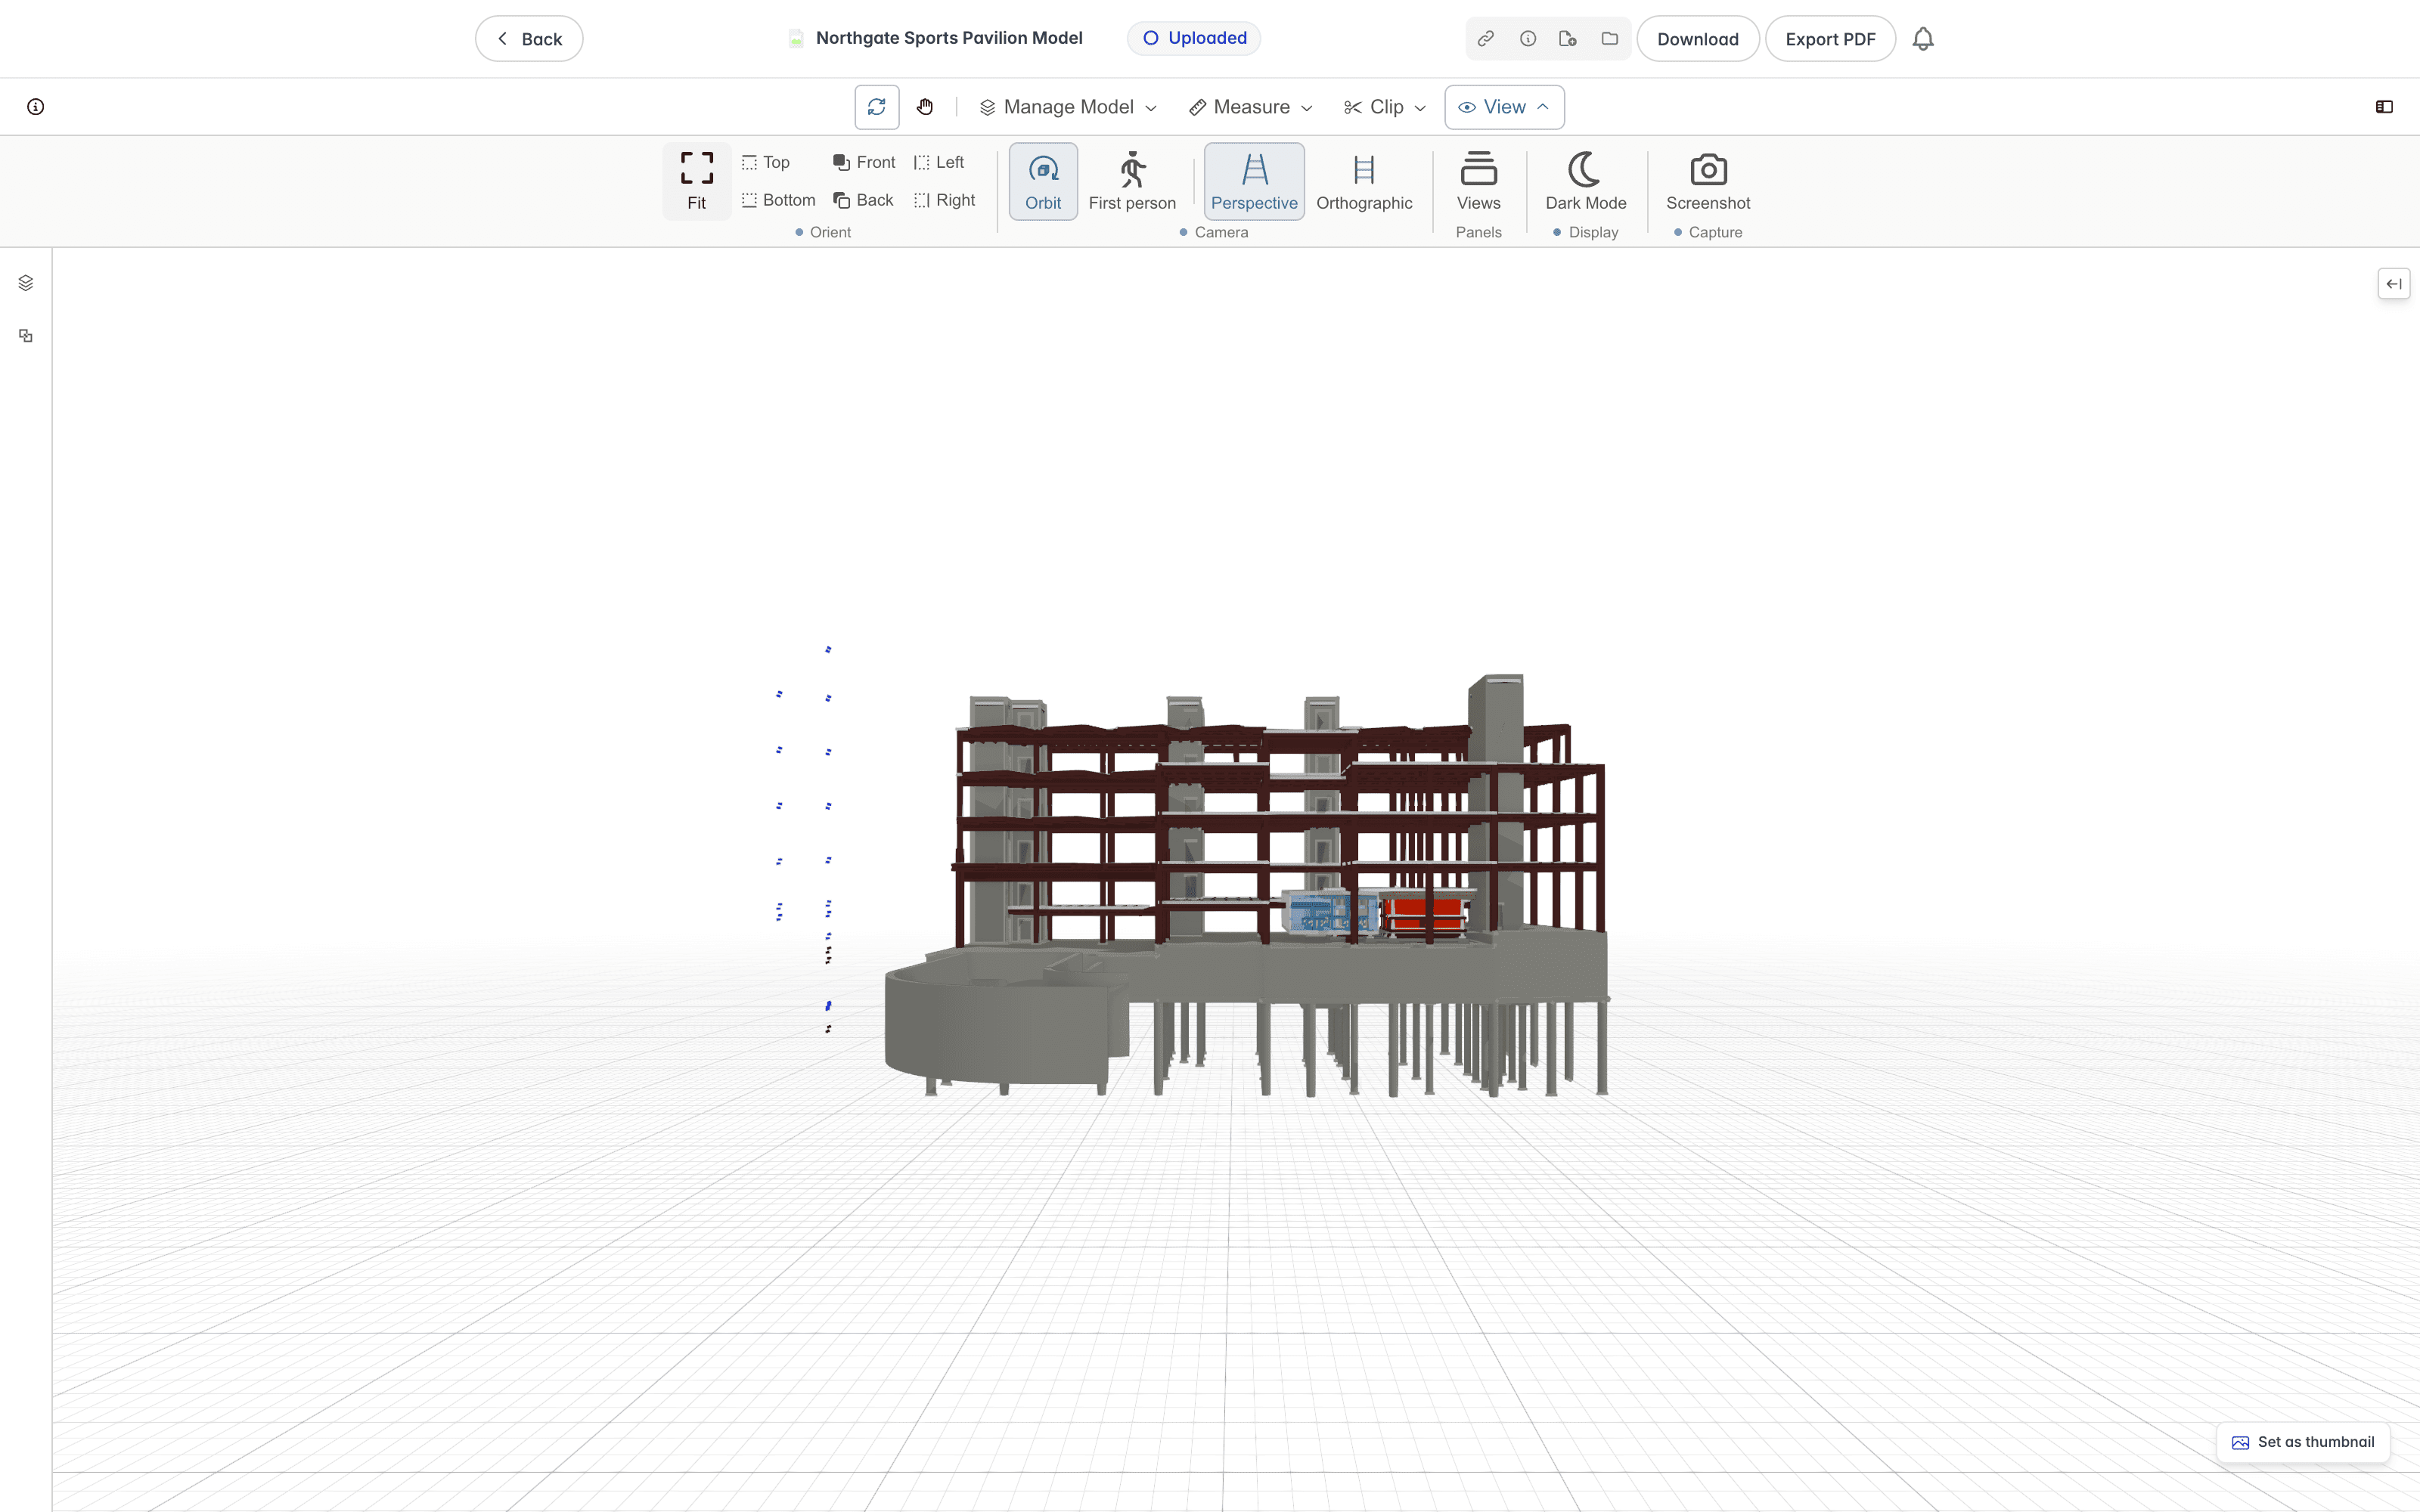
The ribbon is grouped by what the buttons do:
- Fit frames the whole model in the window.
- Orient jumps to a preset view: Top, Bottom, Front, Back, Left, or Right.
- Camera sets how you move and what you see. Choose Orbit or First person navigation, and Perspective or Orthographic projection. First person and Orthographic cannot be used together, so each is unavailable while the other is chosen.
- Panels has a Views button, which opens the Views panel.
- Display has Dark Mode, which switches the scene between light and dark.
- Capture has Screenshot, which saves a PNG of the current view to your downloads once a model has loaded.
Measurements
Open the Measure ribbon to measure the model. The Lines group has Length and Angle, and the Size group has Area and Volume.
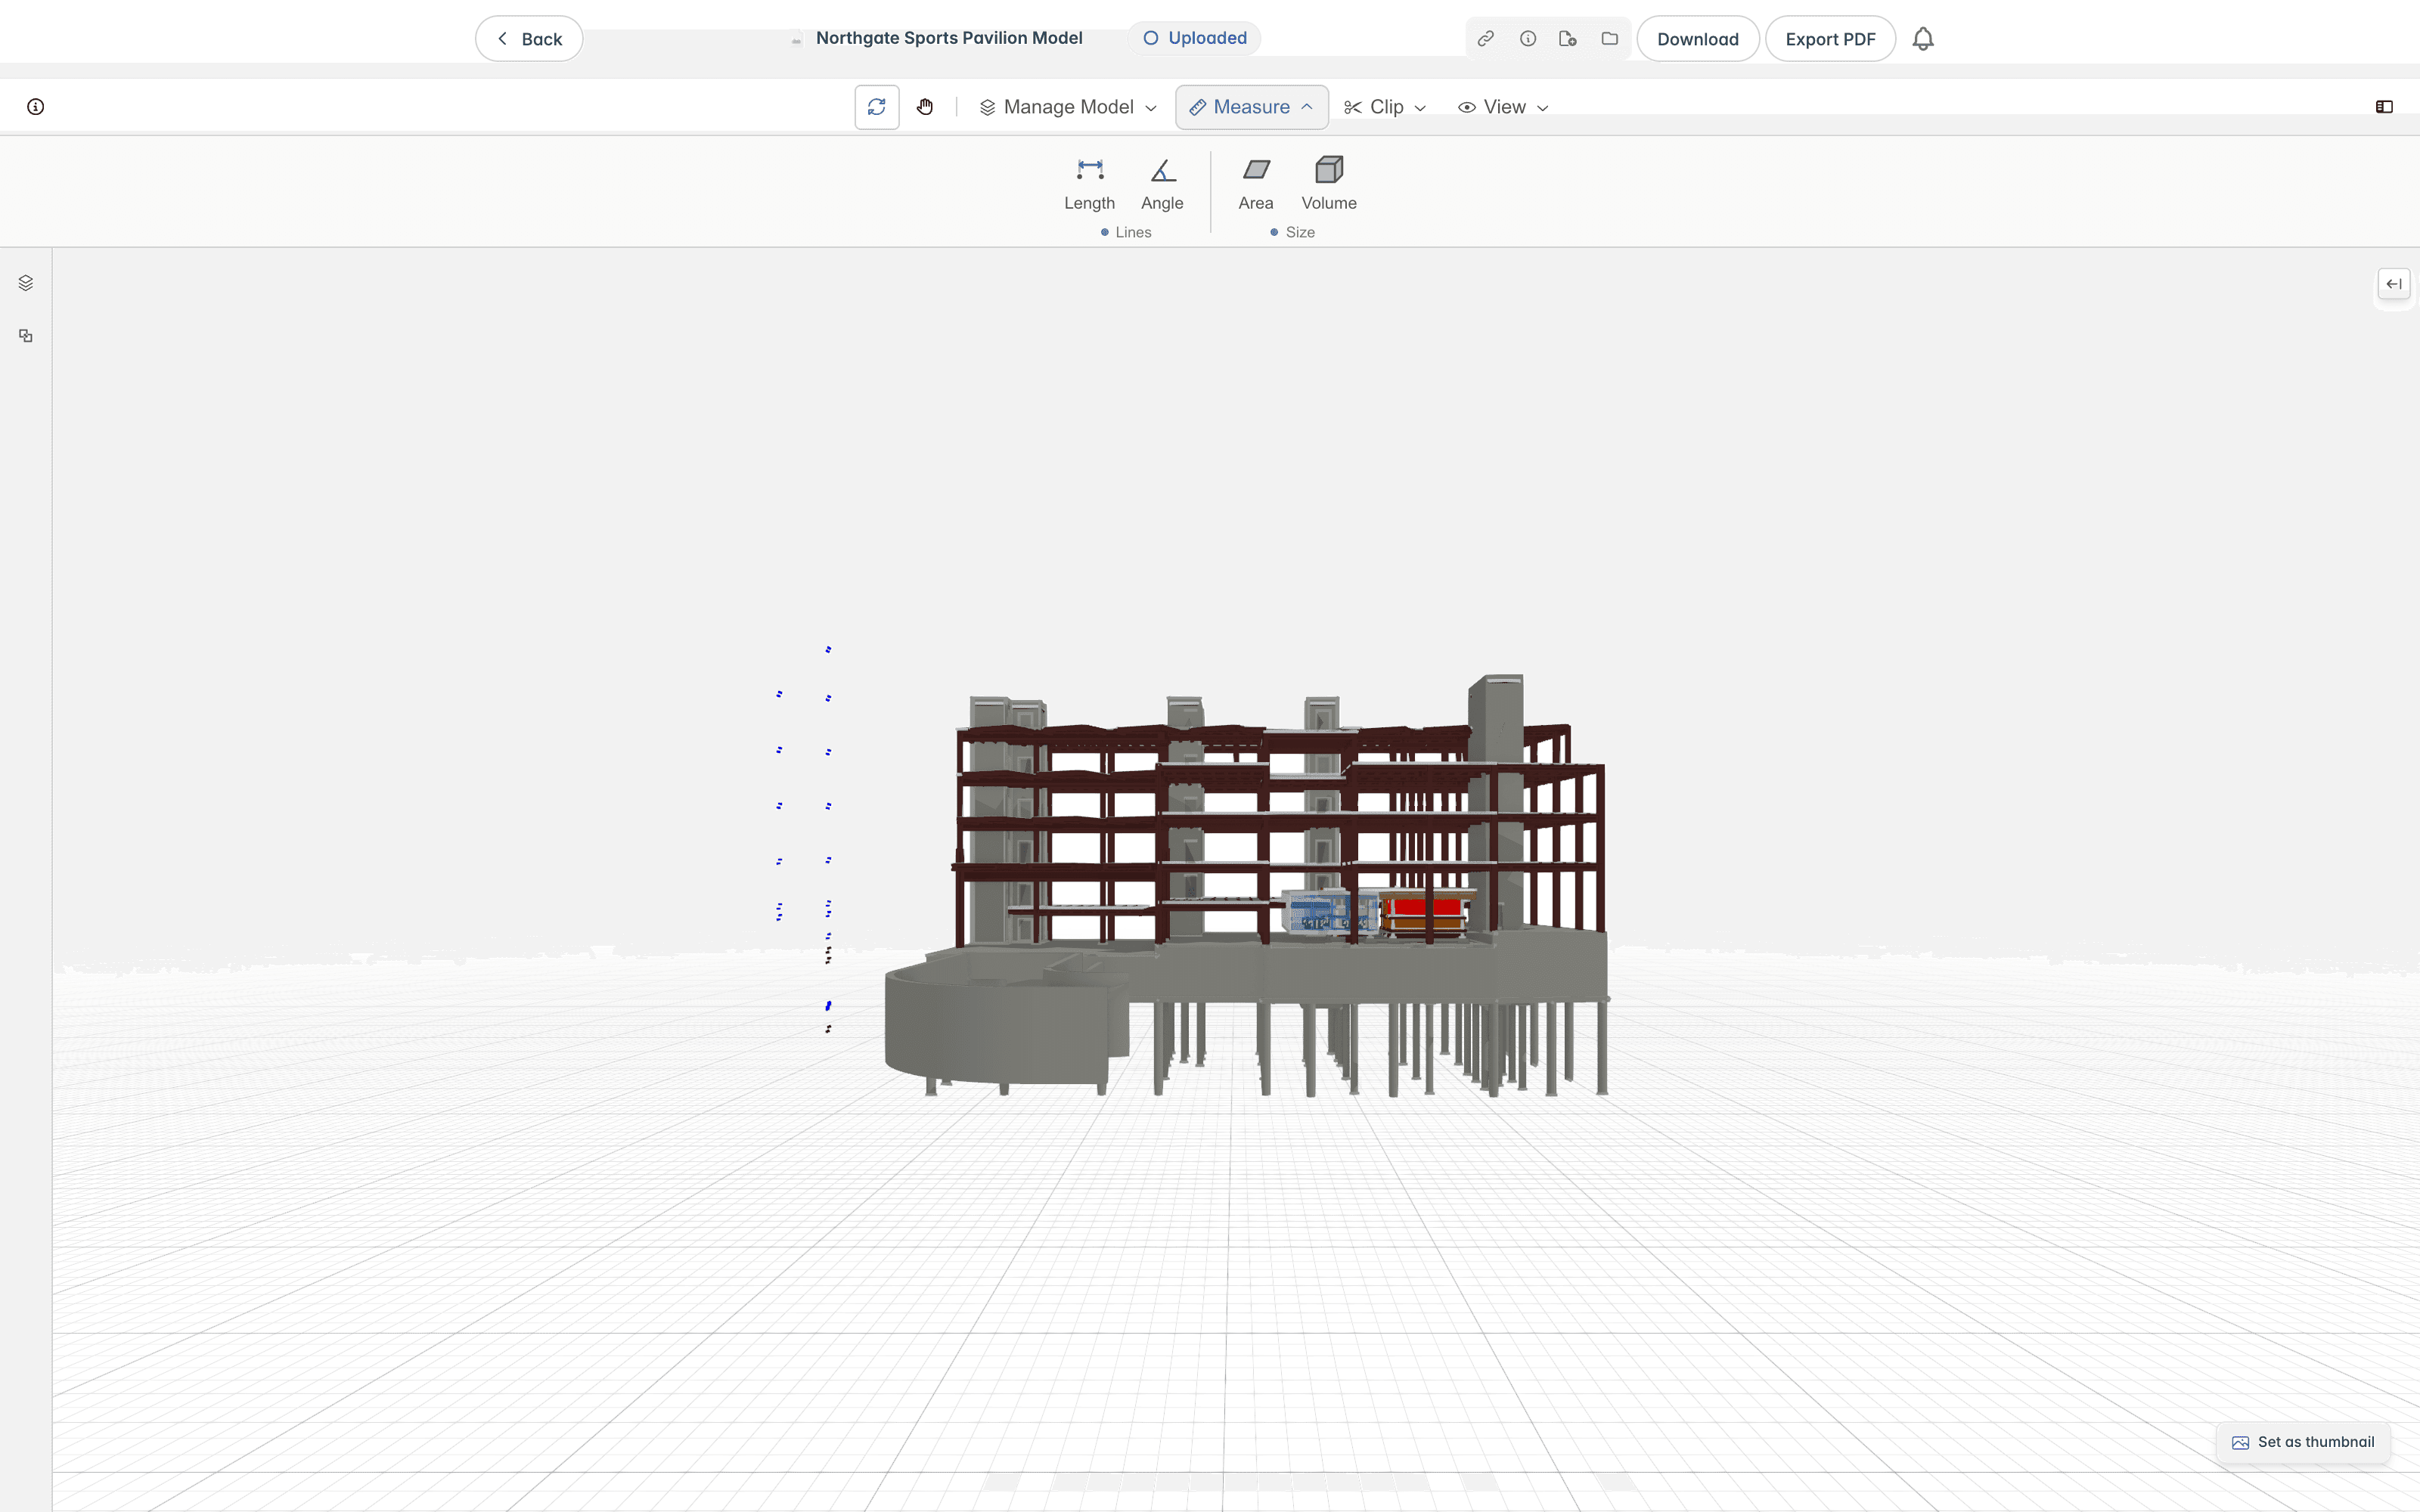
Pick a tool from the ribbon, then double-click the model to place a measurement. The tool opens a panel on the left with a short hint, such as "Double click to measure". The view zooms towards each point you double-click, so scroll back out afterwards to see the whole measurement. By default, lengths are reported in metres, areas in square metres (m²), volumes in cubic metres (m³), and angles in degrees.
Each tool's panel has Measurement visible to show or hide its measurements, and a Delete All button to clear them.
Length
The Length tool measures the straight-line distance between two points on the model.
Double-click a first point, then double-click a second point. The distance is drawn between them and labelled in metres.
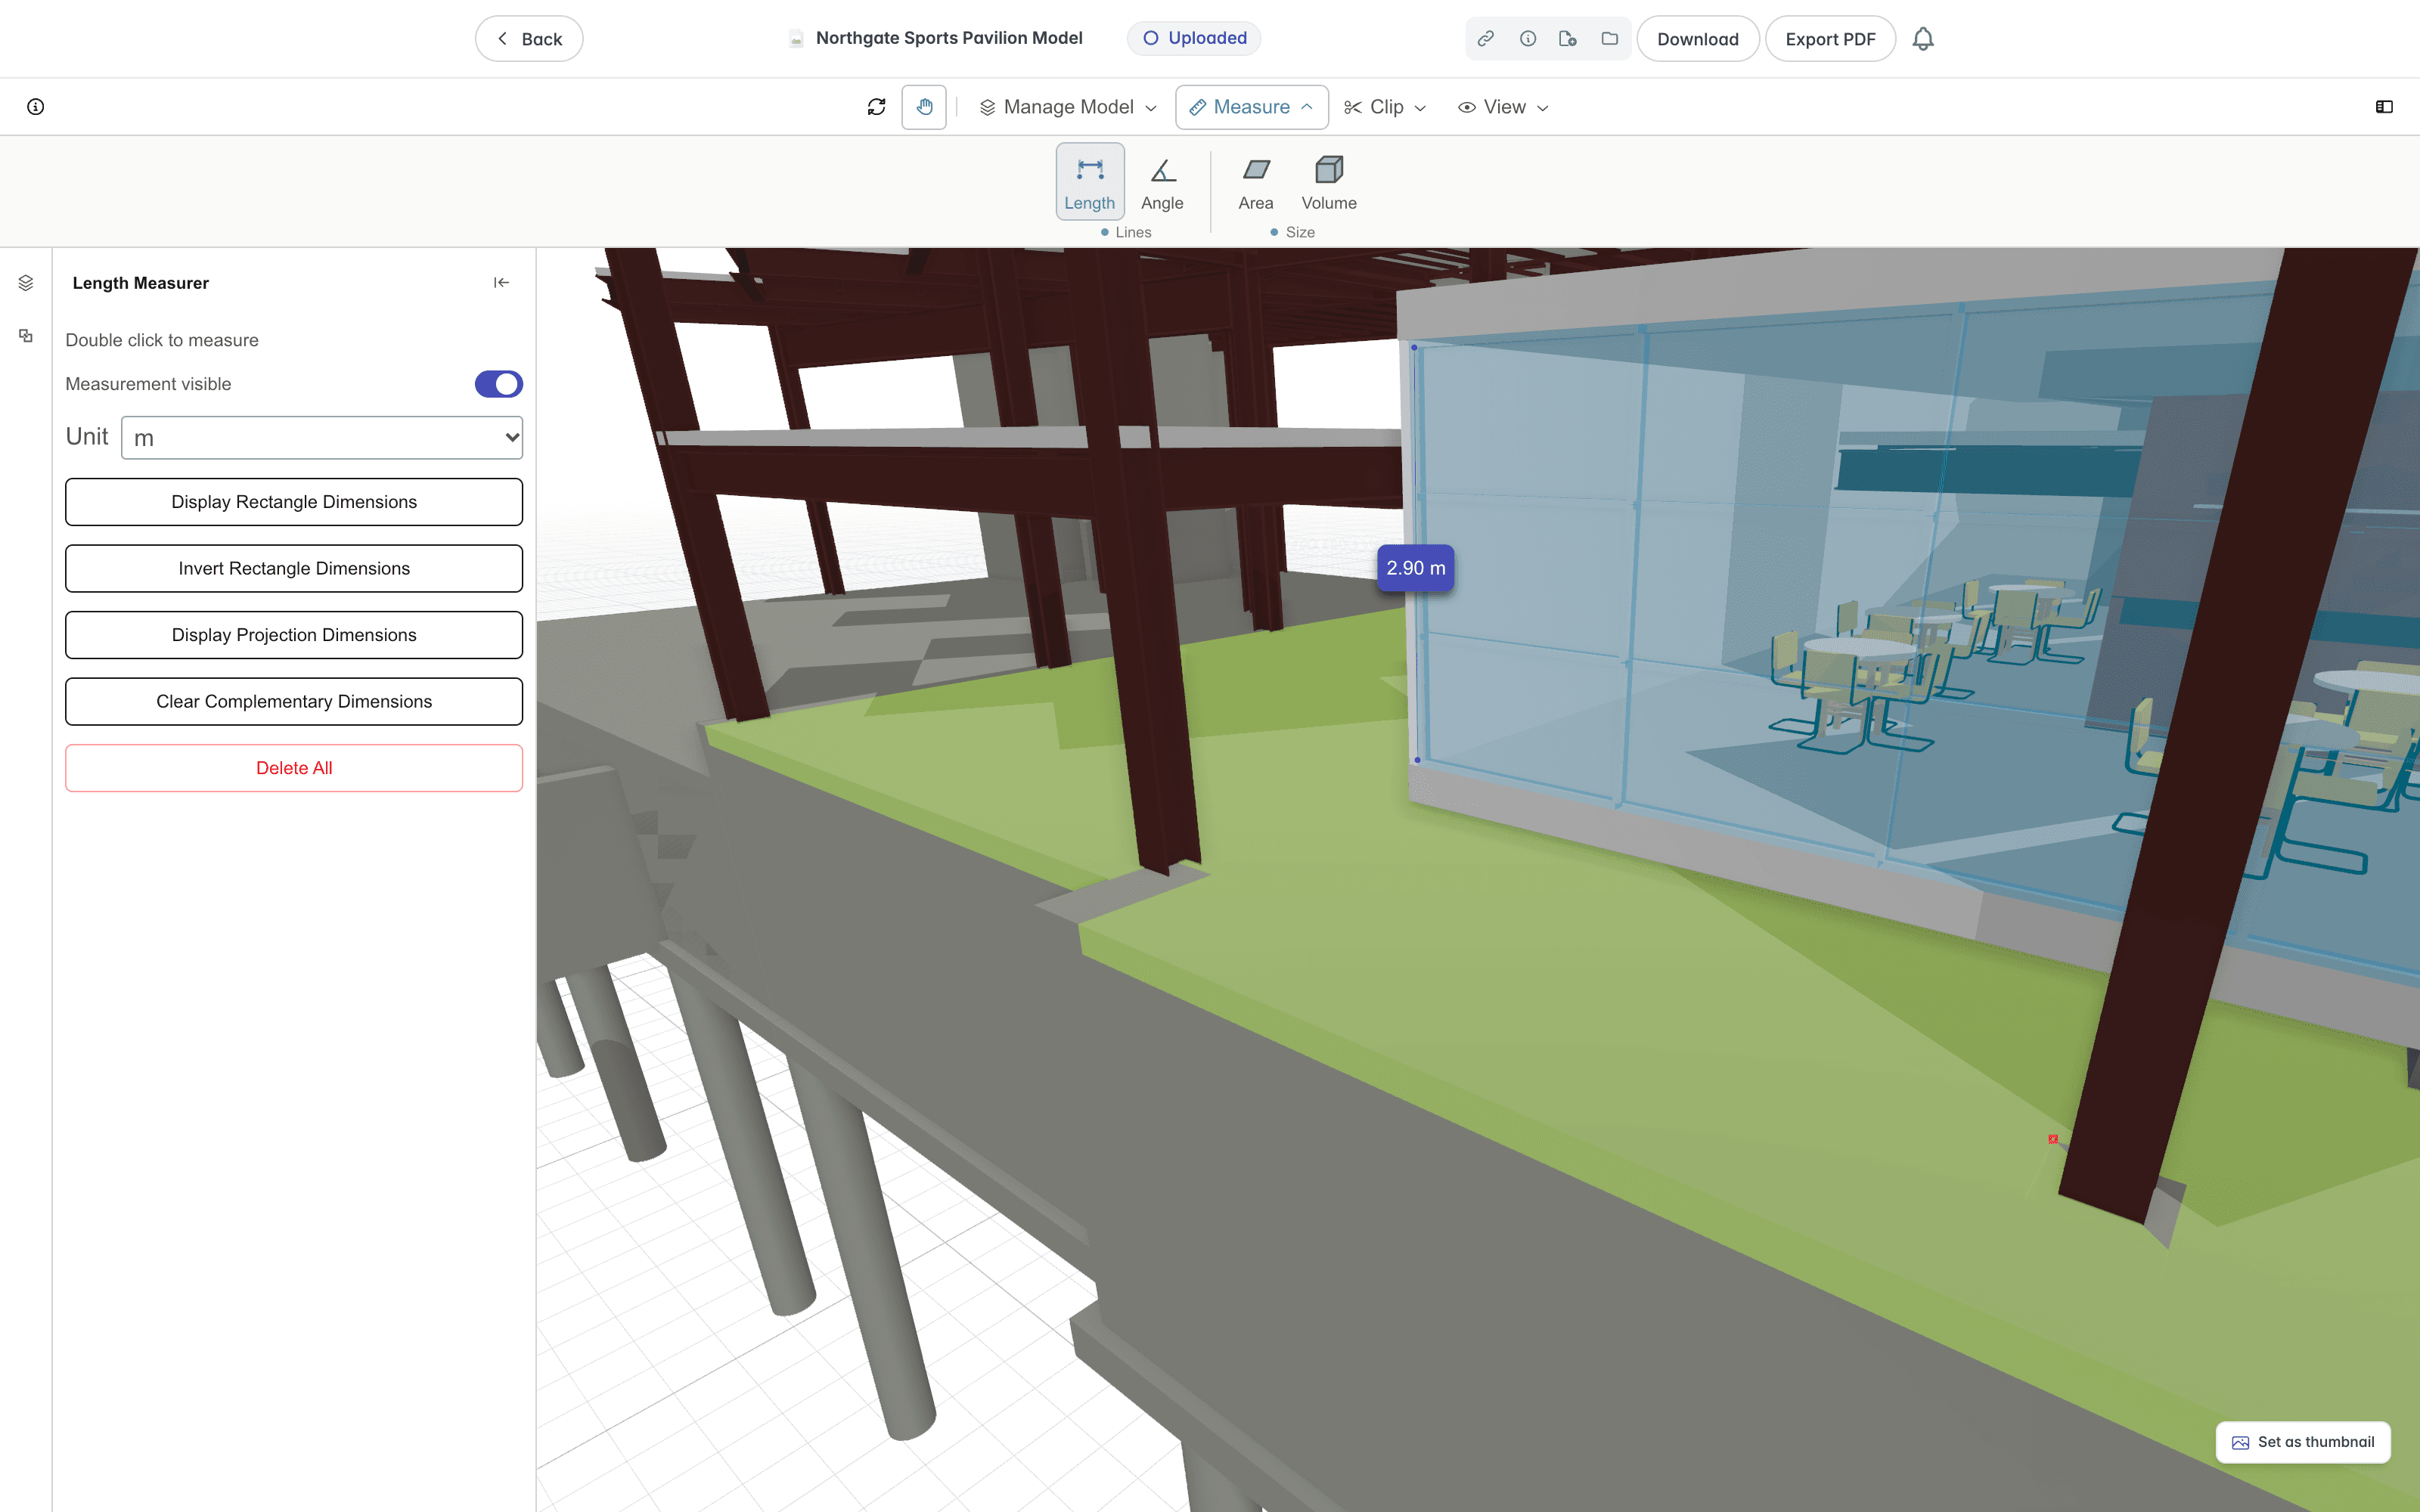
Use the Unit list to change the unit the length is reported in.
The tool can also show the dimension broken into its parts:
- Select Display Rectangle Dimensions to add the horizontal and vertical components of the measurement, and Invert Rectangle Dimensions to flip which way they are drawn.
- Select Display Projection Dimensions to add the measurement's projection onto the axes.
- Use Clear Complementary Dimensions to remove these extra dimensions and leave only the main length.
Area
The Area tool measures a rectangular area on a surface.
Double-click one corner of the region, then double-click the opposite corner. The rectangle between them is drawn on the surface and its area is reported.
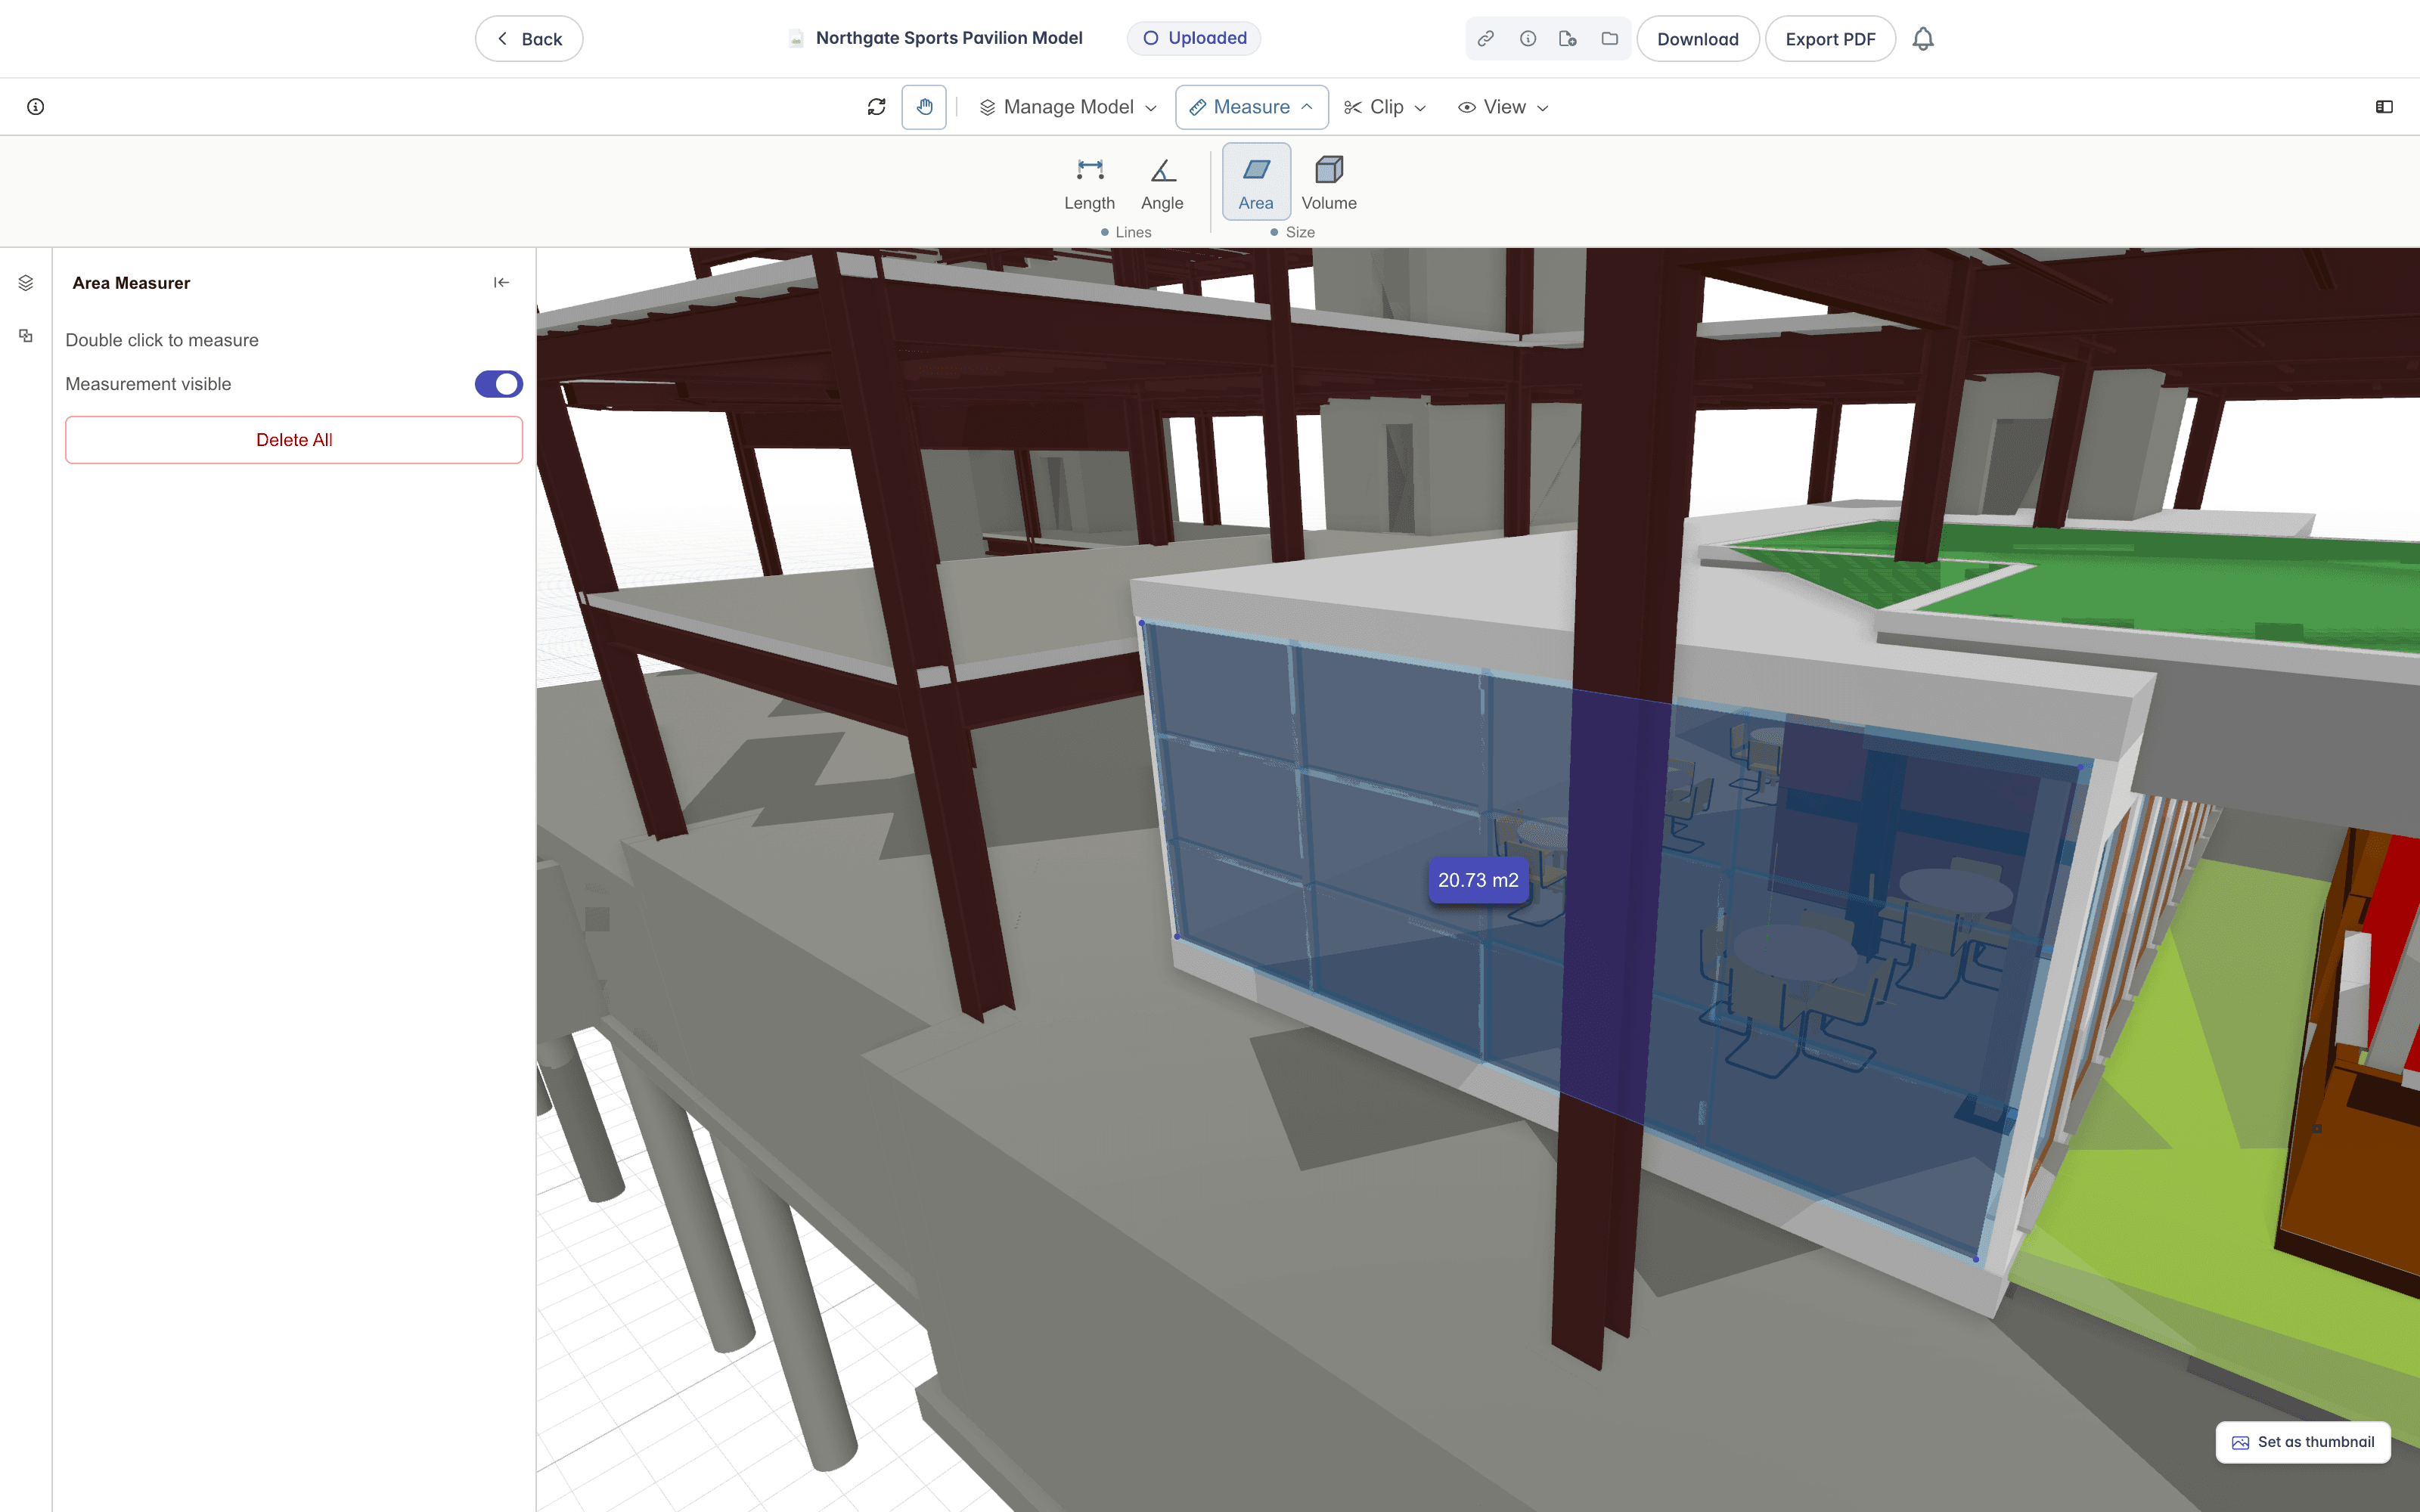
Use it for floor areas, wall faces, or any flat region you need to size.
Volume
The Volume tool reports the volume of model elements.
Double-click an element to select it and read its volume in cubic metres. The tool uses the element's own geometry, so you get the true volume of the object rather than a drawn box.
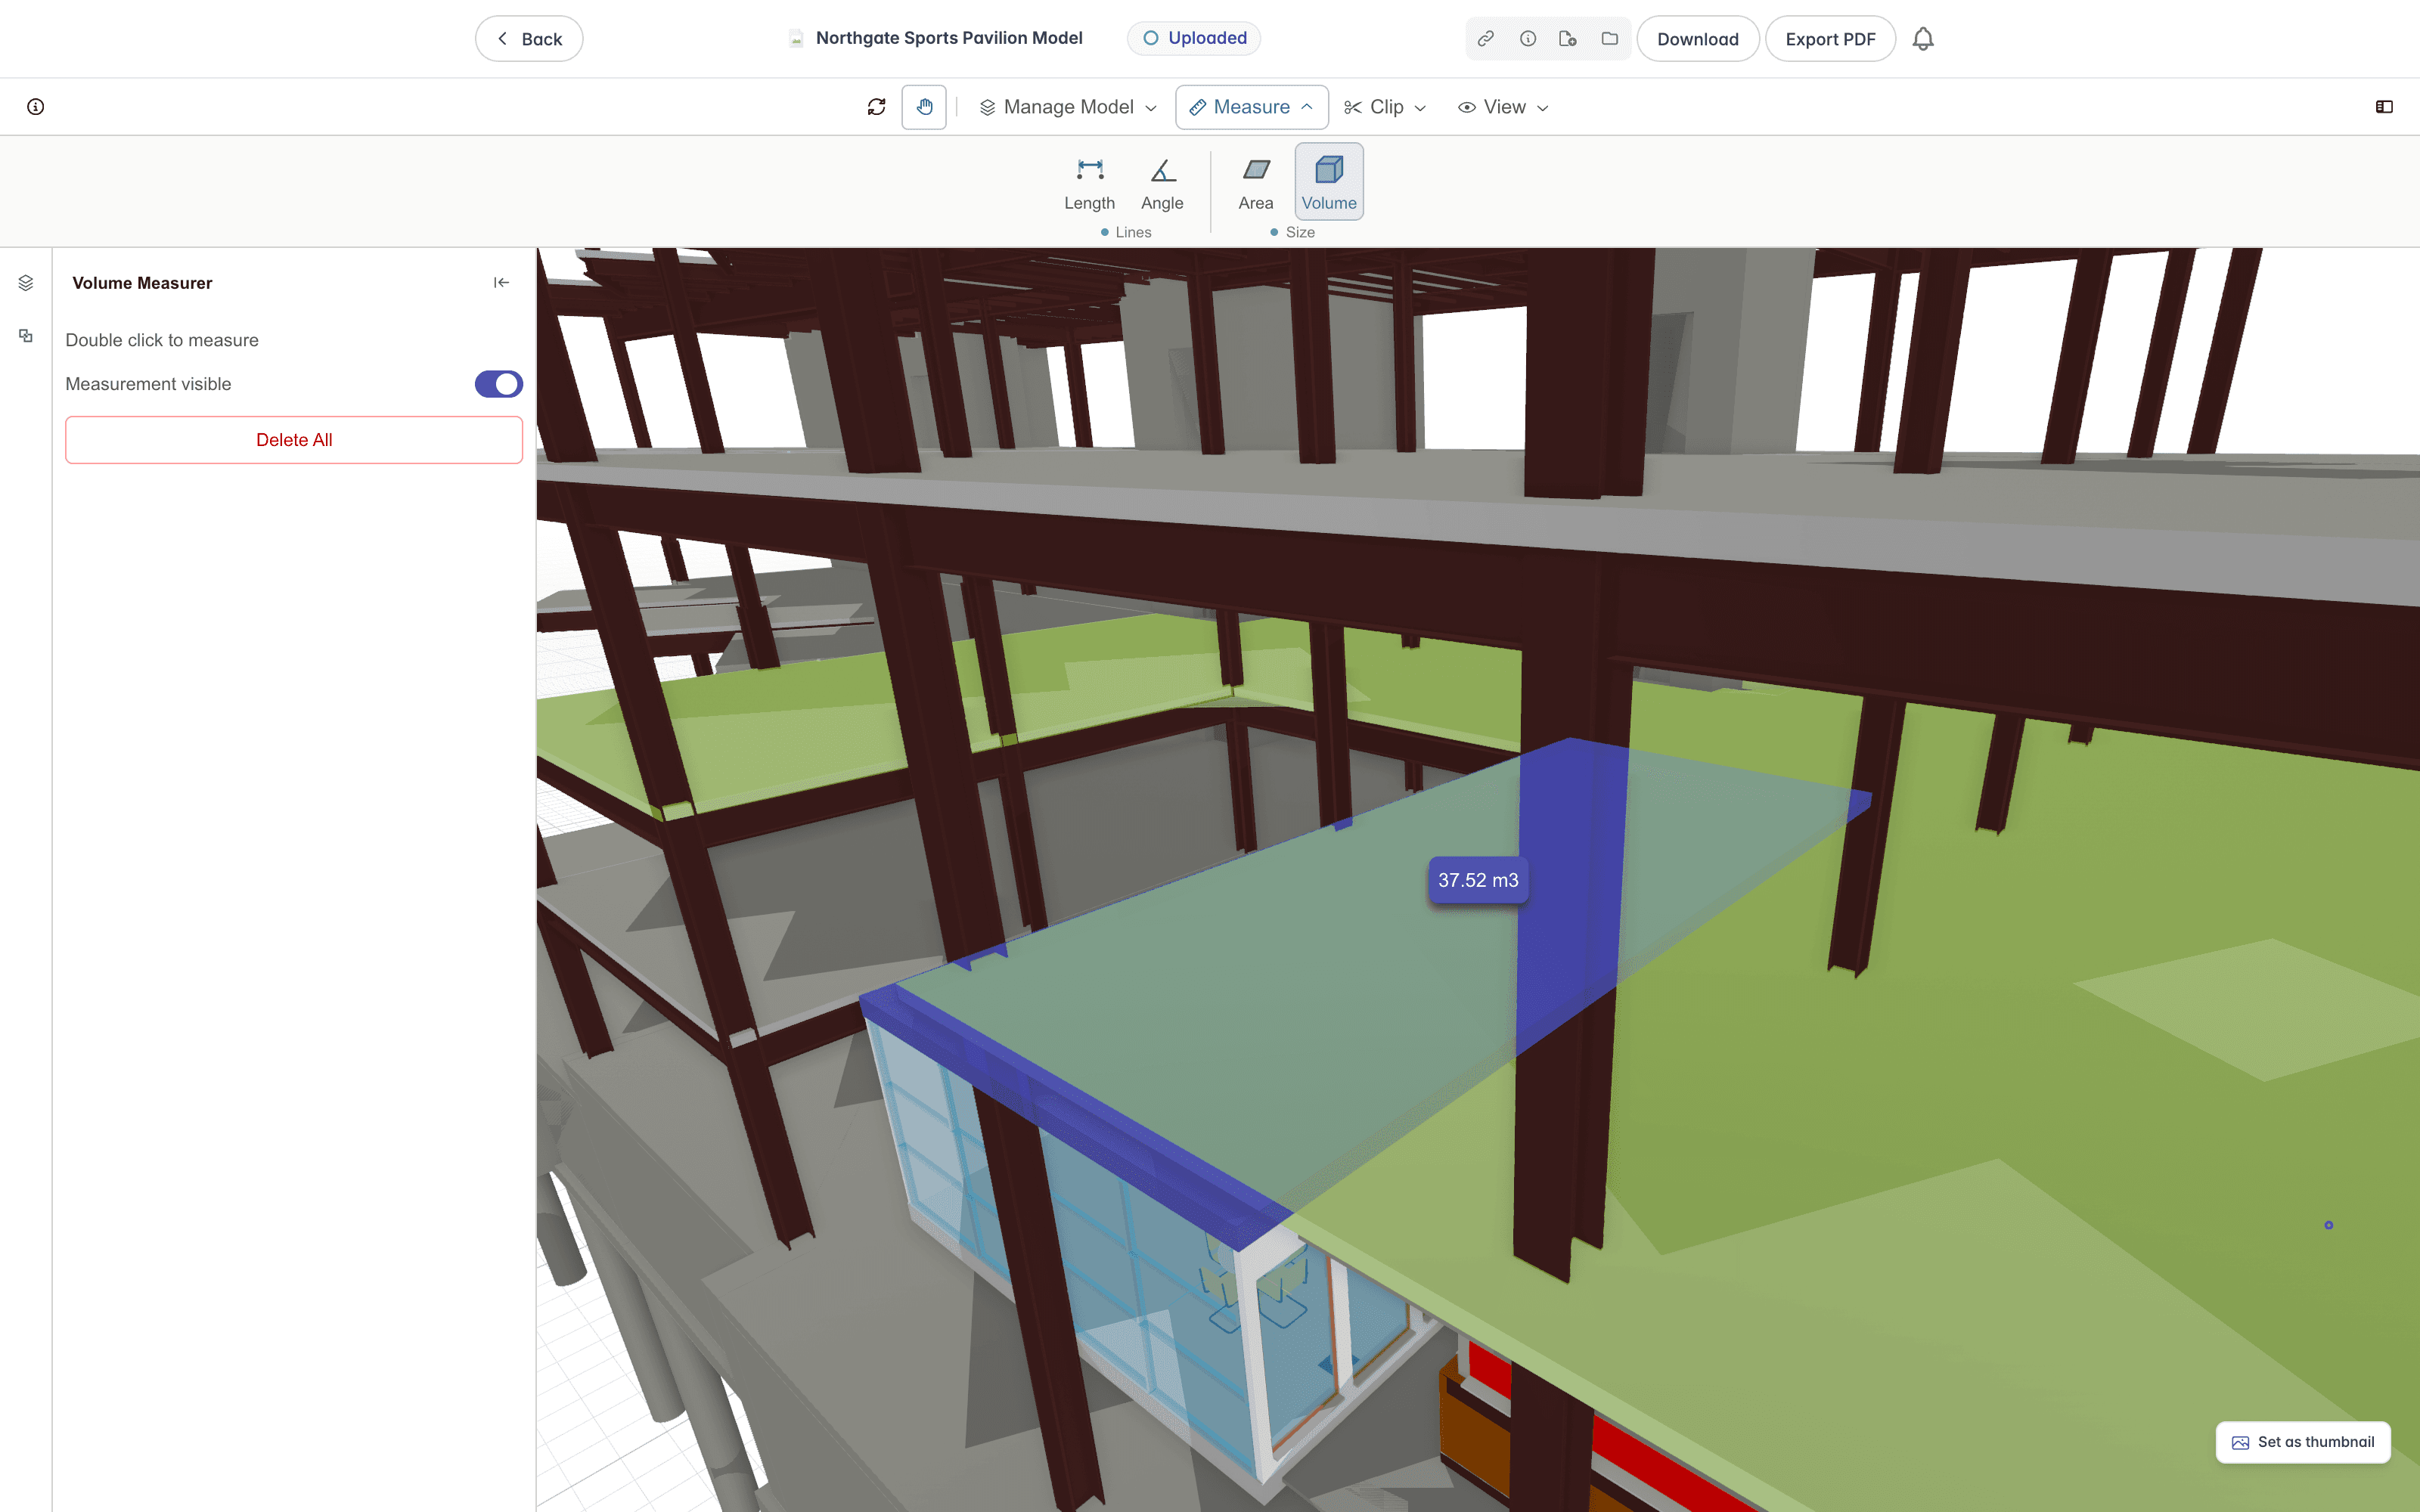
Use it to size structural members, slabs, or other components.
Angle
The Angle tool measures the angle formed by three points.
Double-click three points: the corner point is the middle one, and the angle is measured between the two arms. The angle is reported at the vertex.
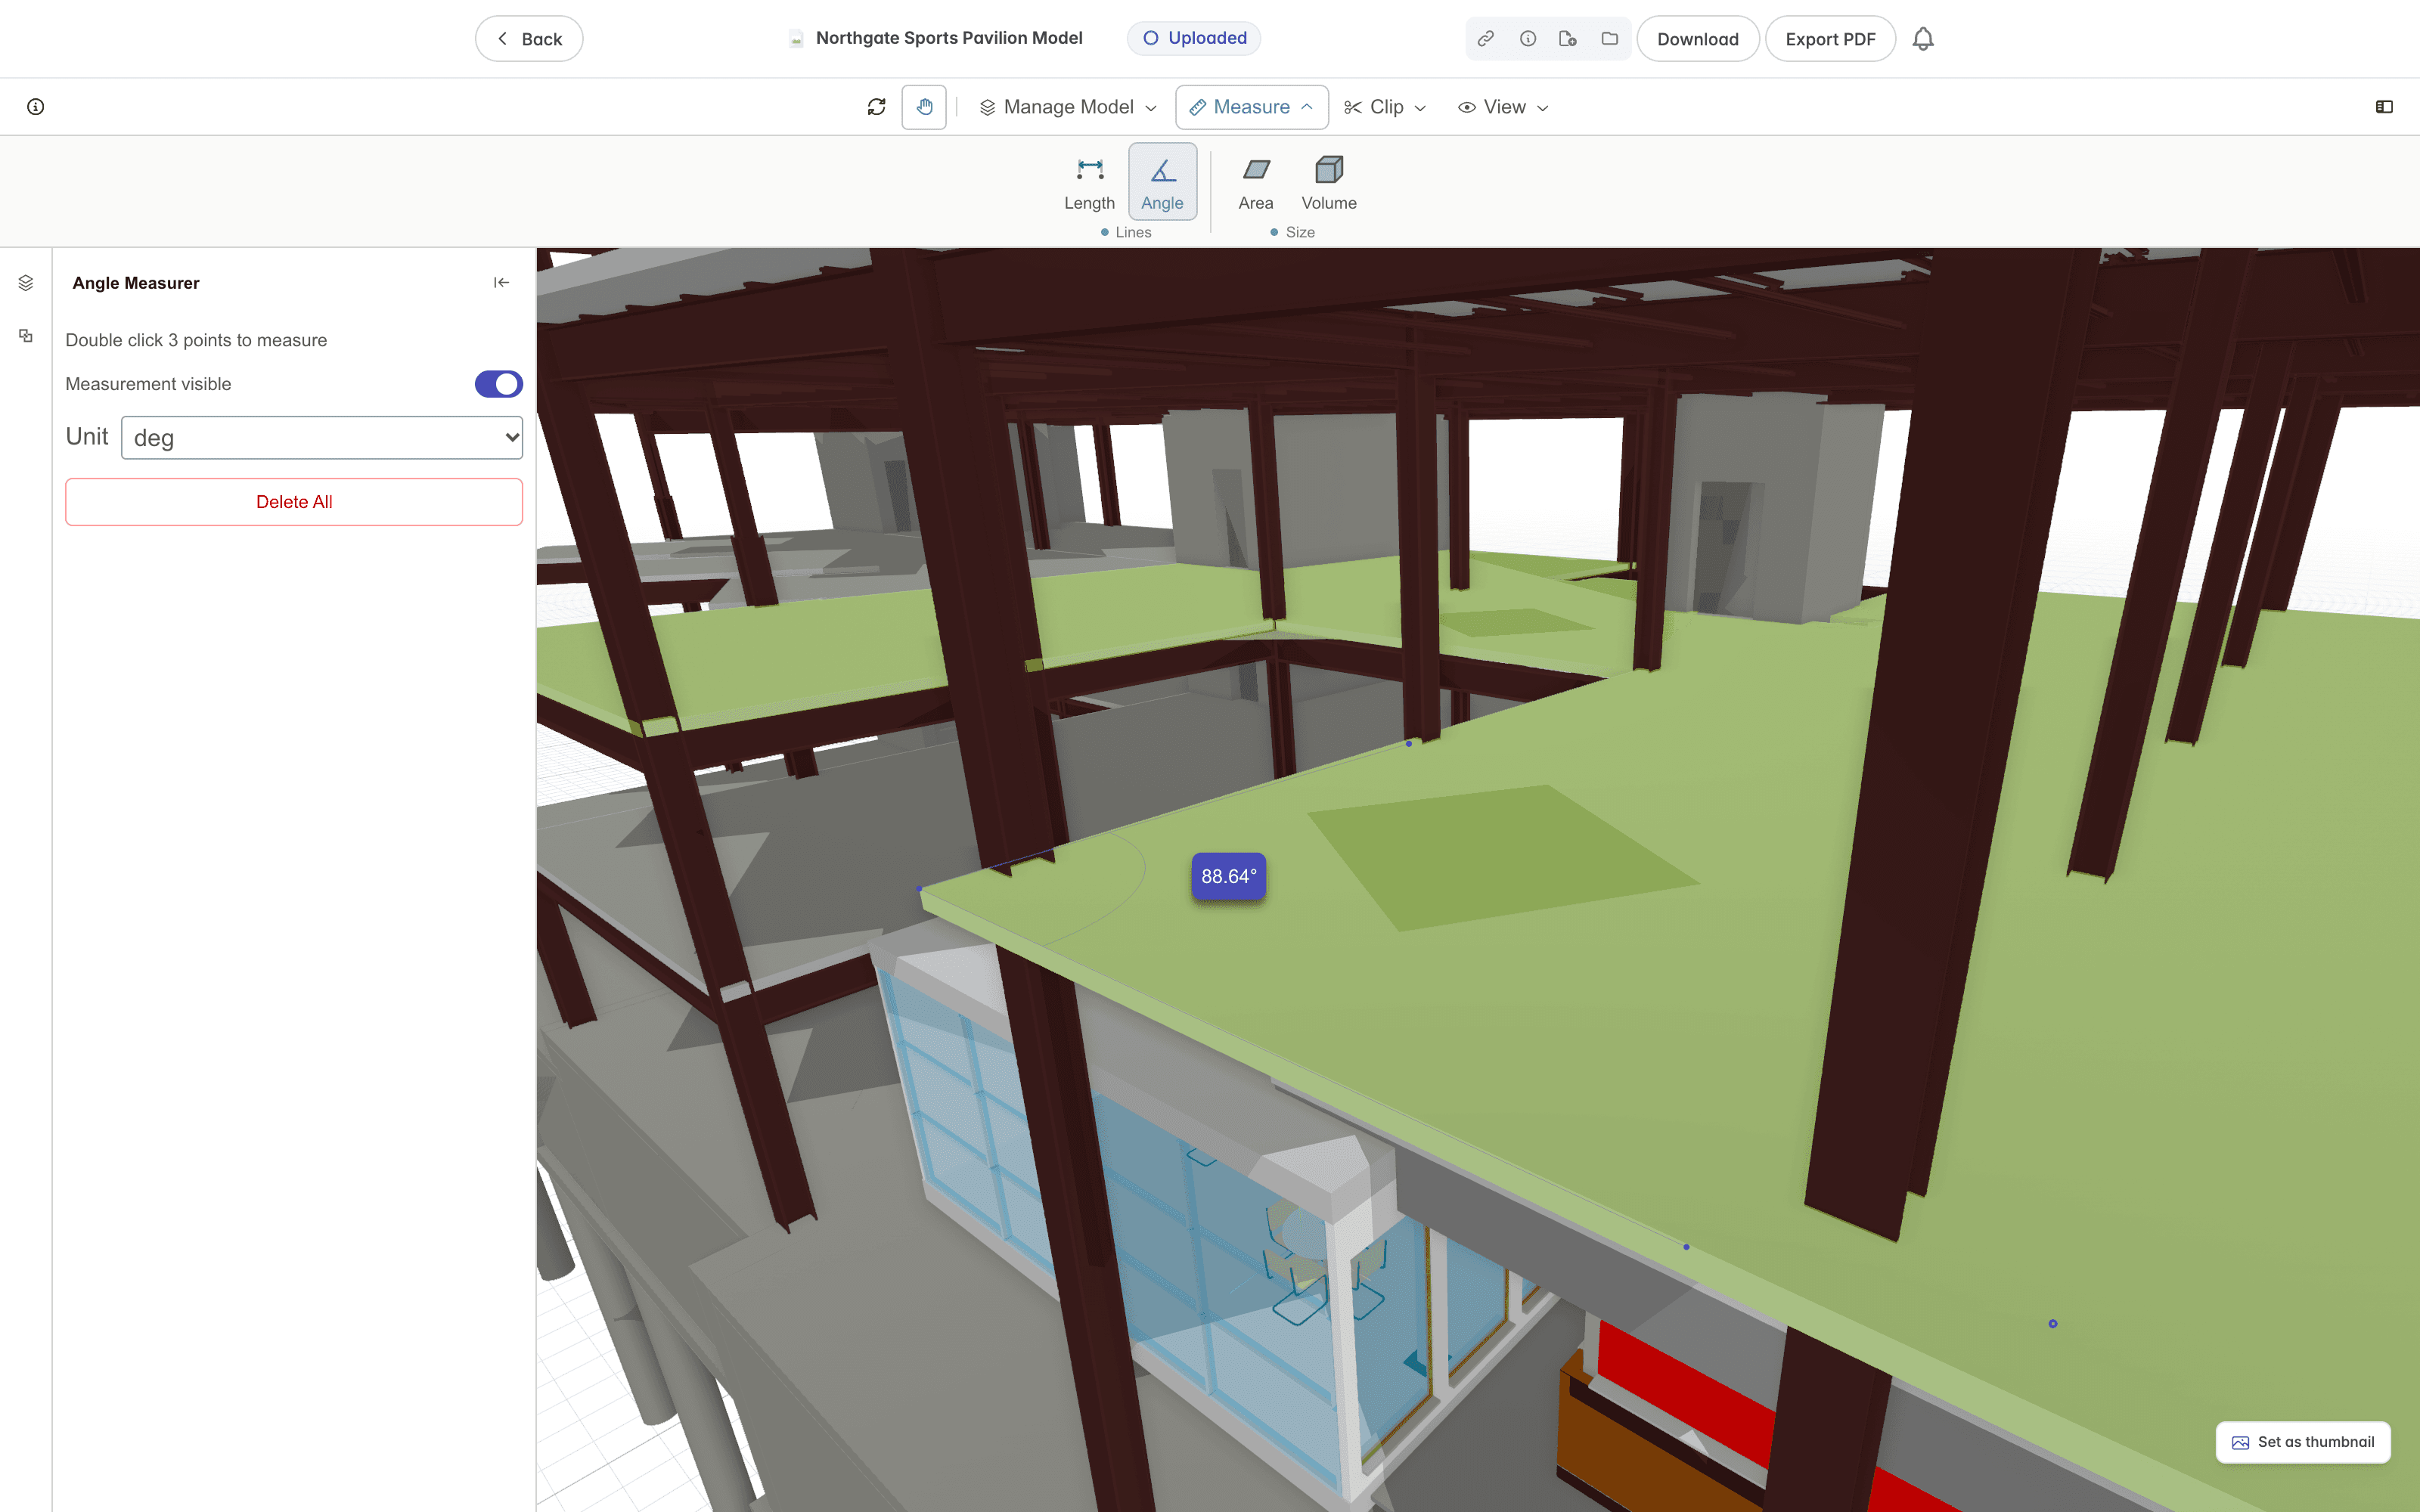
Use the Unit control to switch the reading between degrees and radians.
Sectioning the Model
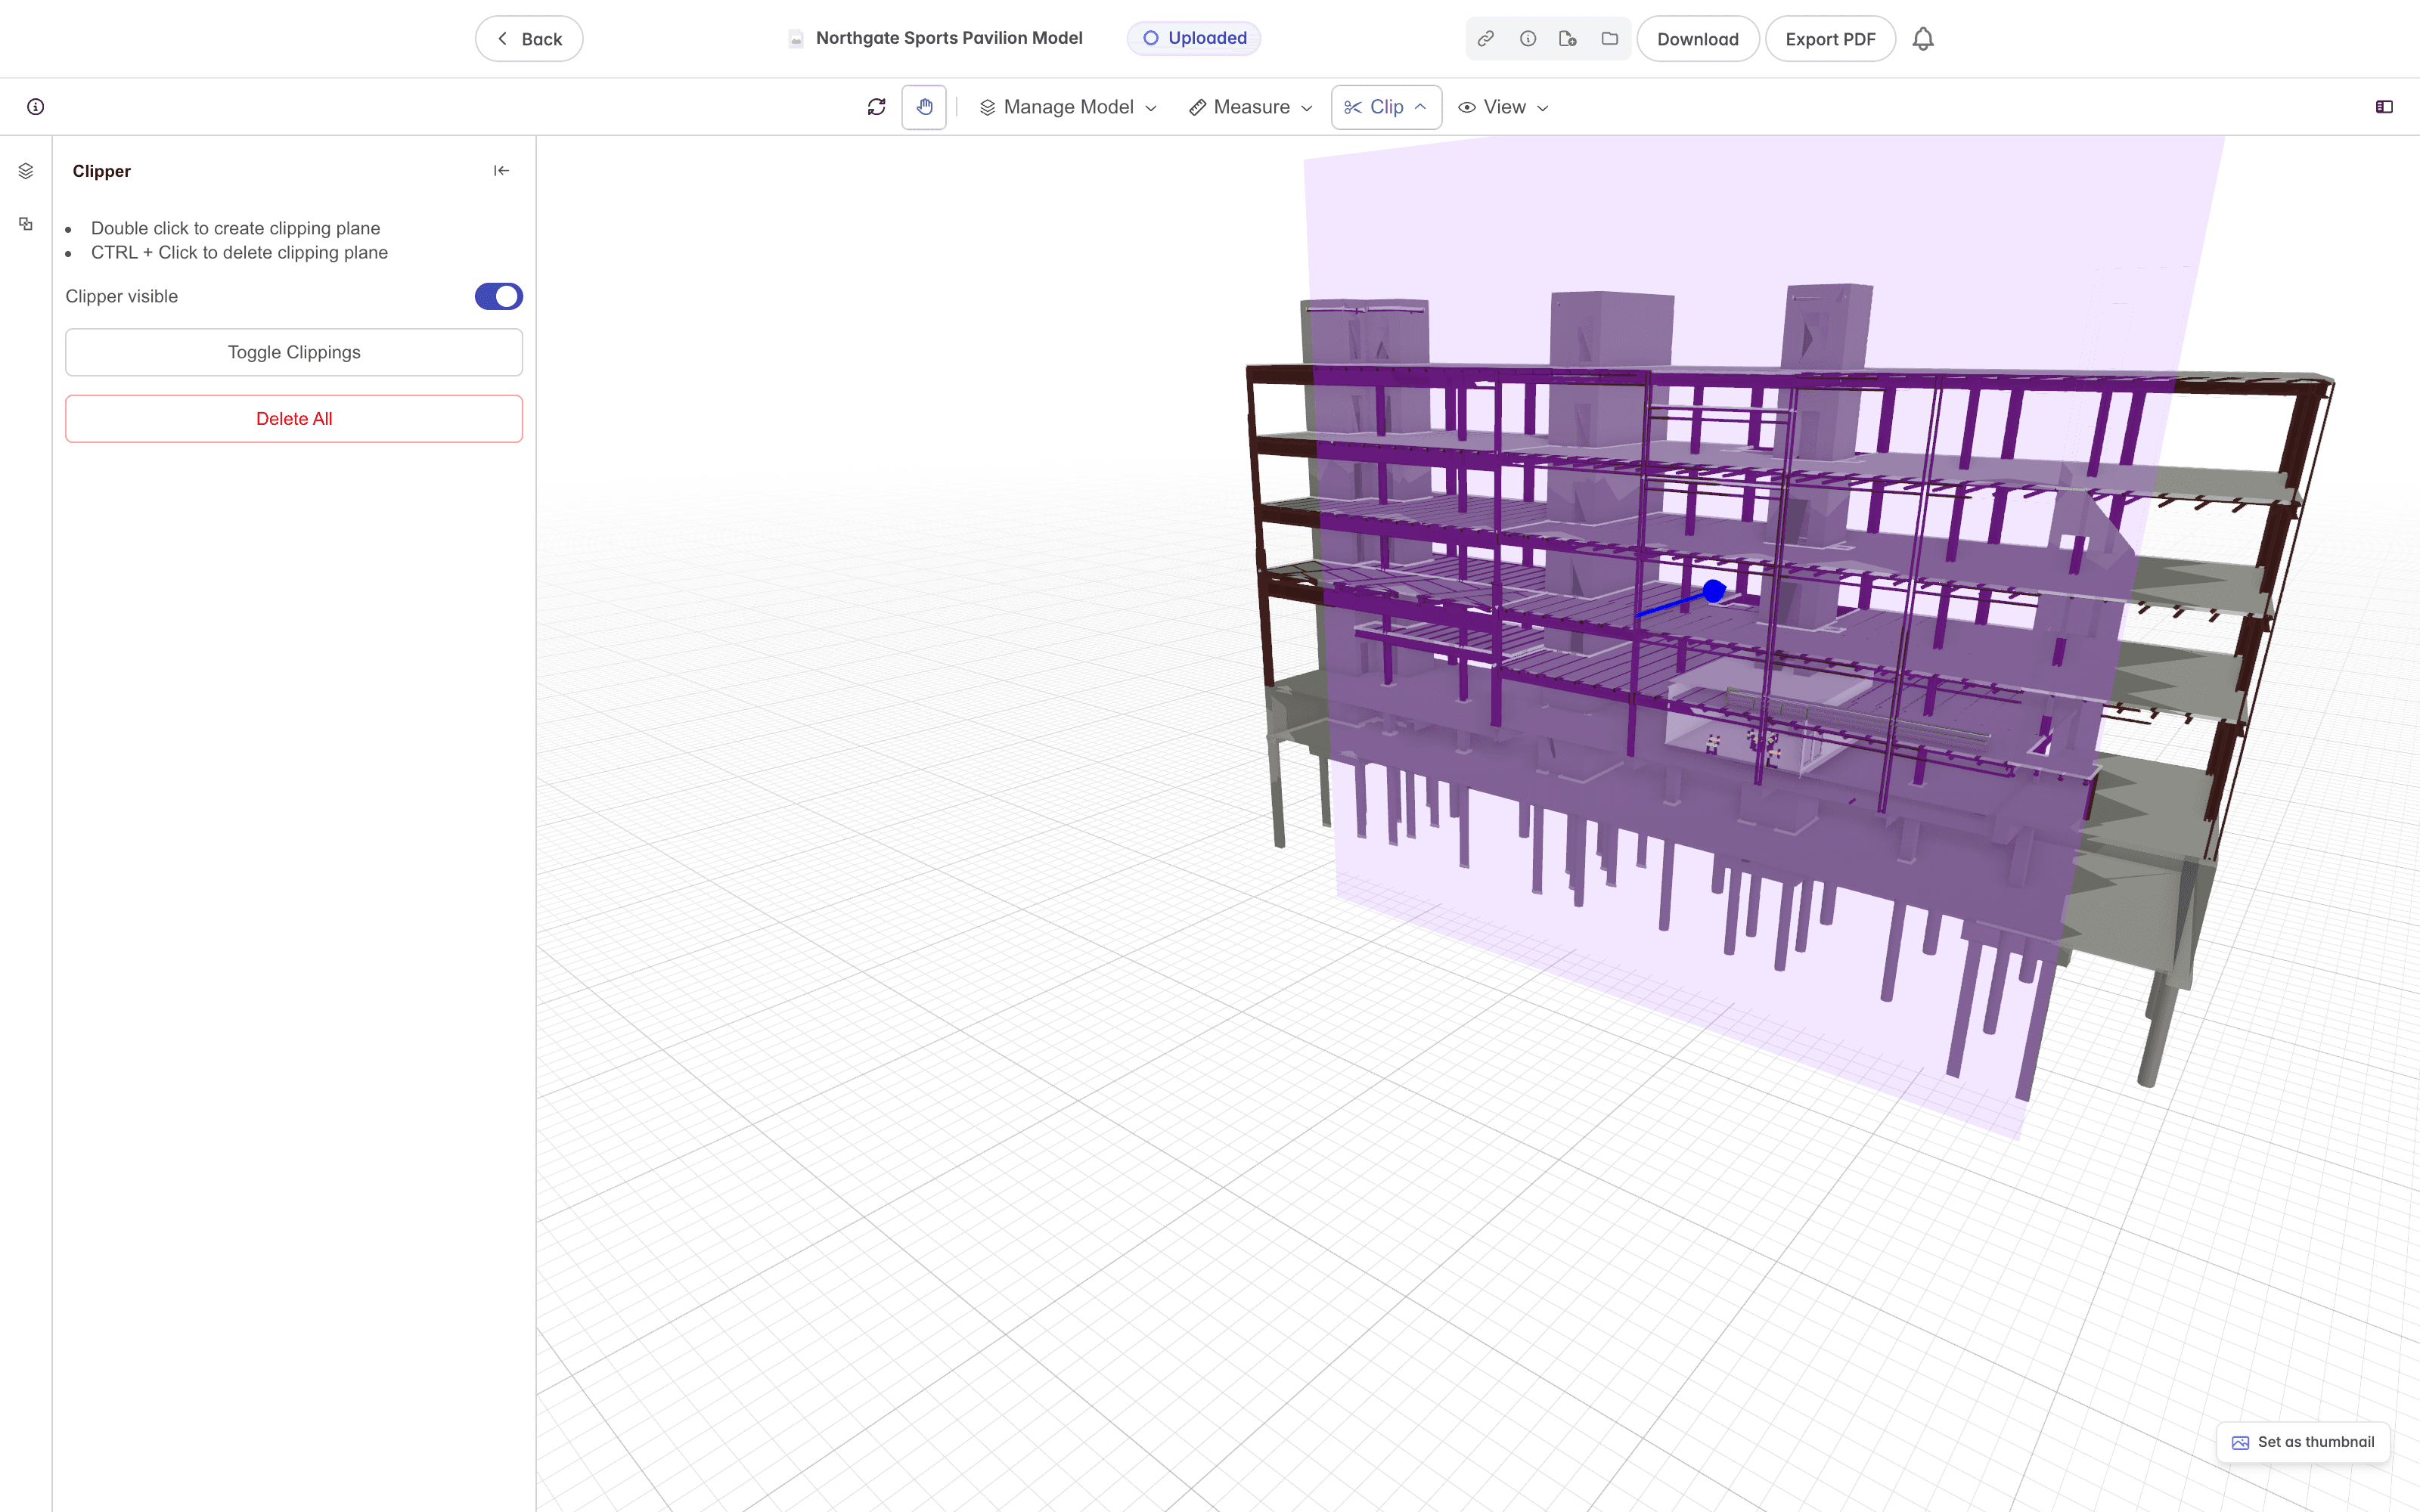
Open the Clip tool to cut through the model with a clipping plane. It opens a Clipper panel on the left. Double-click on a surface to create a clipping plane, hold Ctrl and click a plane to delete it, or use Delete All to remove them. Clipper visible shows or hides the planes, and Toggle Clippings enables or disables the cuts they make.
Working With the Model
Open the Manage Model ribbon to work with the model's contents:
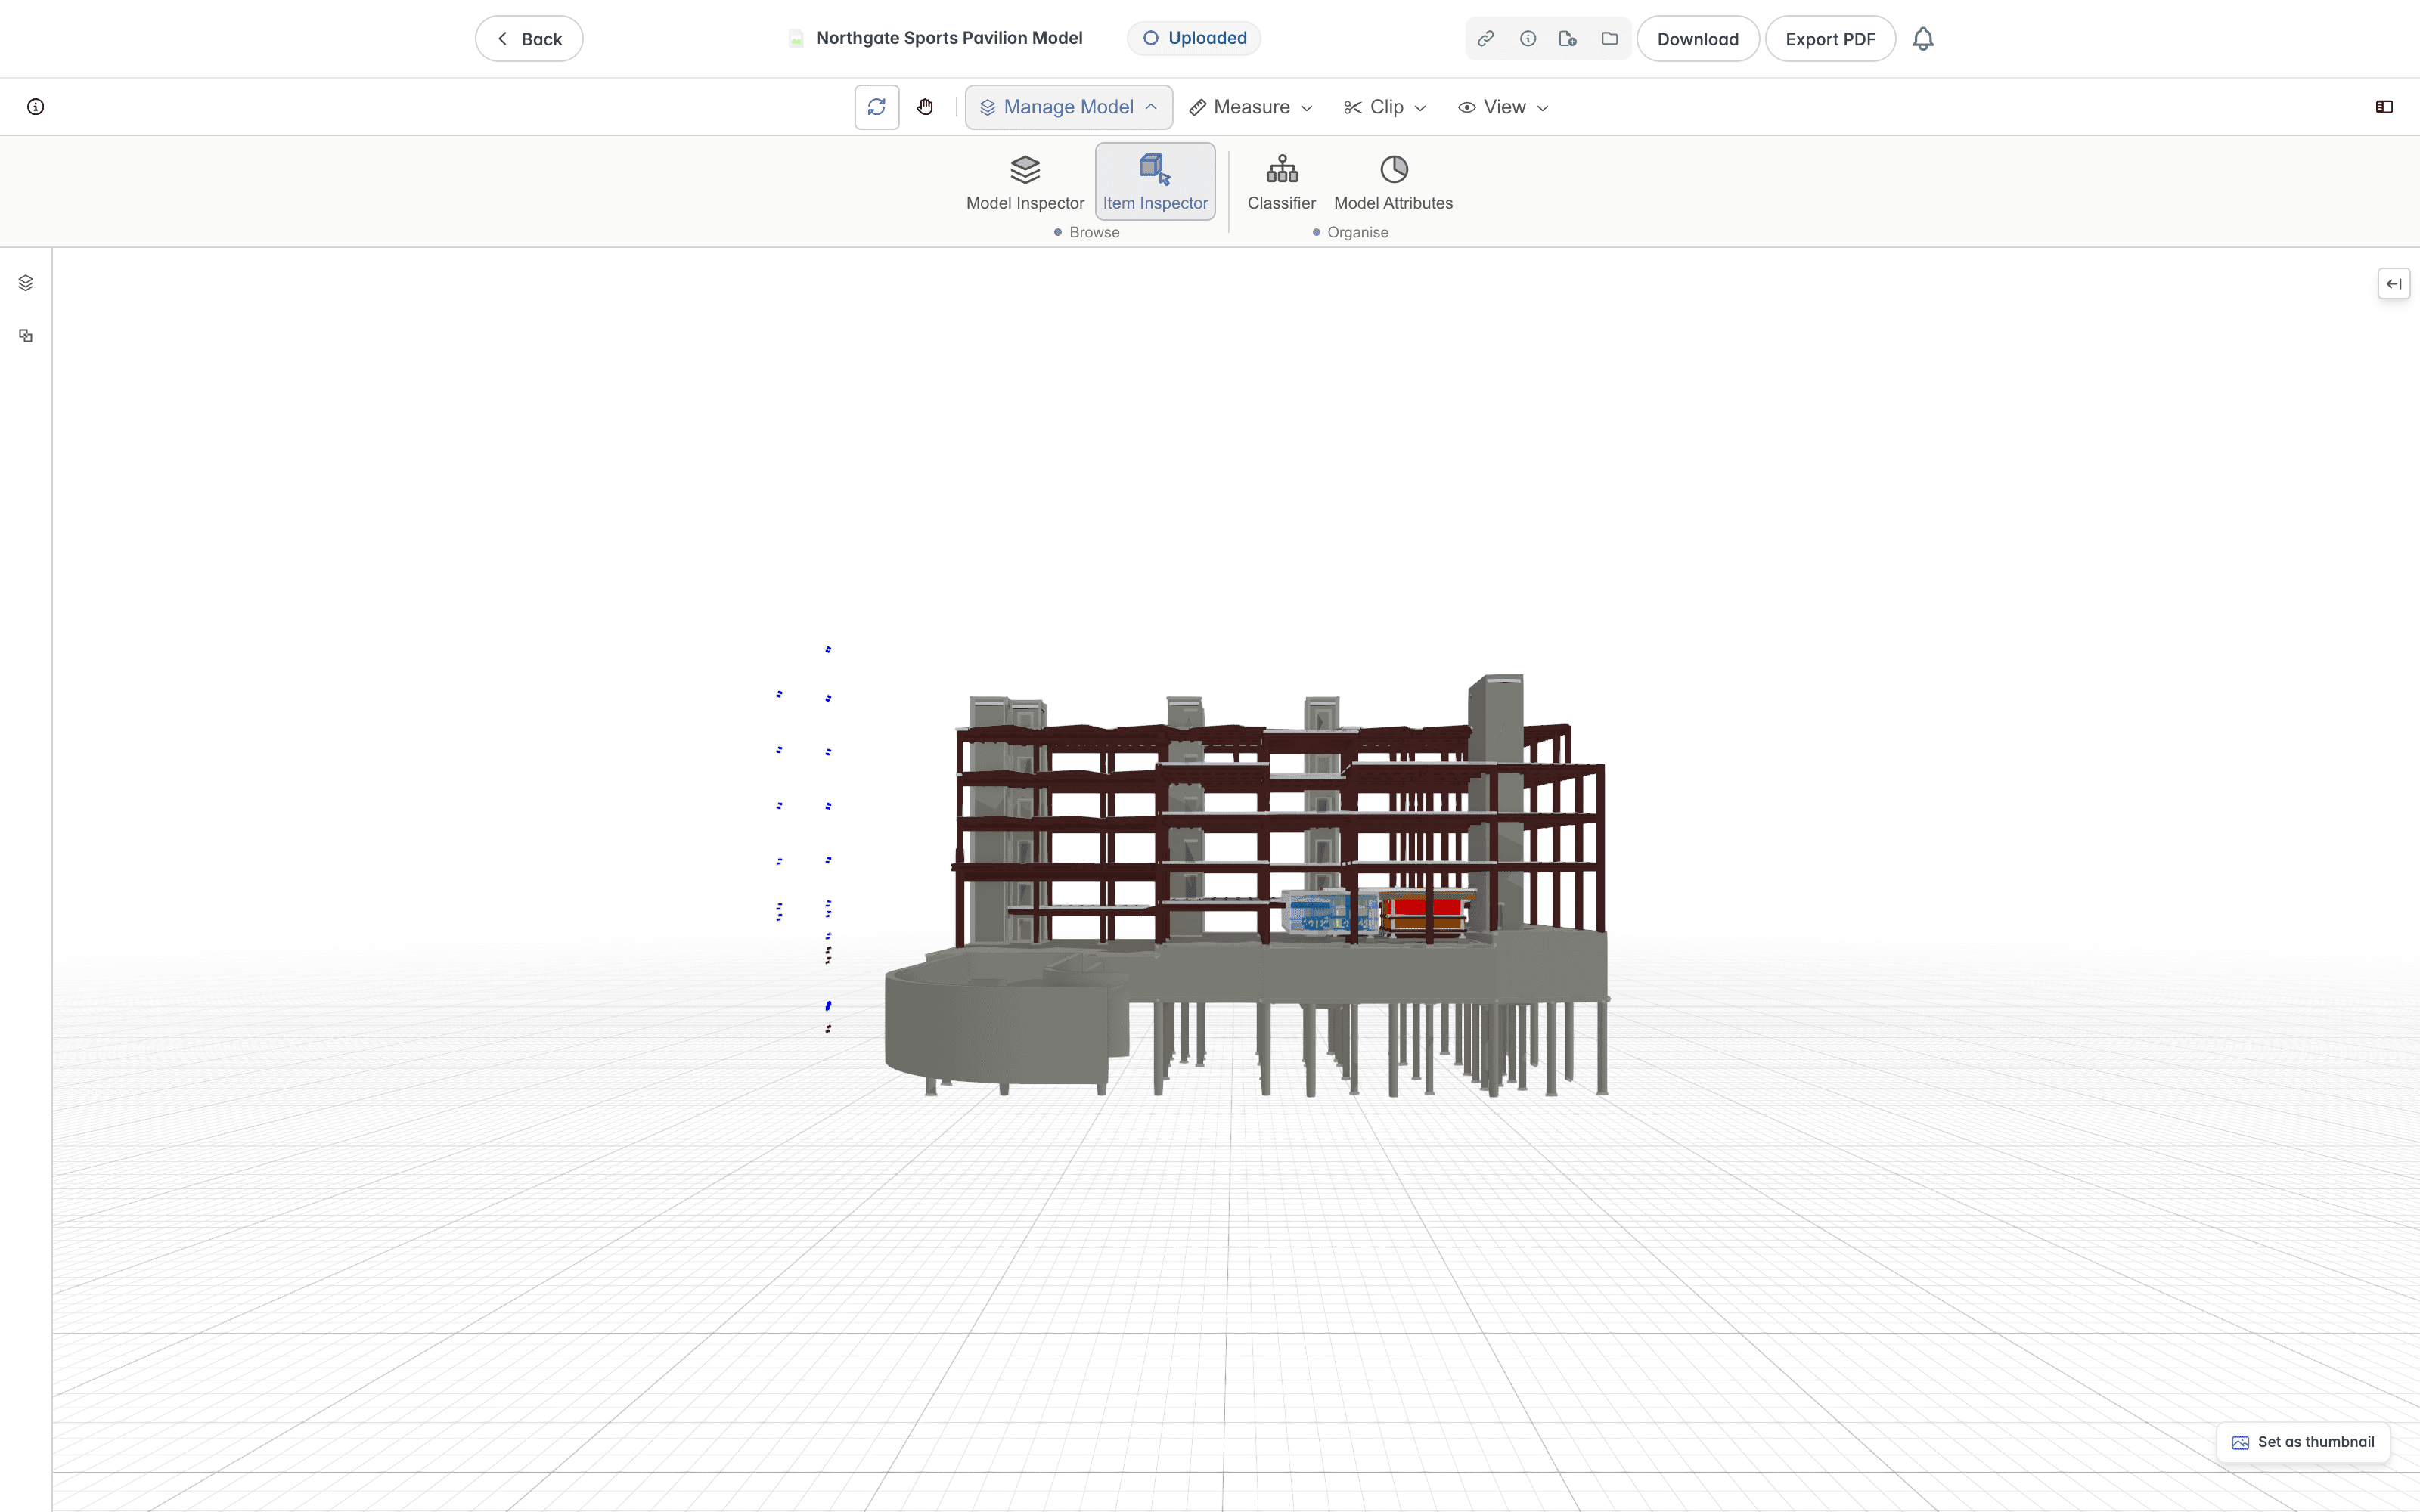
- Browse has the Model Inspector and the Item Inspector. They open as panels down the sides of the viewer, the model tree on the left and an element's properties on the right. Click a model item to highlight or inspect it, and hold Ctrl and click to add more items to the selection.
- Organise has the Classifier and Model Attributes. The Classifier groups elements by category, so you can Isolate Category or Hide Category, and Reset Visibility to bring everything back. Model Attributes displays the model's attributes as a chart, and clicking a chart section highlights the matching elements in the 3D view.
Right-click an element to open a menu.
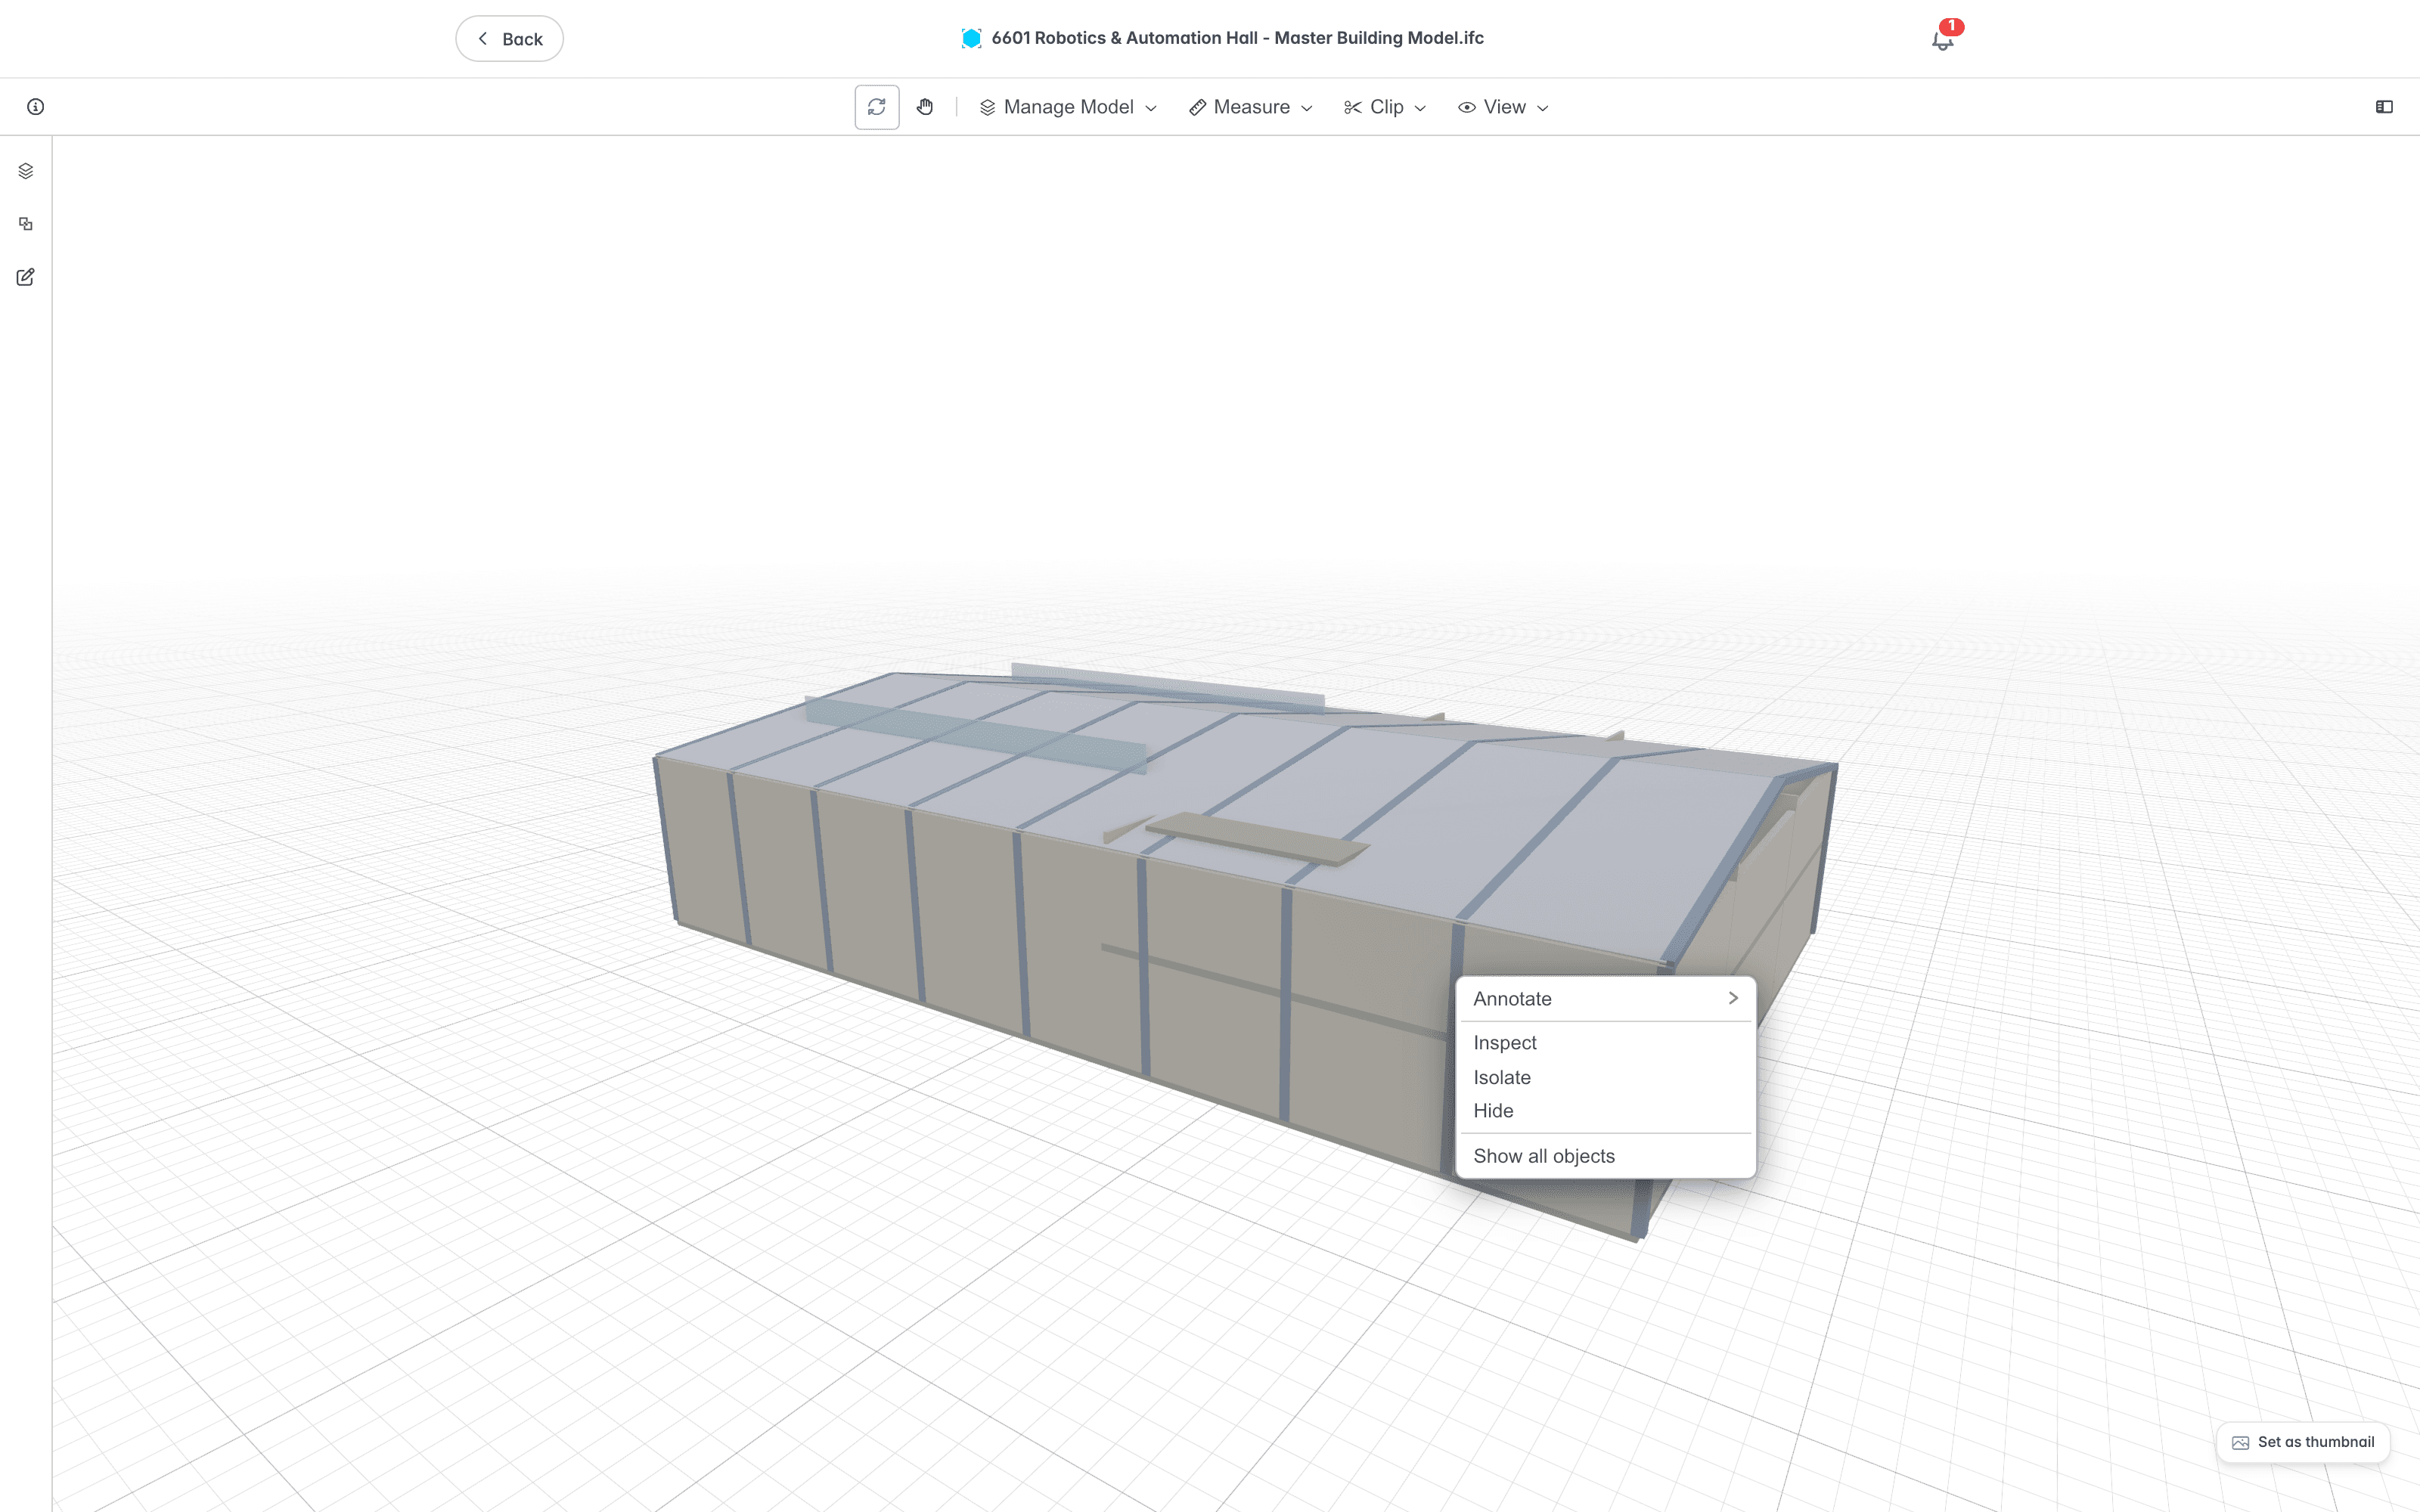
- Annotate, then Note, adds a note, covered under Notes.
- Inspect selects the element and zooms to it.
- Isolate shows only the element, and Hide hides it.
- Show all objects brings everything back.
Inspecting Properties
Select an element to see its properties. You can read the values in the Item Properties table and use Copy as TSV to copy them out, ready to paste into a spreadsheet.
Notes
A note pins a comment to an element or a point on the model, so the next person who opens it sees what to look at. Notes are saved with the version of the model and shared with everyone who can open it.
Adding a Note
Select the annotations icon in the panel rail down the left of the viewer to open the Annotations panel. Its header shows a count of the annotations, and a row of filters narrows the list when there is more than one kind. With nothing added, the panel reads "No annotations yet".
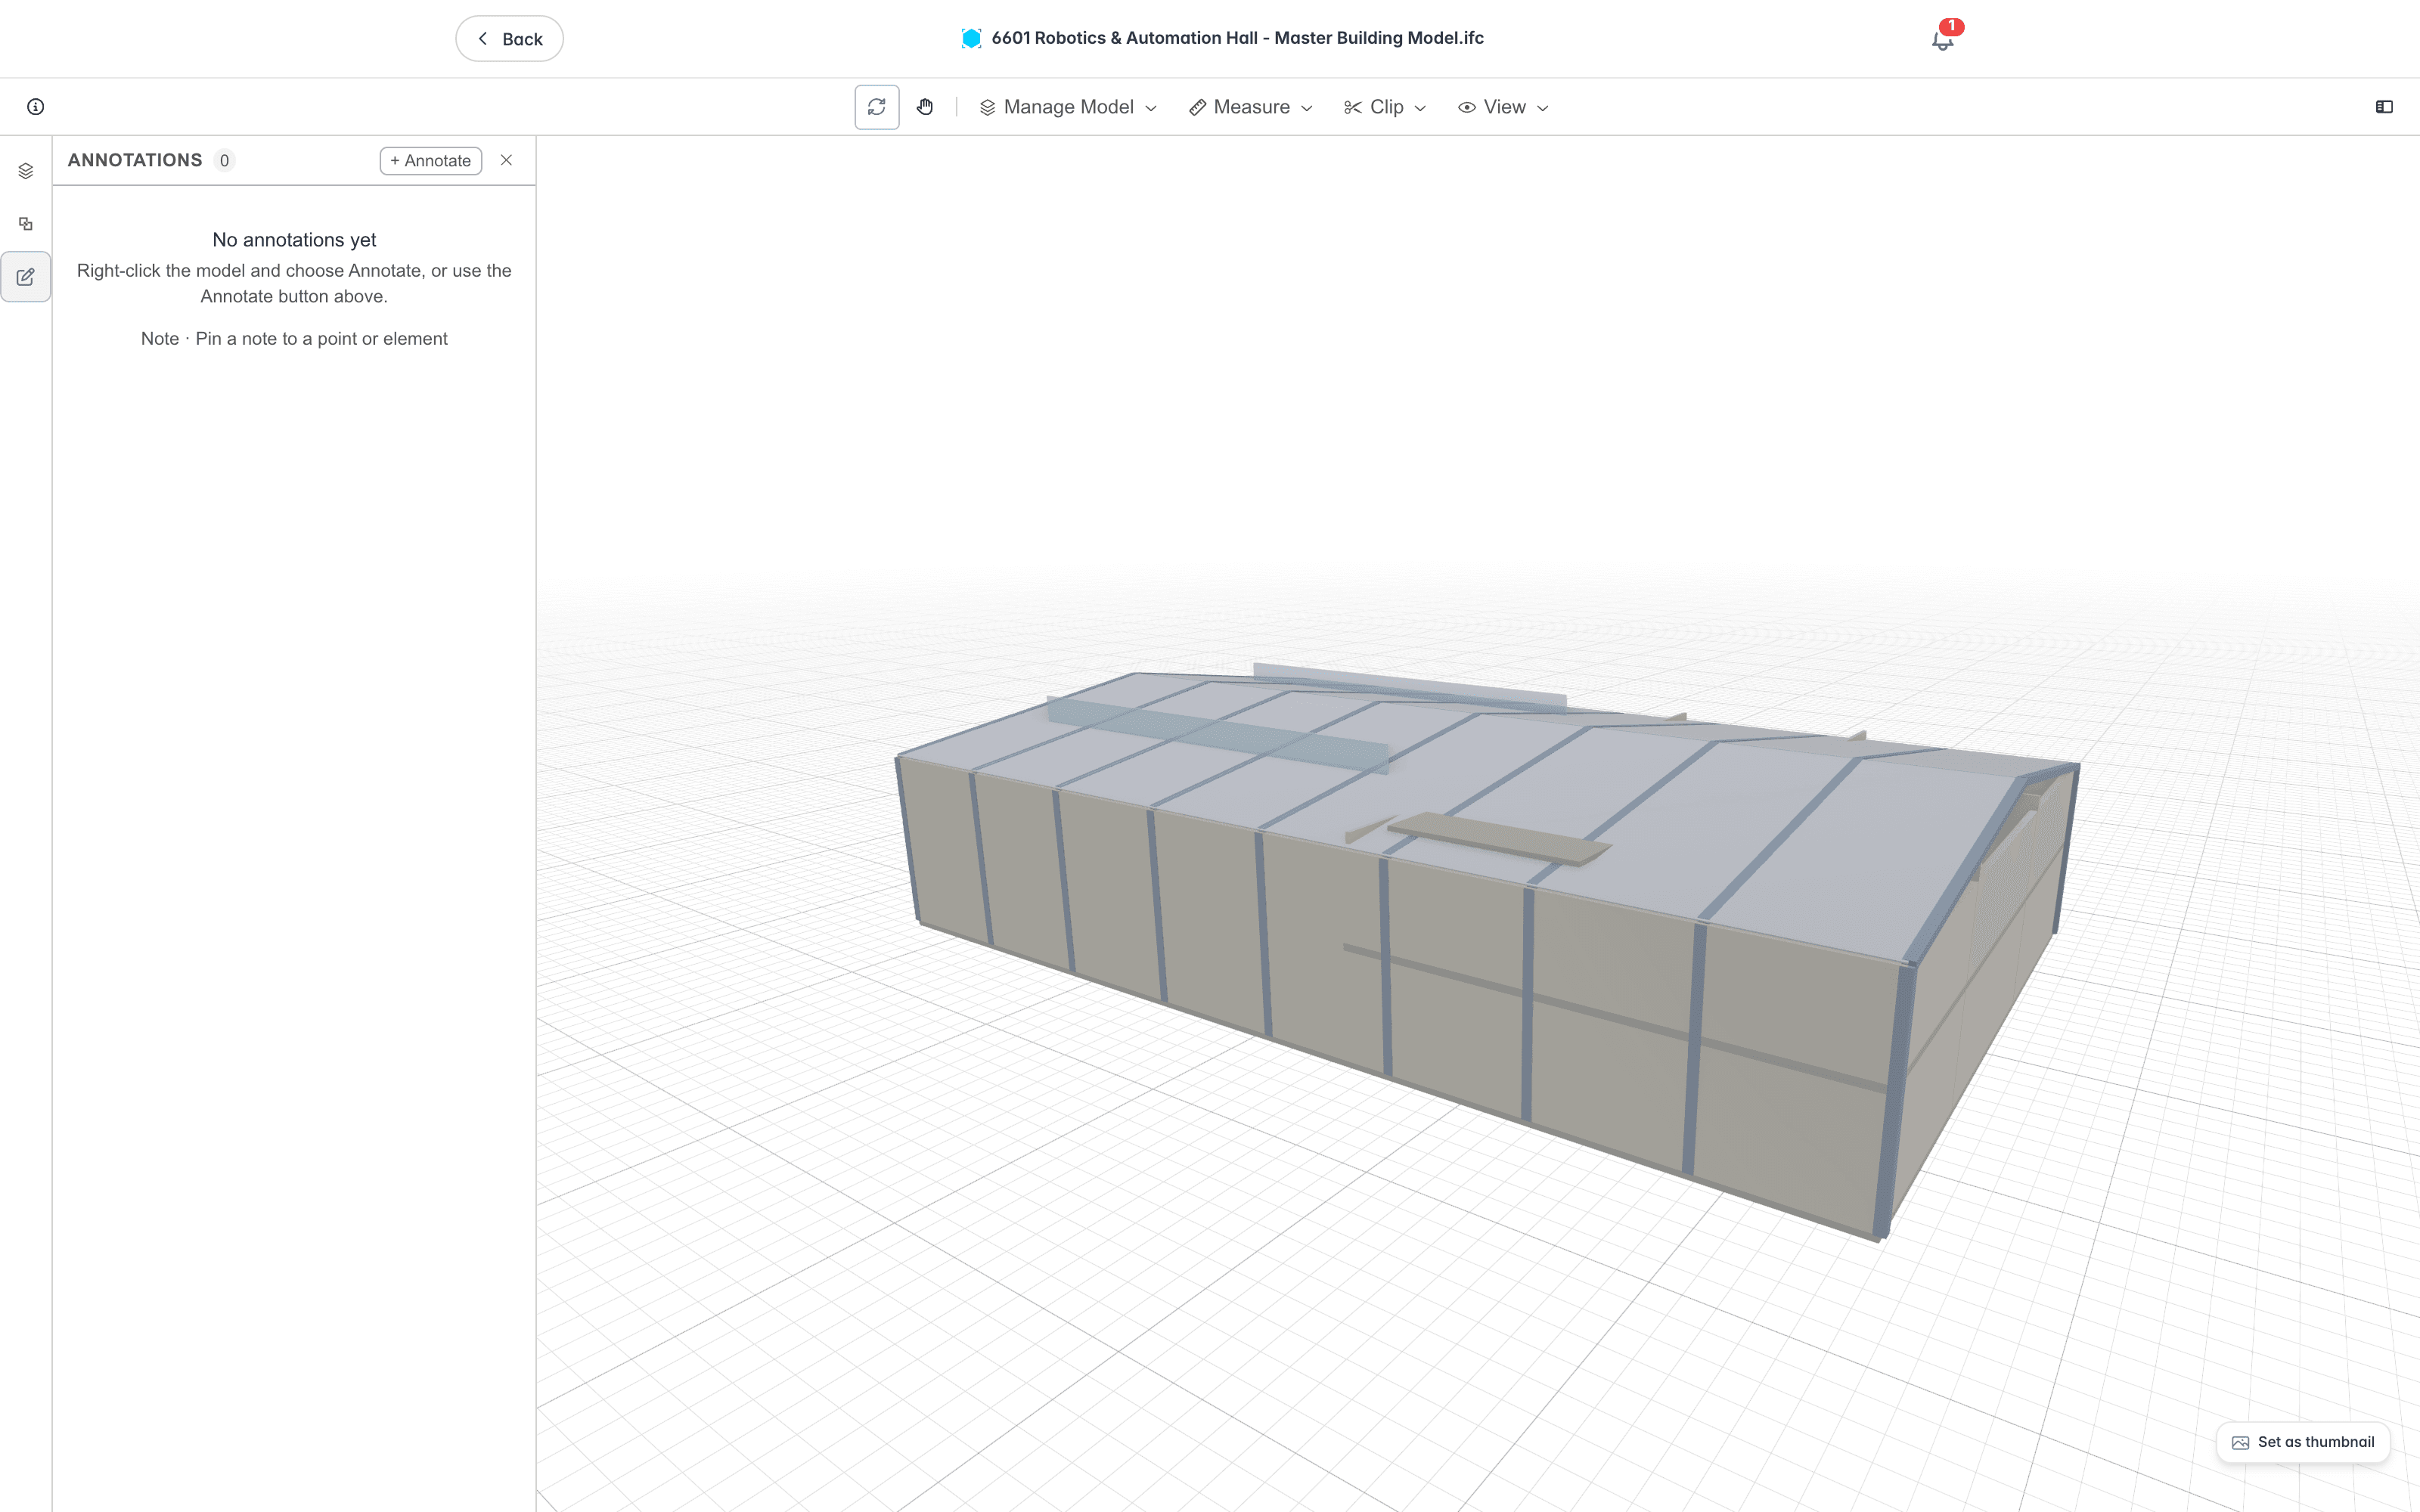
- Select Annotate in the panel header, then Note. Alternatively, right-click an element, choose Annotate, then Note, and the note starts where you right-clicked.
- Click the model where the note belongs. Press Esc to cancel the placement.
- In the Add a note dialog, enter the text in the Note field, up to 10,000 characters. A counter shows how much room is left.
- Select Add note, or press Ctrl+Enter.
The note appears as a pin on the model, and as a row in the panel with a thumbnail of the view, its text, its author, and the date.
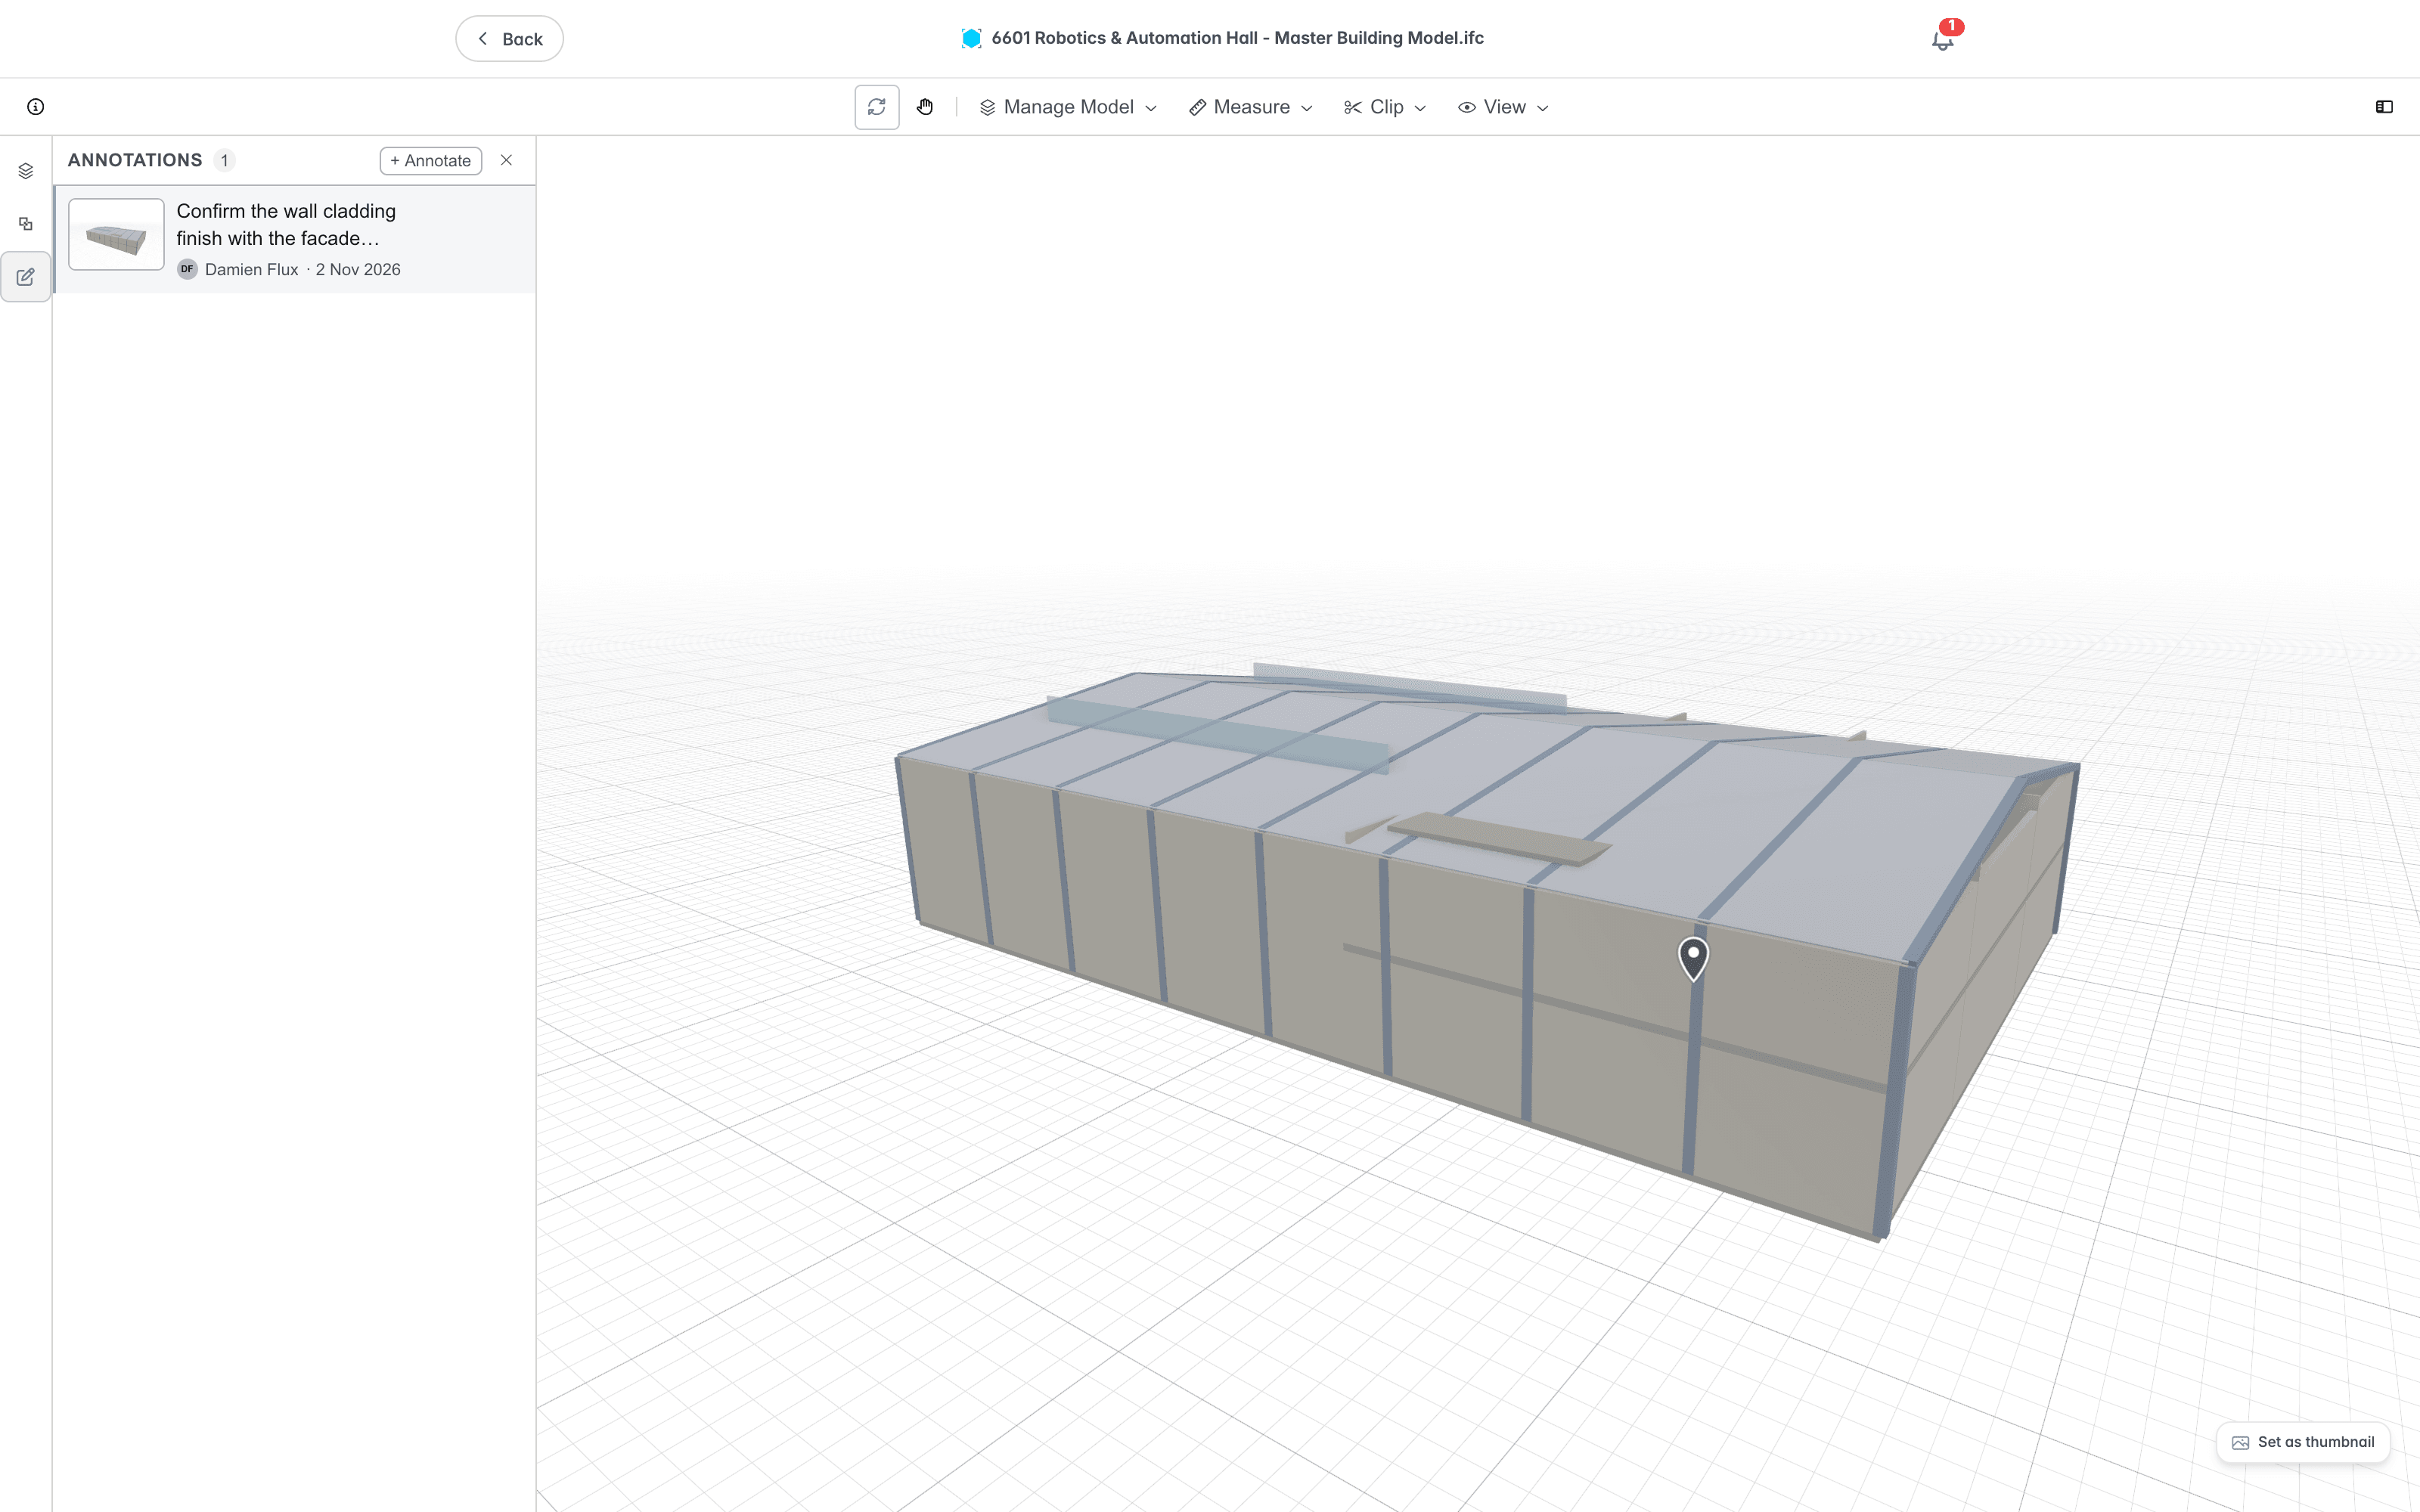 A pin's tooltip shows the first line of the note, and two notes at one spot show as a single pin that counts them.
Working With Notes
Select a row in the panel to fly to its pin. Each row has three buttons.
- Make issue raises an issue pinned at the note. The Raise an issue dialog opens with the note's first line as the title, the note's text as the description, and a picture of the view. The note then shows the issue number. This is offered only where your organisation uses coordination issues, you can create them, and you are allowed to mark up documents.
- Edit changes the note in the Edit note dialog.
- Delete removes the note, after you confirm. The Delete note dialog reads "Delete this note? Everyone who opens this model loses it." and offers Delete and Keep.
Adding, editing, and deleting notes is not available to everyone. Without it you can still read notes, and a message says you can view the document but not edit it. Changing or deleting a note another person made needs further permission. A model holds at most 200 notes.
Notes and Revisions
Notes belong to a version. The first time you open a version that has no notes, Lunr carries over the nearest earlier version's notes, matching them to the same elements. A note whose element is not in the new version is kept, marked Not in this version, and a message reads "A note could not be placed" or gives the number that could not. Those notes cannot be flown to or used to raise an issue.
2D Views
Select Views in the Panels group of the View ribbon to open the 2D Views panel and work with named 2D views. The panel's Info section reads "Double click to create a new view". Below it, the Views section lists the views the model already has, such as Front, Back, Left, and Right. Each row has an Open button and a Remove button, and Close active 2D View returns you to the 3D model.
Setting the Document Thumbnail
Frame the view you want, then click Set as thumbnail. A preview opens, reading "This snapshot will replace the document's thumbnail everywhere it appears." Select Set thumbnail to confirm, or Cancel to leave the thumbnail as it is. A message reads "Thumbnail updated".
Clash Detection
Where more than one model is loaded, the viewer checks whether those models collide. Clash detection compares every pair of loaded models and reports the places their geometry overlaps. To load more than one model, open a scene, covered in Scenes.
Select the clash icon in the panel rail down the left of the viewer to open the Clash Detection panel. Select the cross at the top of the panel to close it again.
Running a Check
The check starts when you open the Clash Detection panel with two or more models loaded. There is nothing to configure, and reopening the panel for the same models shows the earlier results immediately.
While it runs, the panel reports its progress as "Checking model pairs..." followed by a percentage. Larger models take longer, and a model that finishes loading part way through is picked up by the next pass.
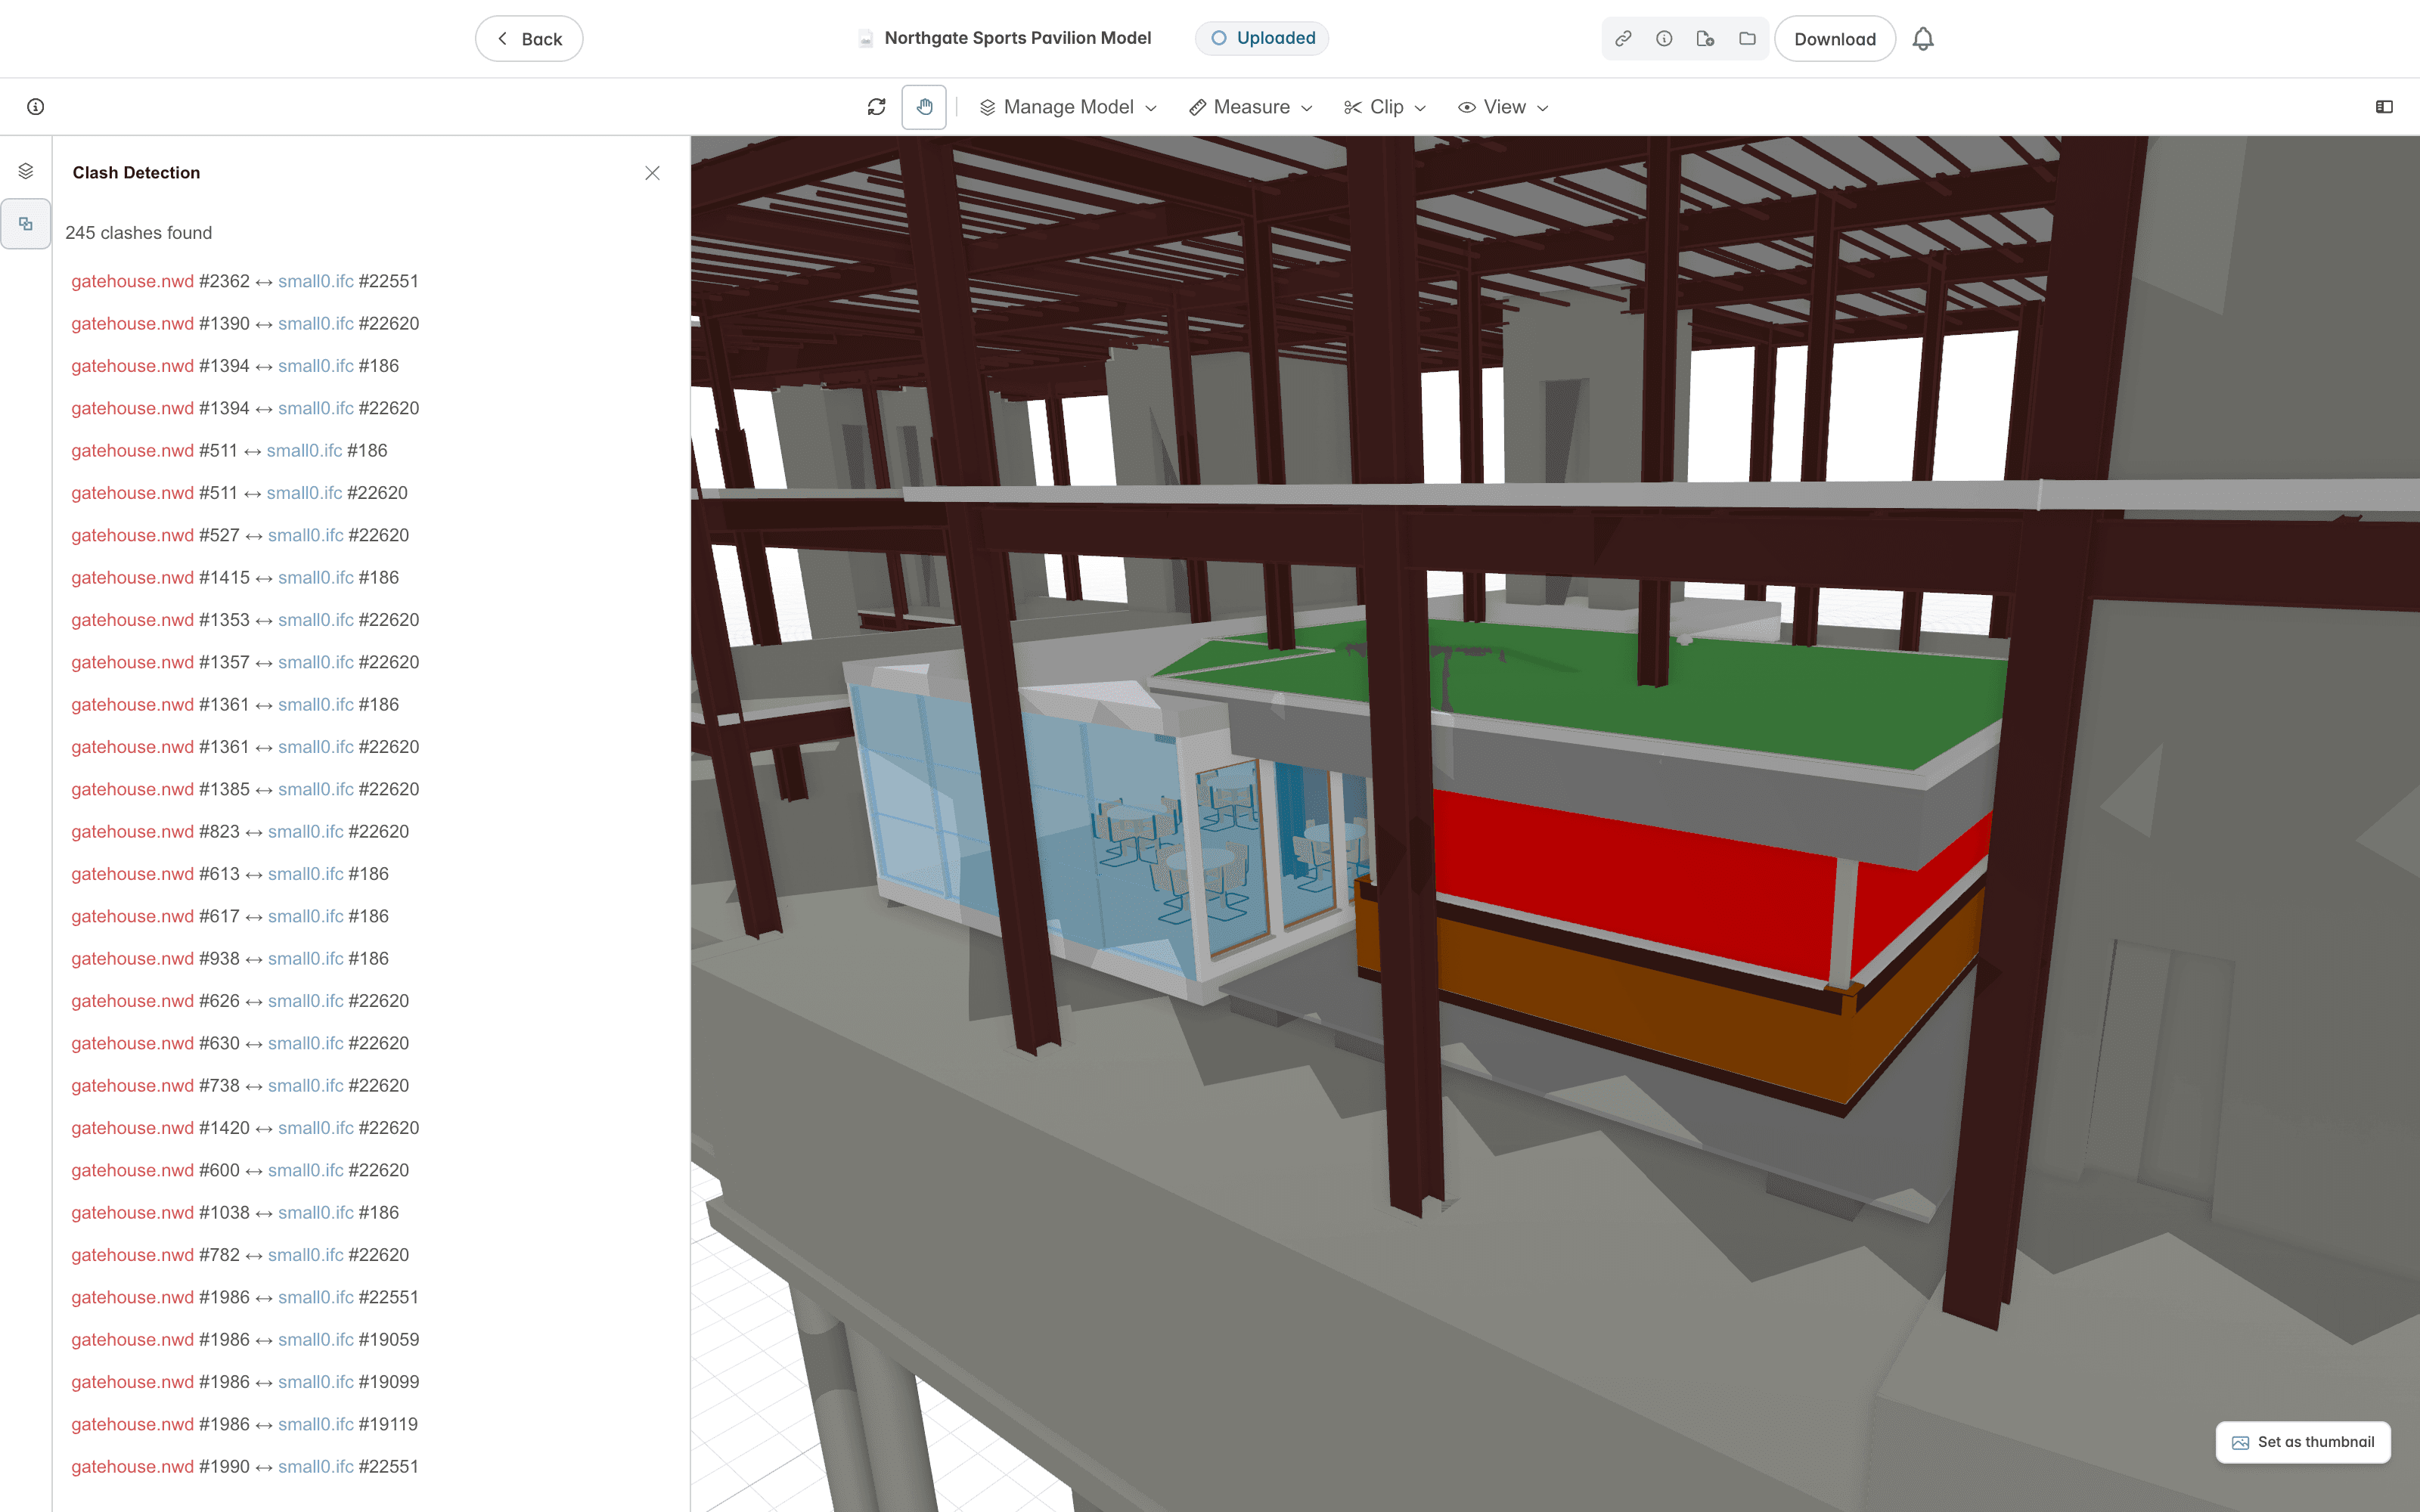
When the check finishes, the panel reports how many clashes it found, above the list of results. A scene with only one model in it reads "Load at least two models to detect clashes." instead, because there is nothing to compare.
Reading the Results
Each clash is one row, naming both sides: the first model and the element number inside it, then the second model and its element number. The two model names are coloured, red for the first and blue for the second, and those are the same colours the elements take in the viewer. Every pair of models in the scene is compared, so a scene of three models can report clashes between any two of them.
Select a row to see the clash. The element from the first model turns red, the element from the second turns blue, the region where they overlap is washed in purple, and the camera moves to frame the pair. The row stays marked in the list, so you can see where you are as you work down it.
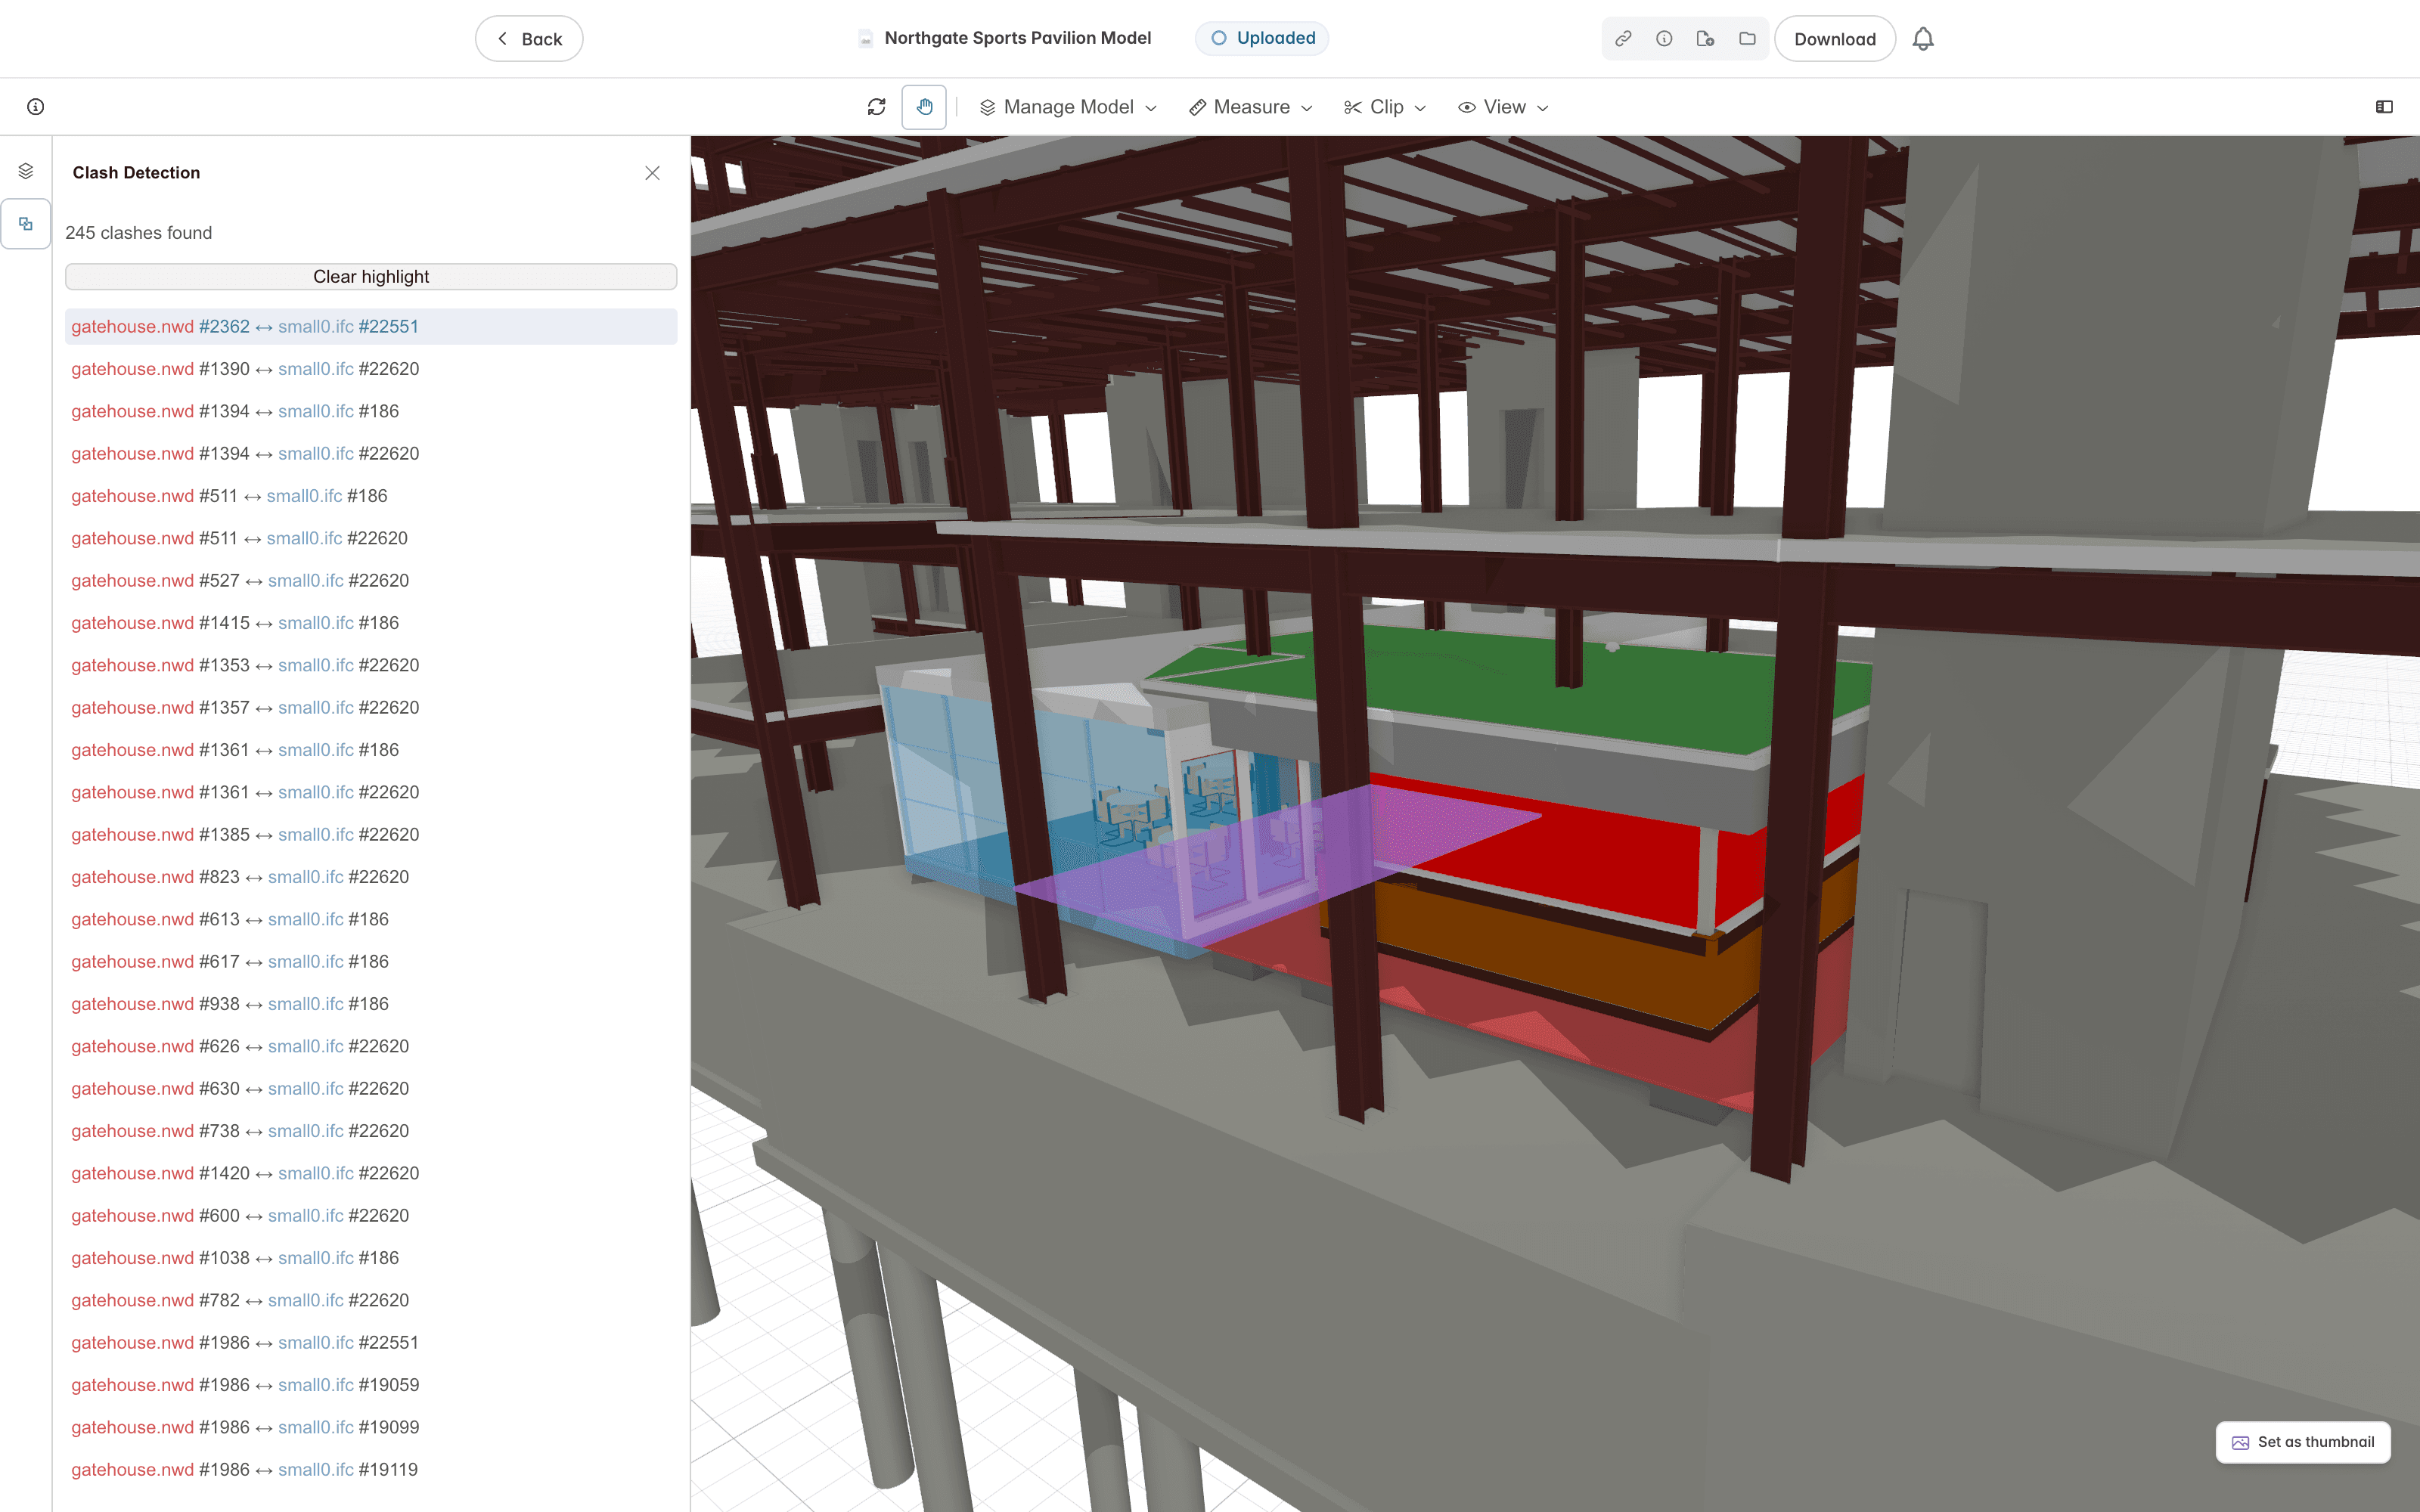
Select Clear highlight, which appears above the list once a row is selected, to take the colouring off the model and leave the results in place.
What the Results Do Not Do
Results are not saved with the scene. They belong to the viewing session, so closing the viewer discards them and opening the scene again runs the check afresh.
Keyboard Shortcuts
These single-key shortcuts work in the viewer. Select Info to see them in the Shortcuts tab of the Info dialog.
- O - Switch the camera to orbit mode
- P - Switch the camera to pan mode
- R - Fit the model to the view
- M - Open or close the Length Measurer
- C - Open or close the Clipper
- T - Switch between the light and dark theme
- S - Capture a screenshot of the view
Viewing Excel Spreadsheets
View and navigate Excel workbooks and CSV files in Lunr's browser-based spreadsheet viewer, with support for worksheet navigation, filtering, searching, exporting, and printing while preserving the workbook's original formatting.
Viewing CAD Models and Assemblies
View Inventor and SolidWorks parts and assemblies, STEP mechanical parts, and STL meshes in Lunr's browser-based 3D viewer, with tools for measurement, sectioning, saved views, assembly parts, bills of materials, issues, model states, and revision comparison.