Browsing the Document Repository
Browse the Lunr document repository using folder, thumbnail, and map views, choose which columns the table shows, select documents to act on them from the Action Pane, and reopen recent documents from the sidebar.
Overview
Browsing is the route to a document when you know roughly where it sits, or when you want to see everything of a particular kind together. The repository's folders are generated from the documents' tags, as described in the Introduction, so opening a folder shows you every document carrying the tags that folder represents.
Six view modes present the same documents differently, from a plain list to thumbnails, a dense table, and a map. Choose the one that suits what you are doing rather than working through a single default.
Browsing for Documents
Select Repository to view the folder structure. The repository opens at the Base | Home level, shown in the breadcrumb trail at the top of the content area. Choose any folder to open it and see the documents inside. To move back up a level, select an earlier step in the breadcrumb trail.
The view-mode switcher sits at the top-right of the content area, a button group that changes how documents are laid out. Below the breadcrumb, the Add Filter and Advanced Search buttons let you narrow the list, and a Sort control orders the results.
The switcher offers six view modes, each identified by a tooltip:
| View mode | What it shows |
|---|---|
| View document list | The default. Documents as a list, filed into a folder structure driven by their tags. |
| View Small Thumbnails | Small preview cards, three to a row. |
| View Large Thumbnails | Larger preview cards, two to a row. |
| View Table | A dense table with a column per tag. |
| View Tree Table | The folder tree beside the table. |
| View Tree Thumbnails | The folder tree beside preview cards. |
The two tree modes appear on the repository only. They are not offered when you browse documents inside a project, a change request, or a search result.
Document List View
The document list is the default view, displaying documents according to their tags in a familiar folder structure. At the repository root, the top-level folders are driven by document metadata, so a document is filed automatically based on the tags it carries.
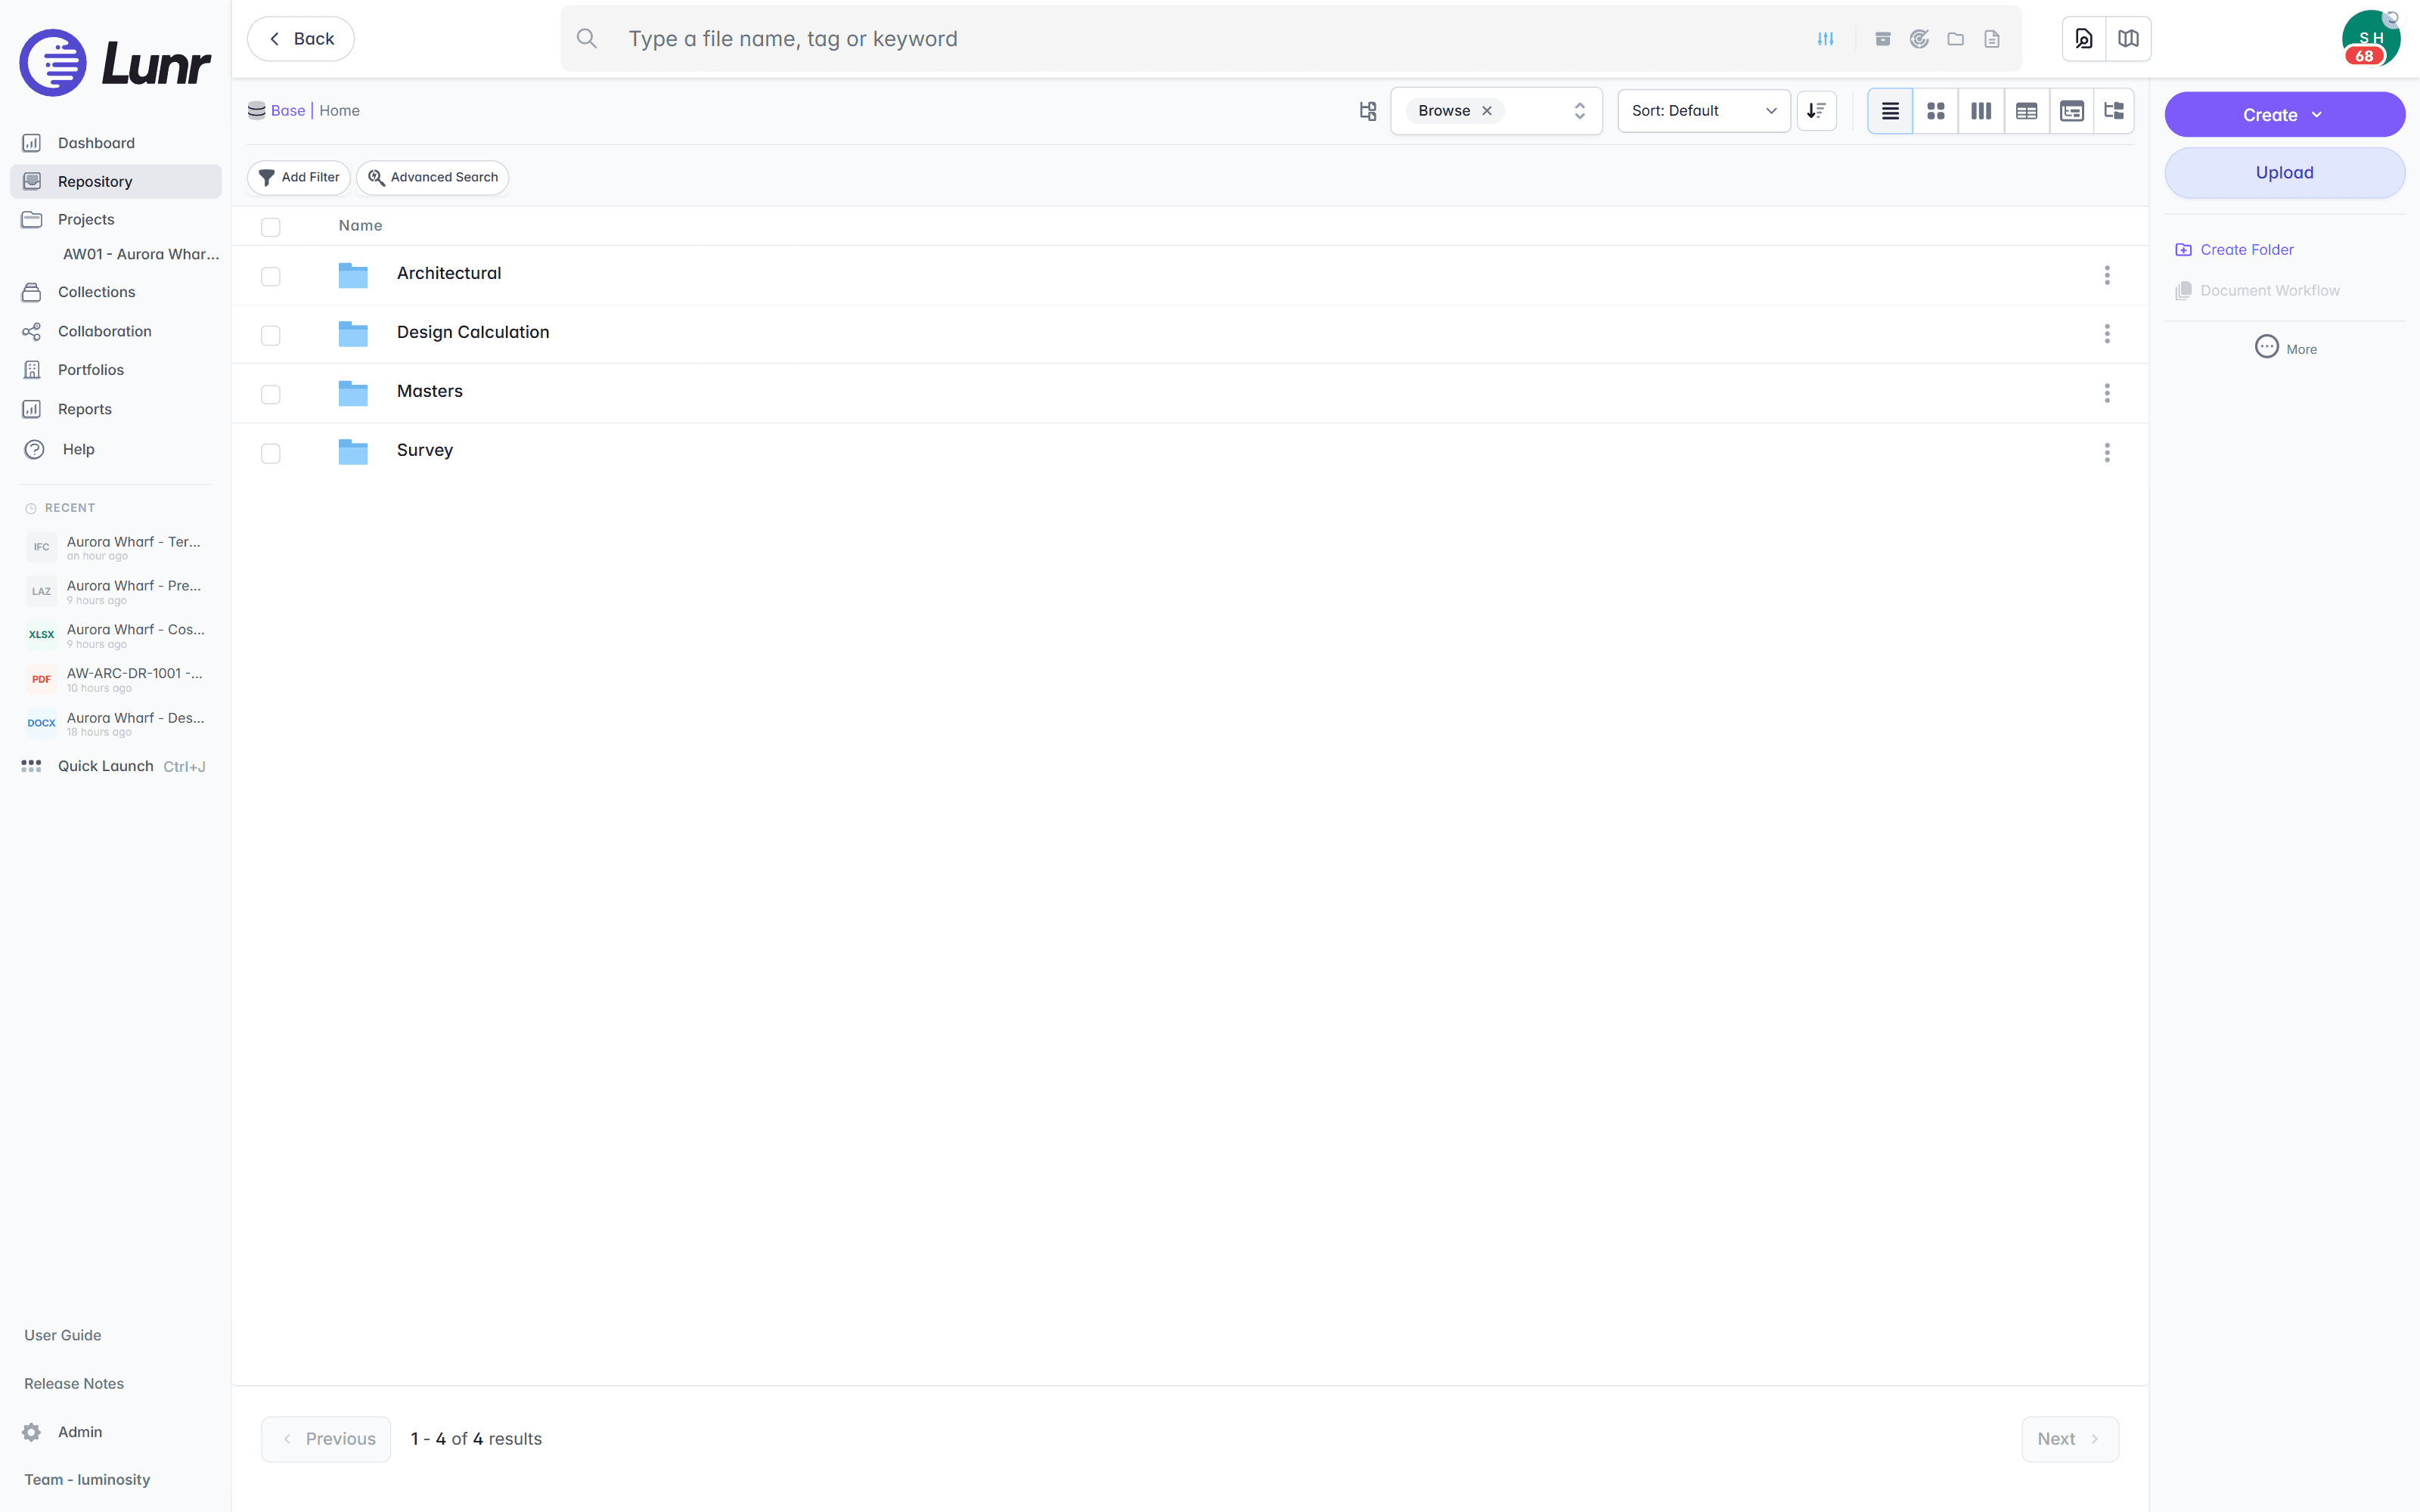
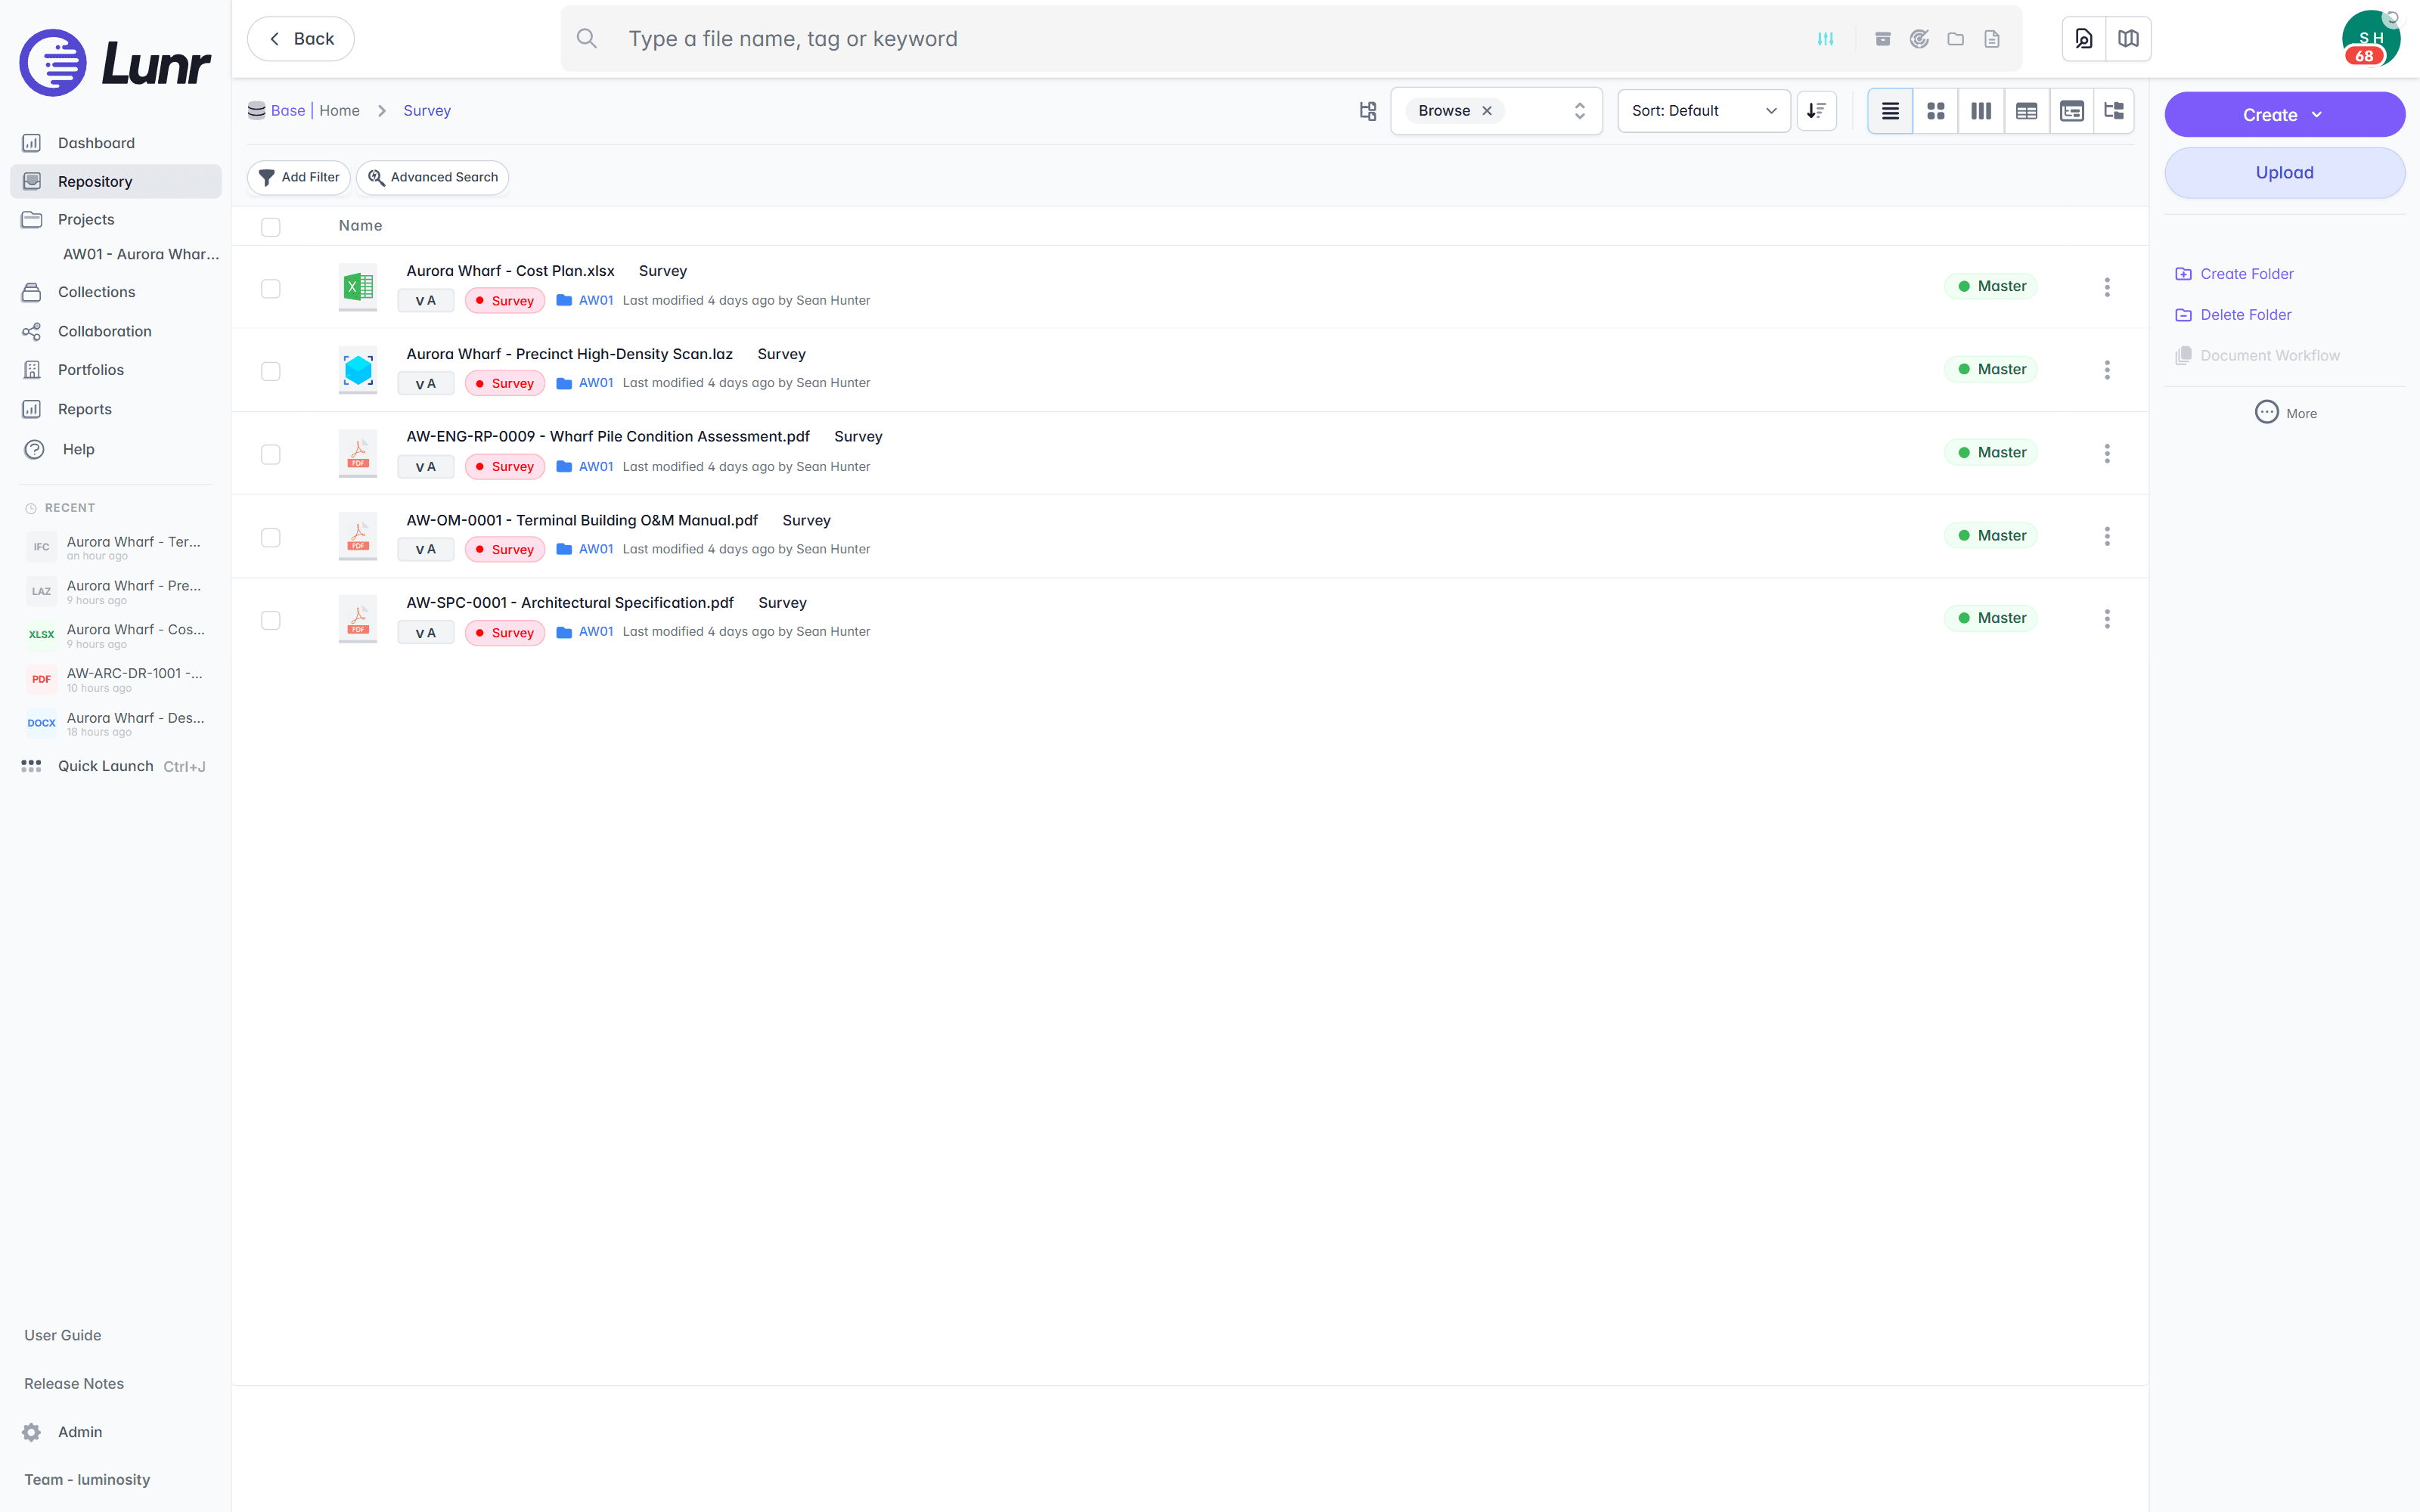
Open a folder to see its documents as a list. Each row shows the file-type icon, the document name, its Discipline, and a version and status. In the example below, the Survey folder holds five Aurora Wharf documents, each tagged with the Survey discipline, version v A, and a green Master status. The right-hand column carries a status badge so you can tell a controlled master from a document still in review at a glance.
Small Thumbnail View
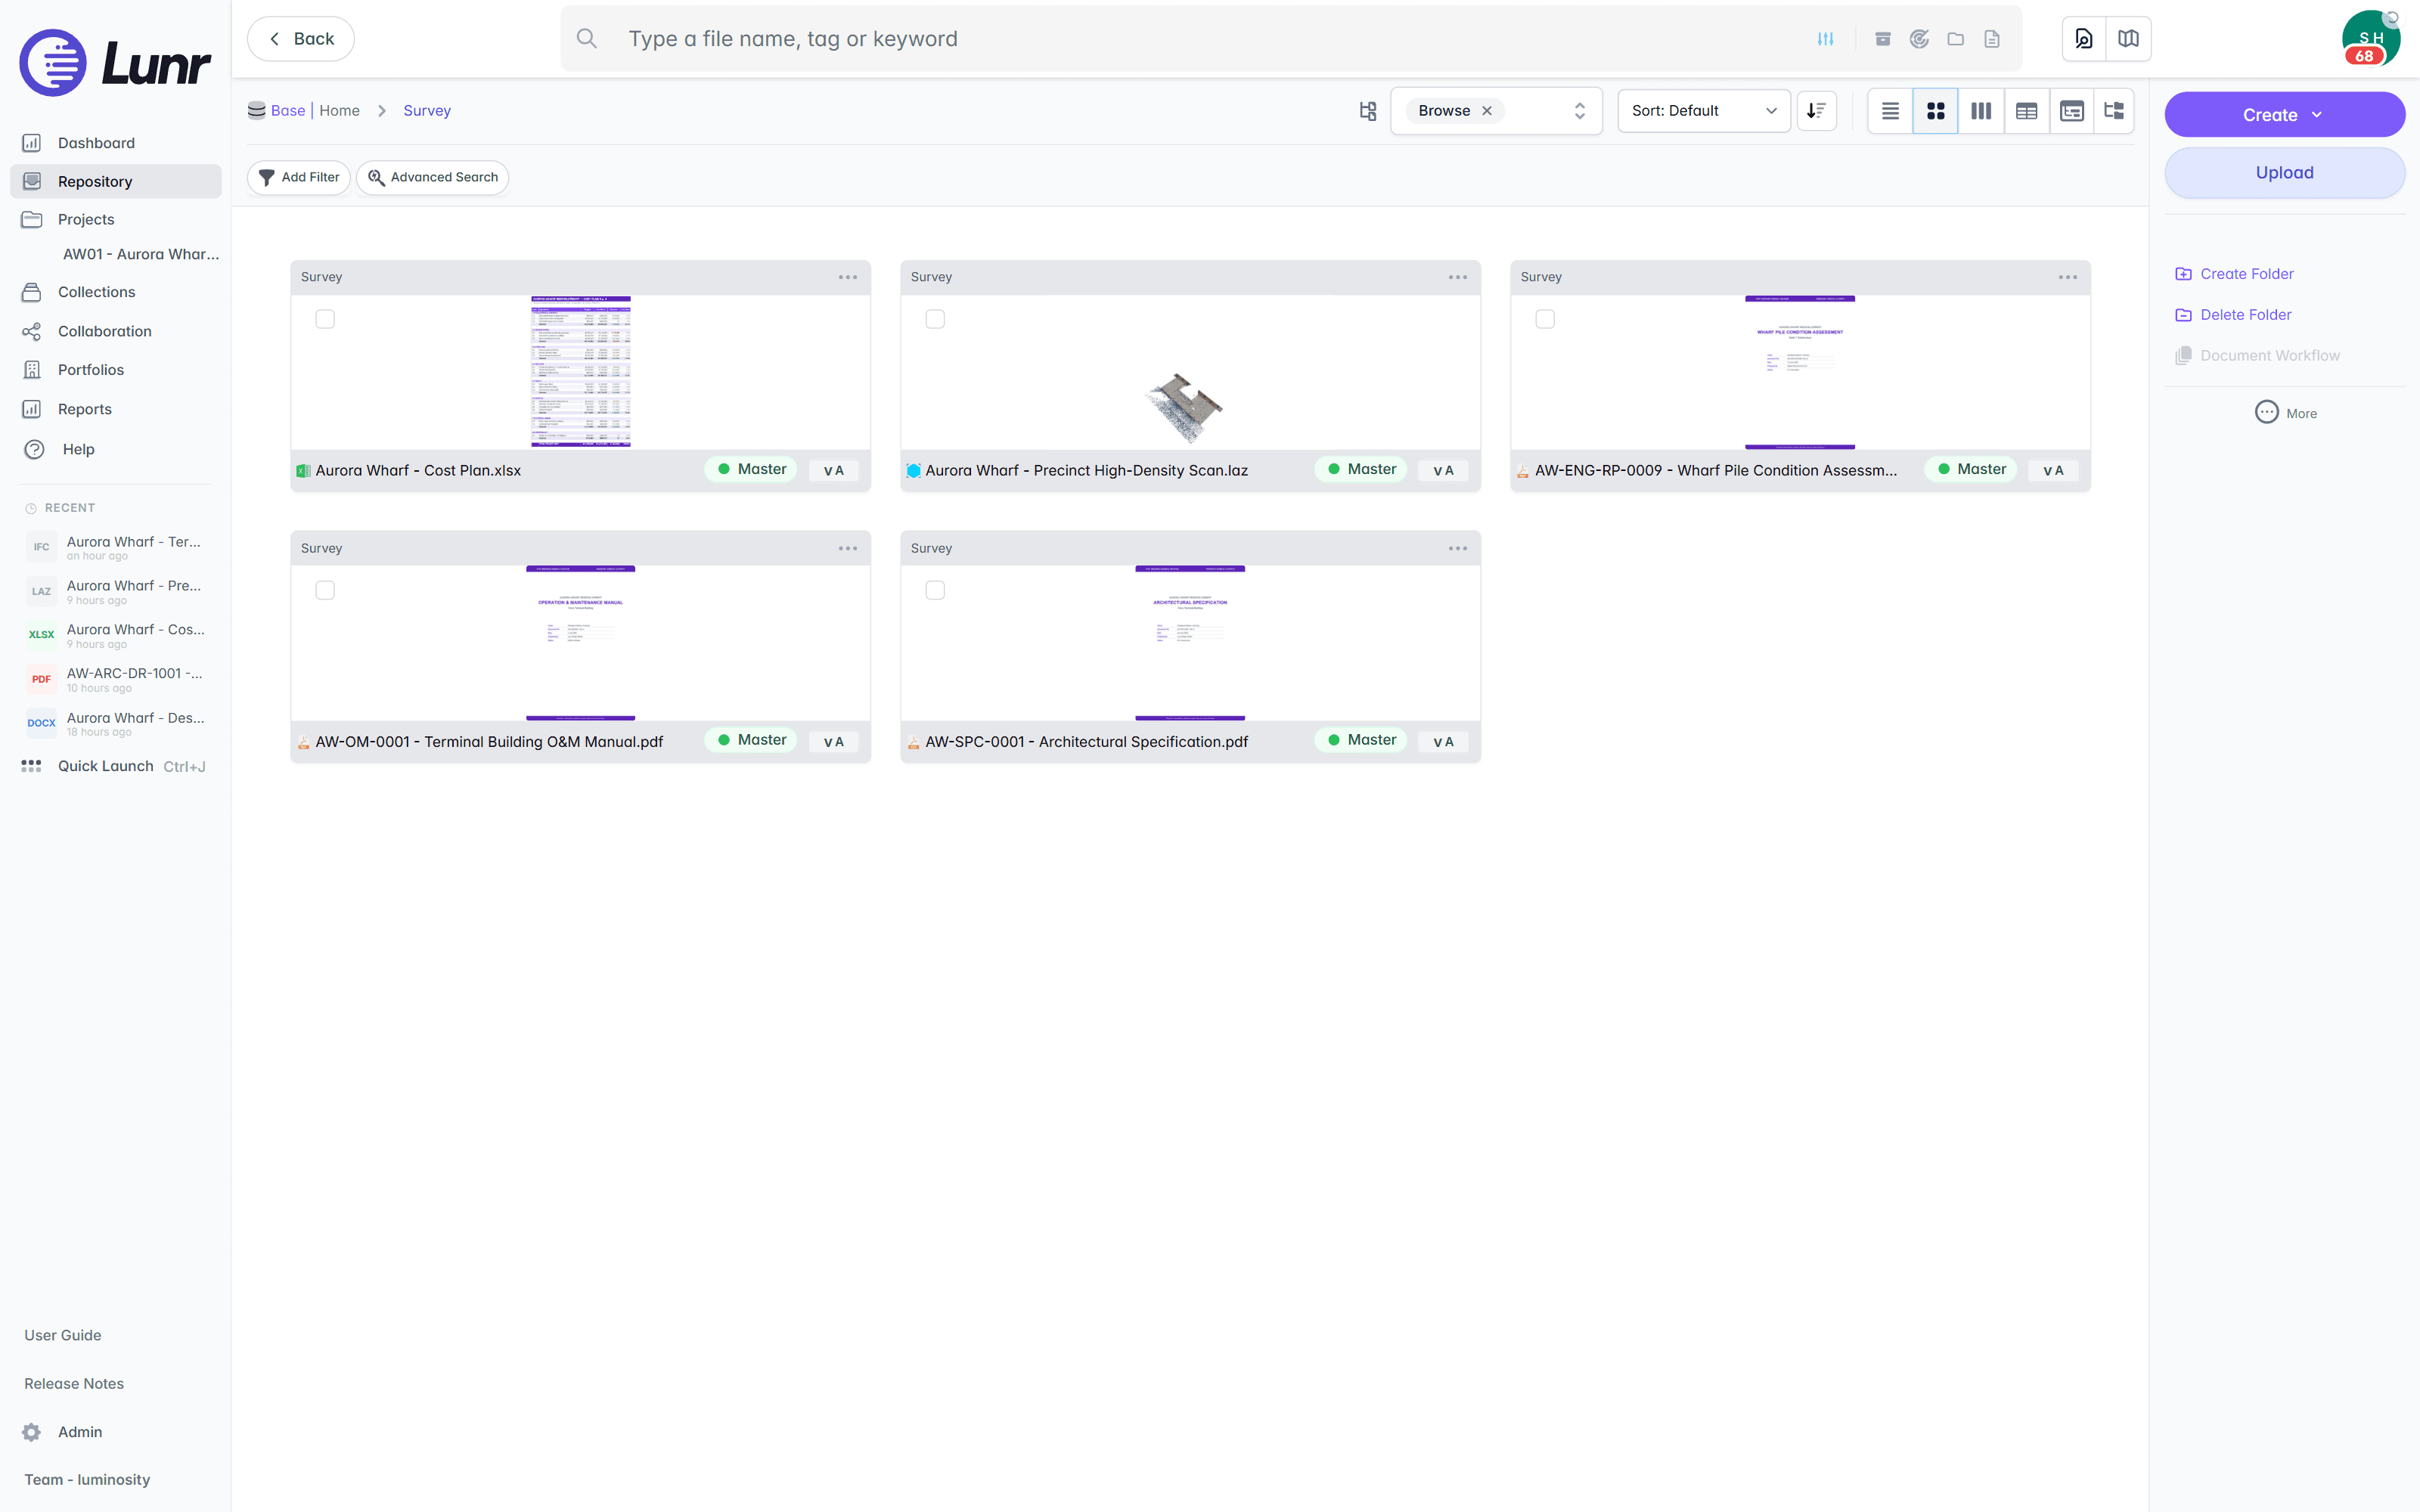
Select the Small Thumbnail view mode to see the documents as small preview cards, three to a row. Each card shows a rendered preview of the document, its name, and the same status badge and version as the list. Previews help you recognise a document by its appearance rather than its name alone.
Large Thumbnail View
Select the Large Thumbnail view mode to see bigger, clearer previews, two to a row. The larger cards render enough detail to read a spreadsheet layout or make out a point cloud, which helps you confirm you have the correct document before opening it.
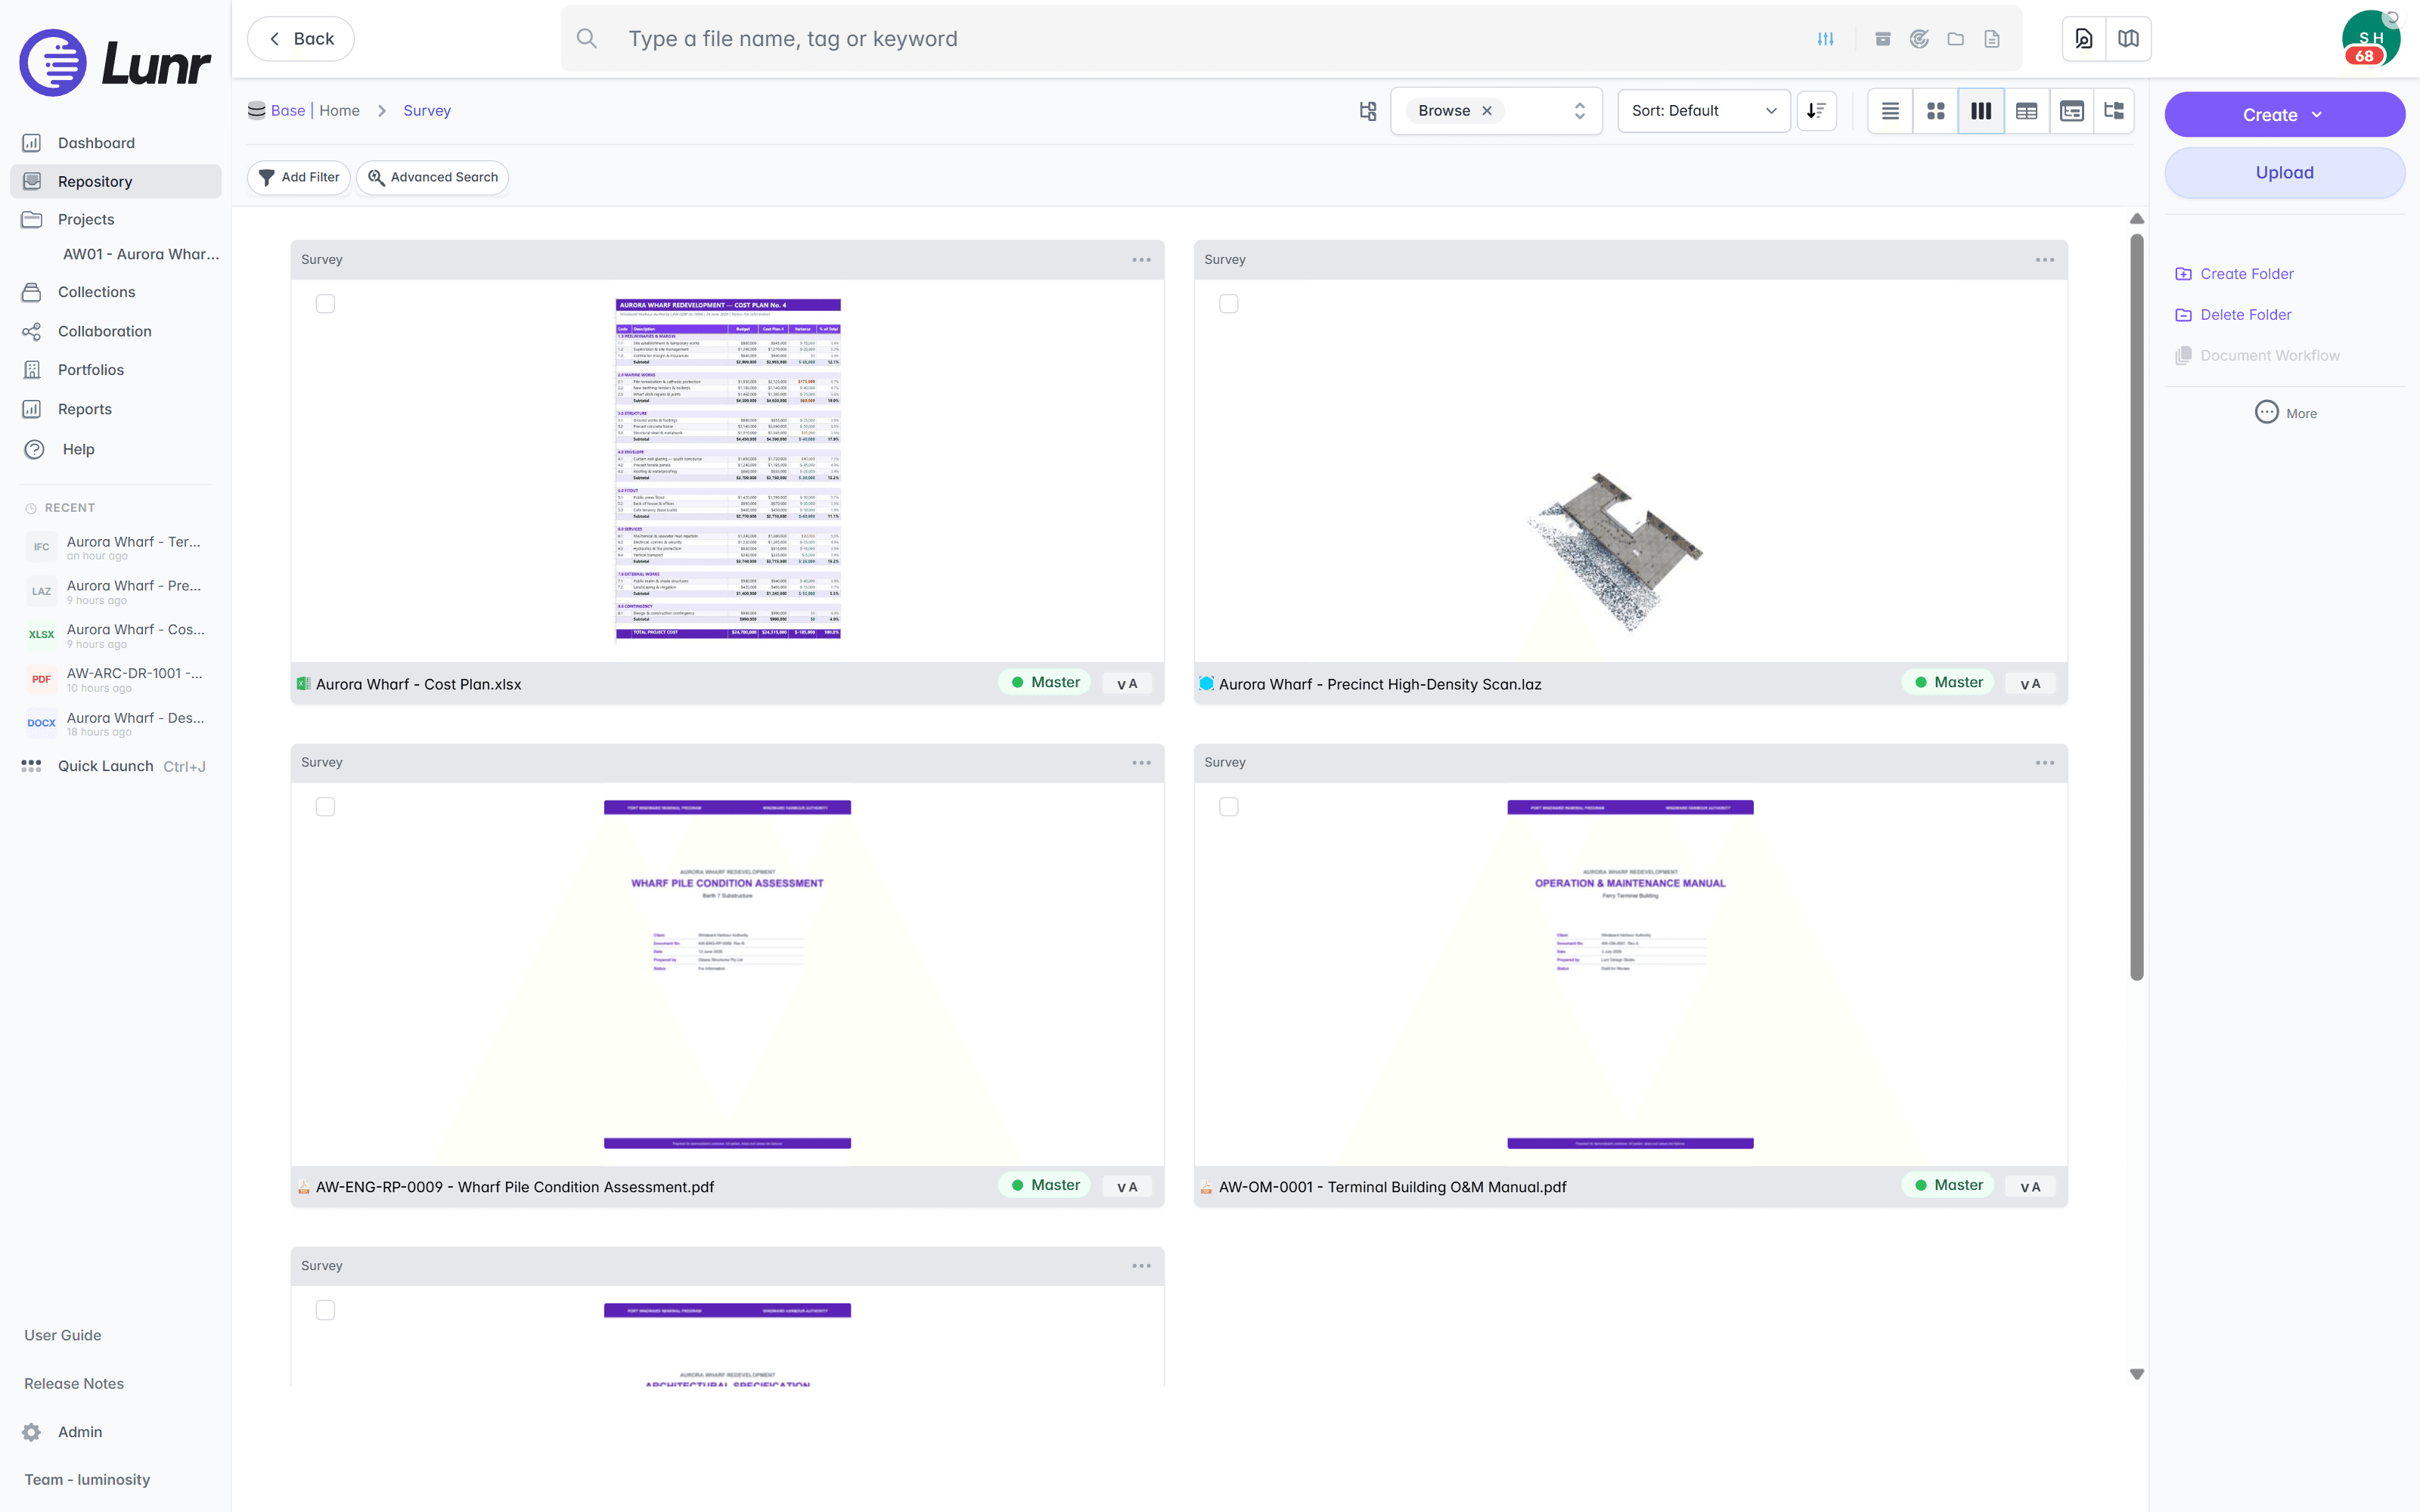
Table View
The table view lays the documents out as a dense table, with a column for the document name, its version, and each tag configured for display, alongside the assignees and the status. It suits comparing metadata across a set of documents, where the thumbnail views suit recognising one by sight.
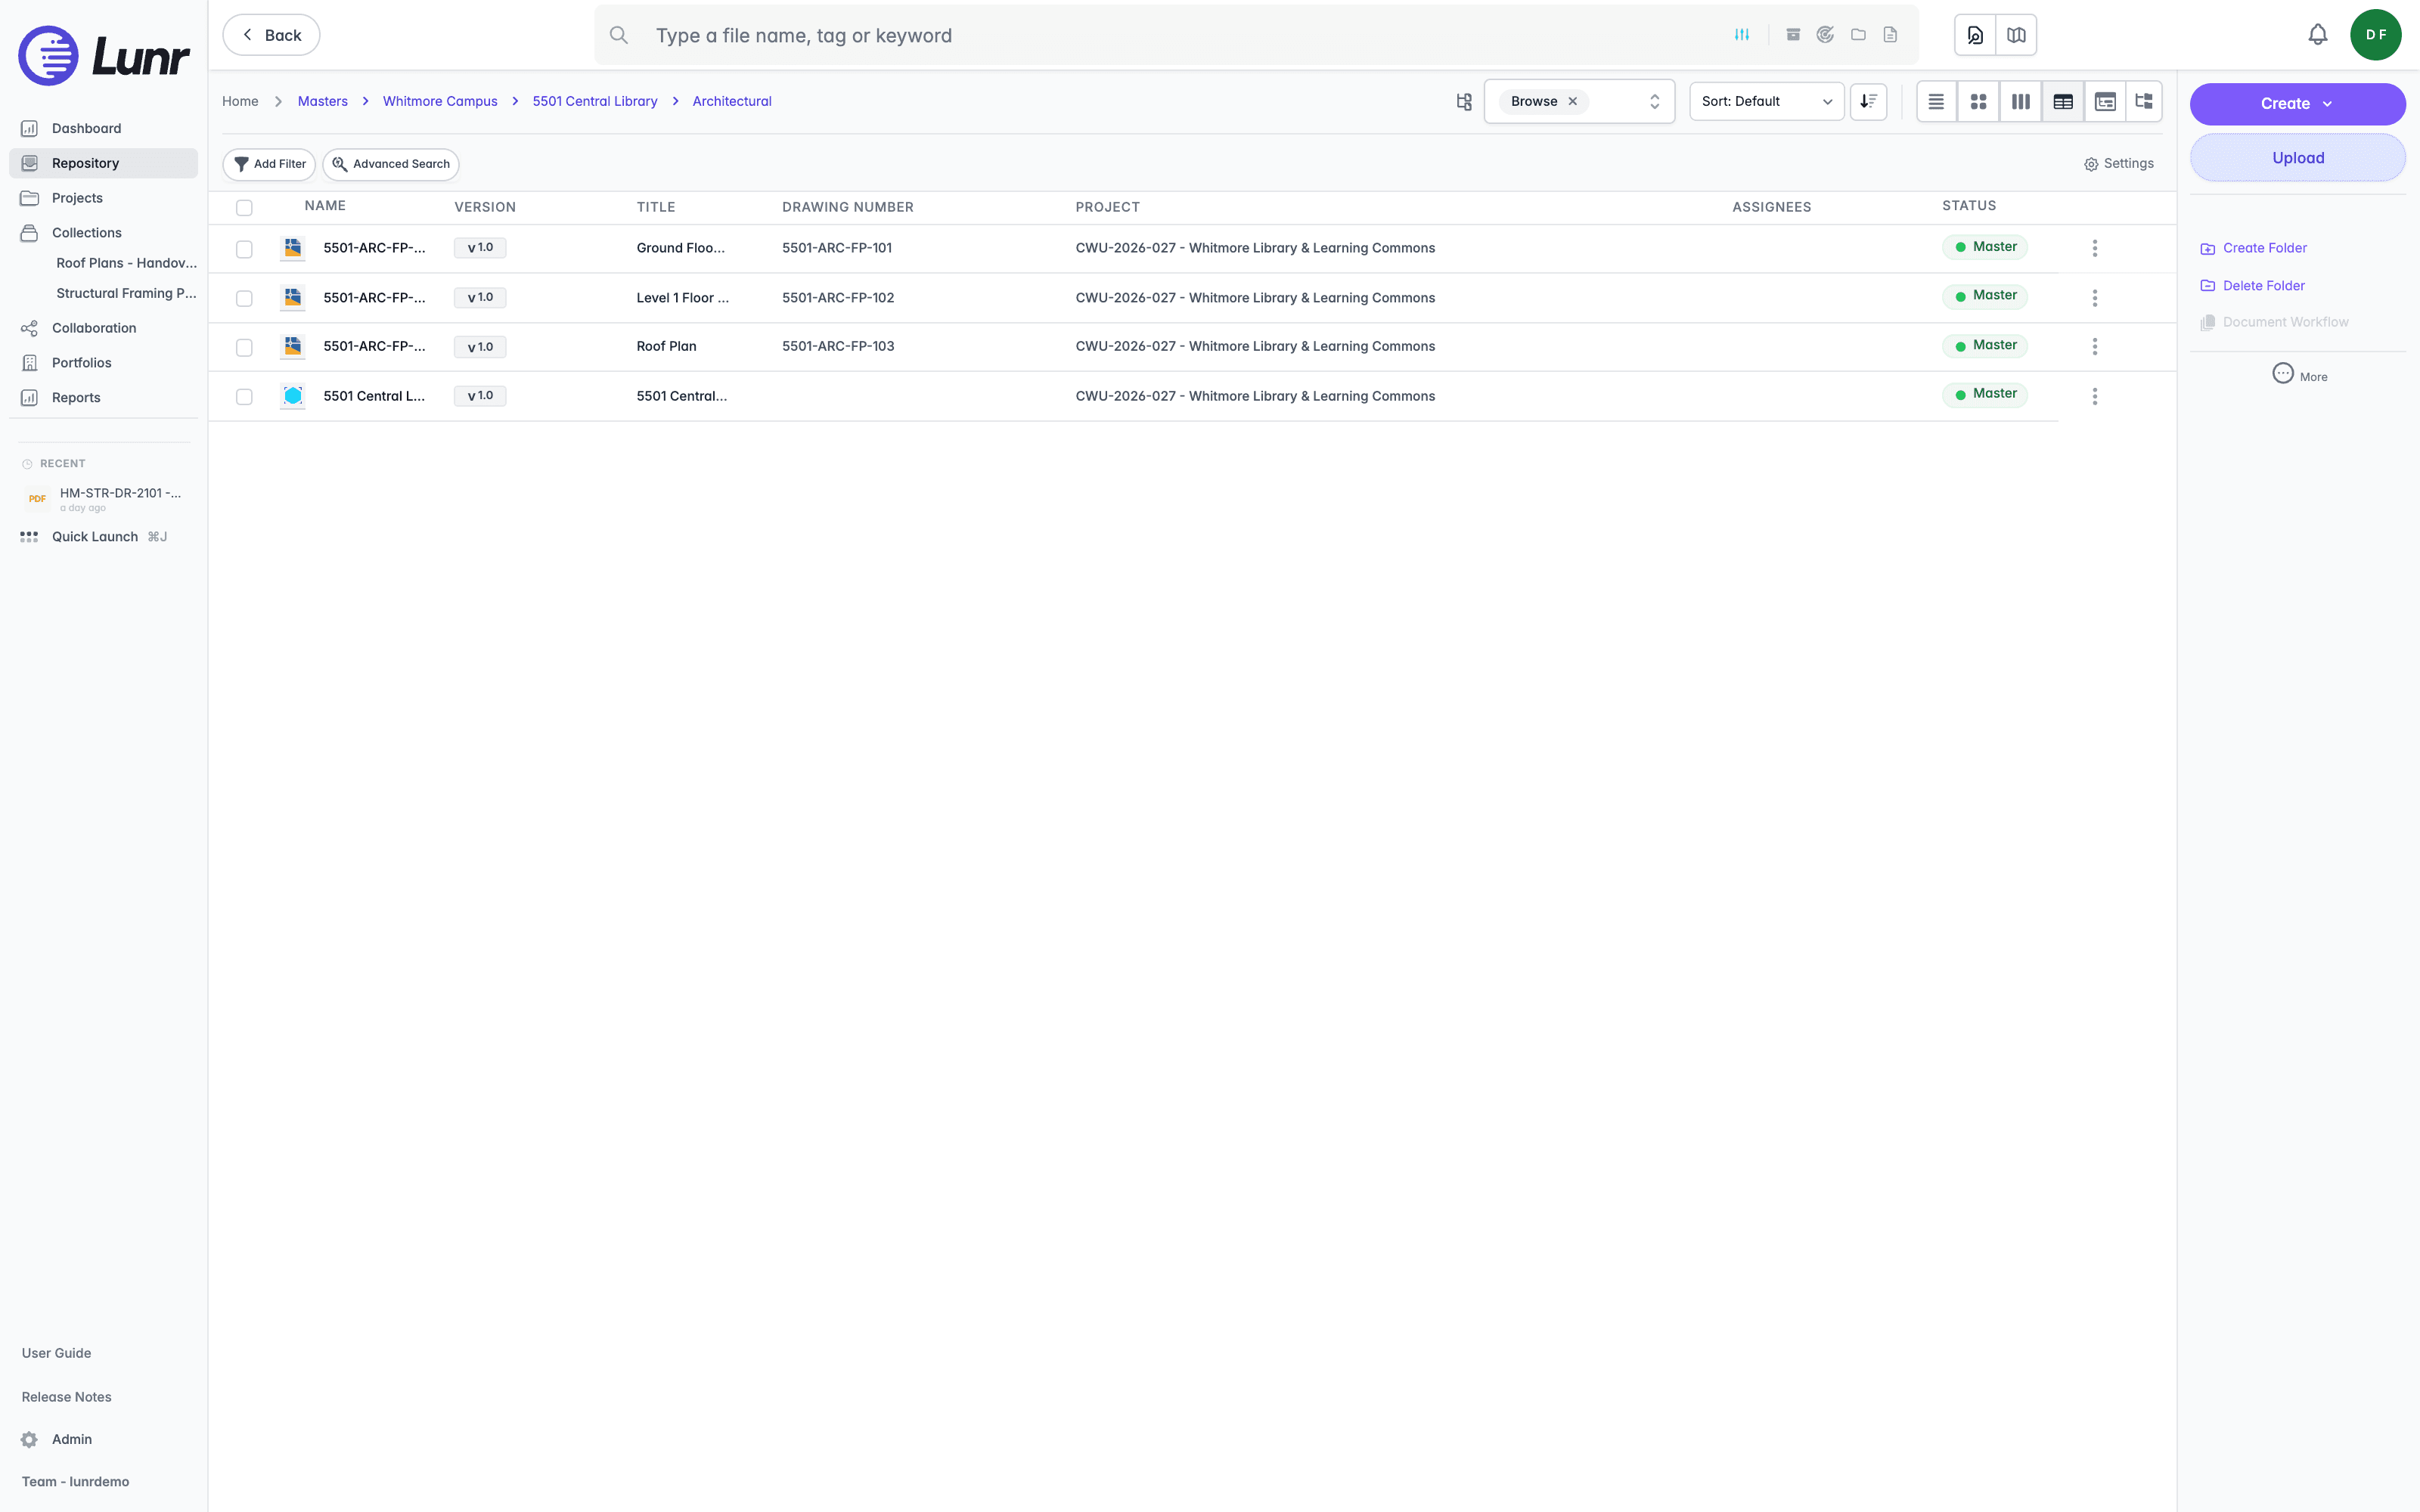
Select a column header to sort by that column, and select it again to reverse the direction. The name, title, and tag columns sort this way; the version, assignees, and status columns do not. Sorting from the header is quicker than the Sort control when the column you want is already on screen.
Choosing Table Columns
Which columns the table shows is yours to set. A Settings control appears at the right of the filter bar while you are in the table view, and only there, so switch to the table view first if you cannot find it. It needs the Manage Projects access right.
Select Settings to open the Grid Settings dialog, which lists the columns in two groups:
- Standard Tags covers the columns every repository has: File Name, Version, Title, Assignees, and Status. Each one has its own control for showing or hiding that column.
- Custom Tags lists the tag definitions configured for your repository, for example Drawing Number and Project, again one control each. Drag a tag by the handle at the left of its row to change the order its column appears in.
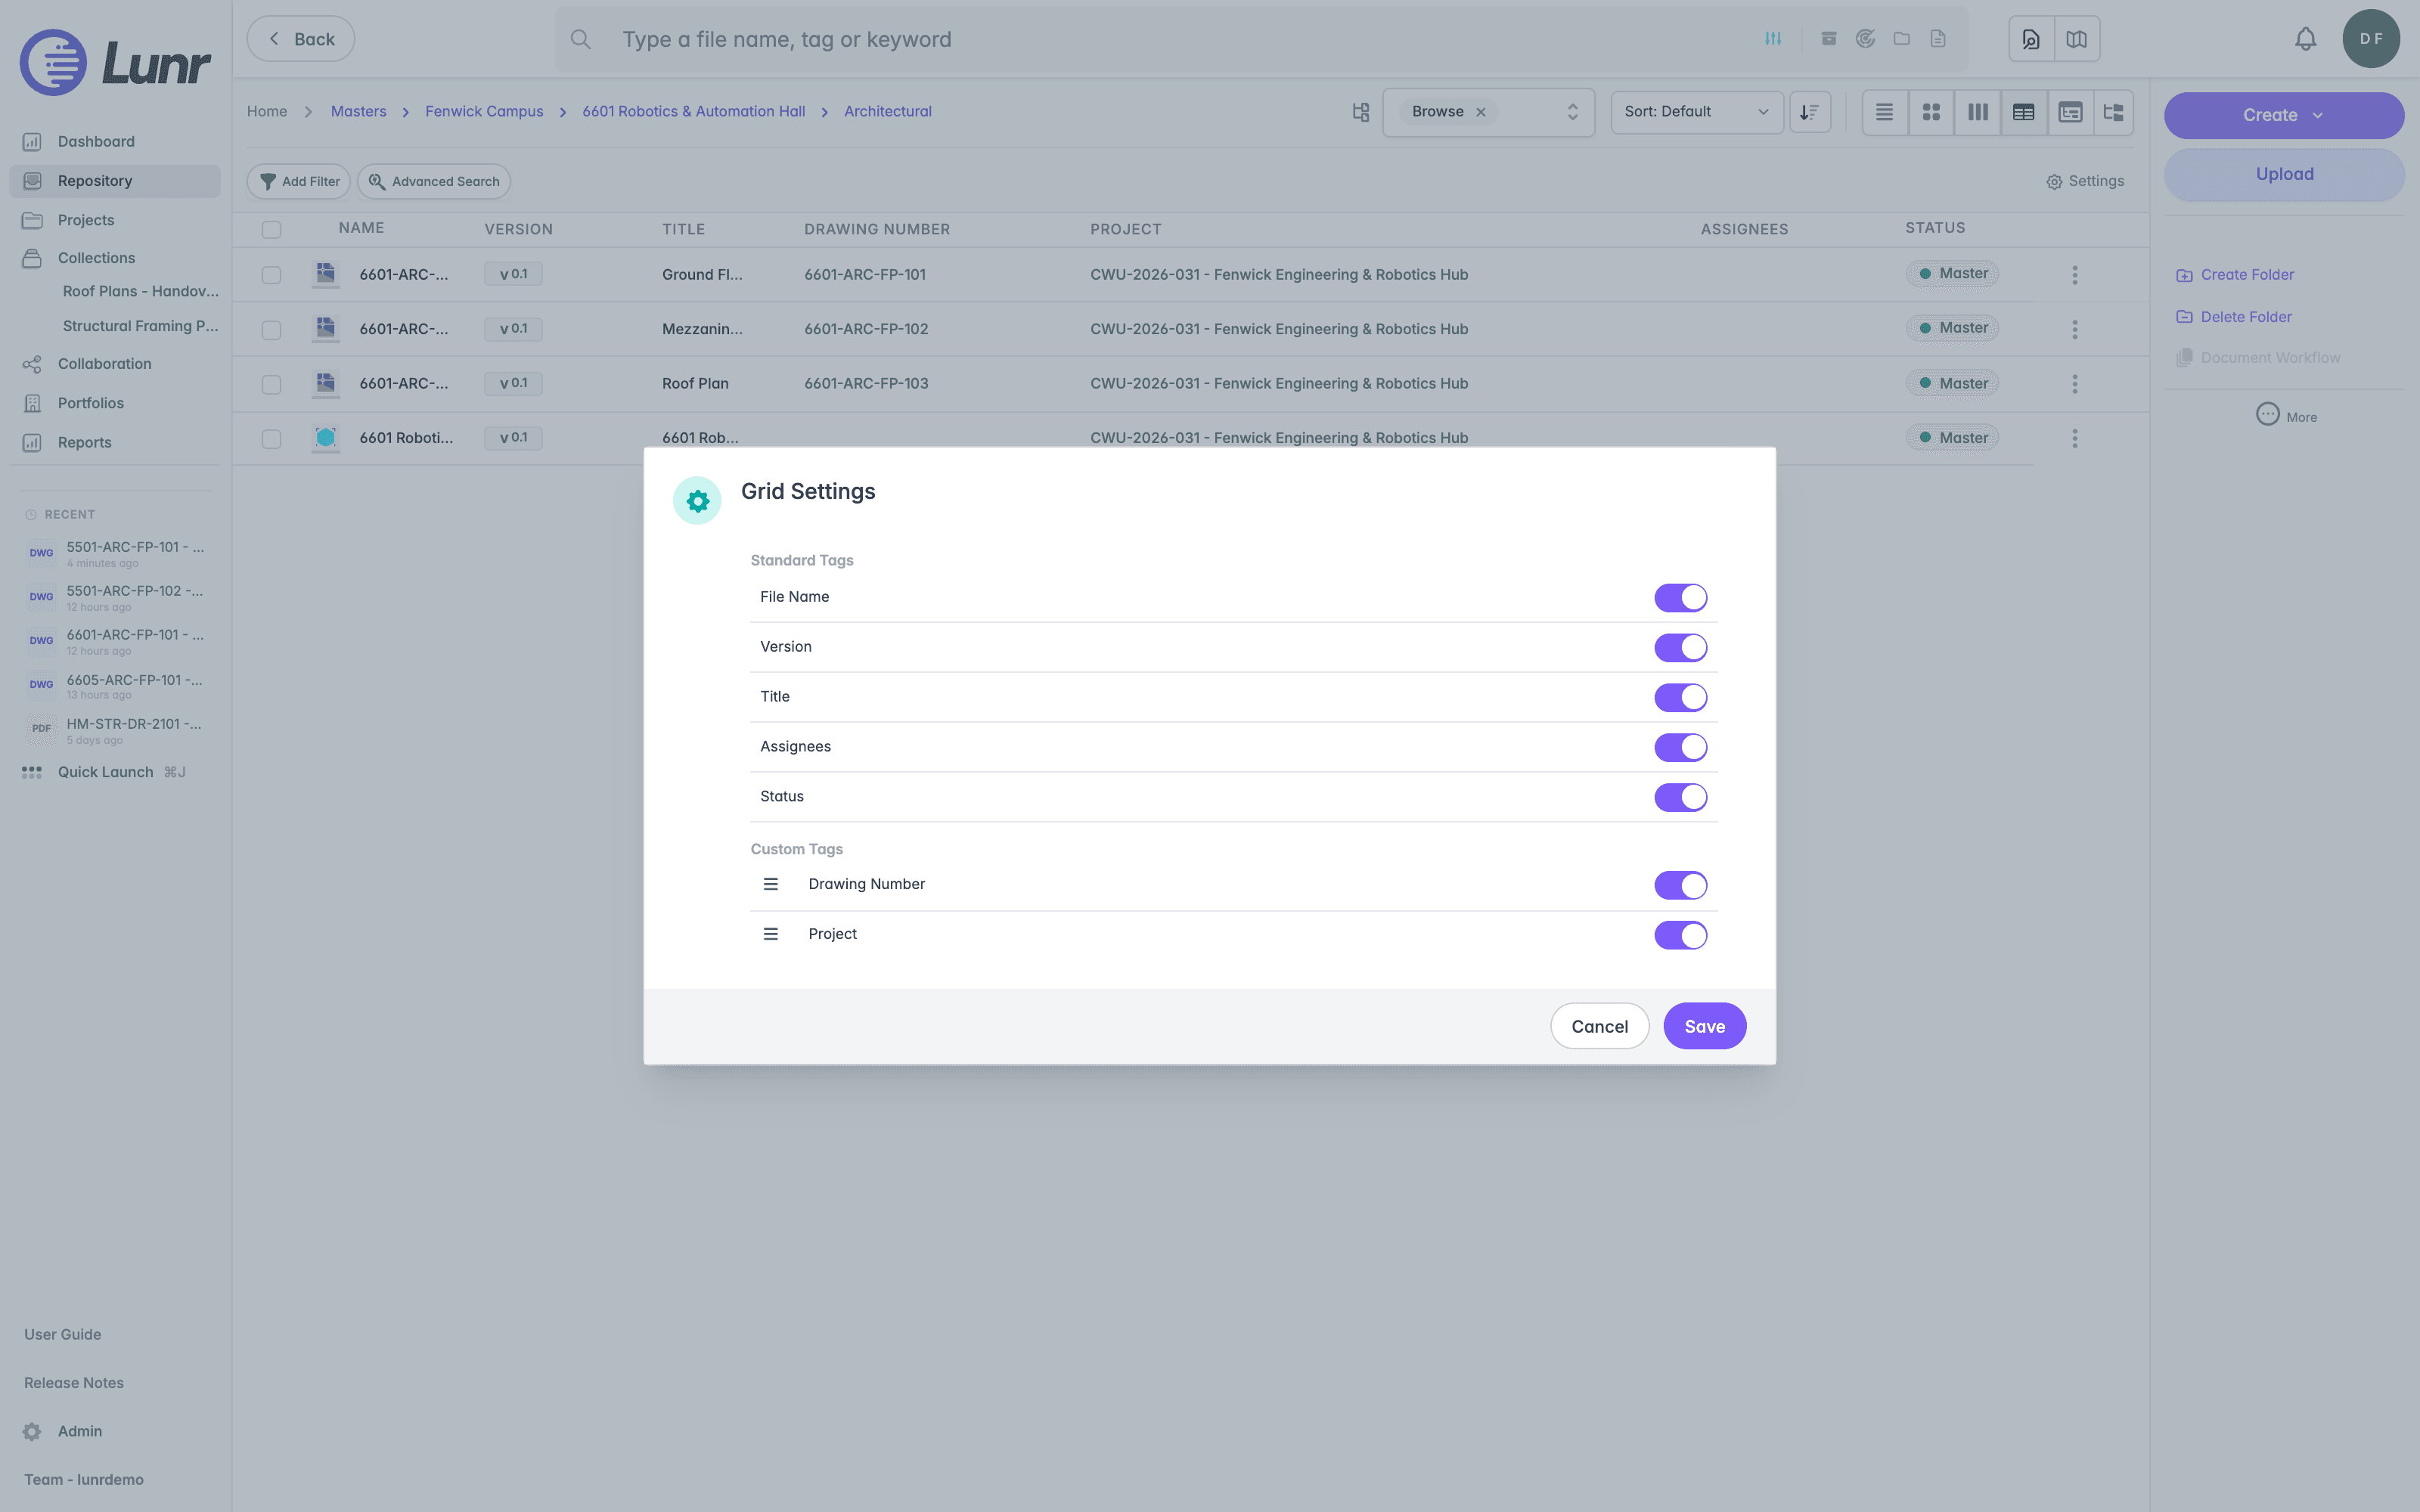
Select Save to apply your choices to the table, or Cancel to leave it as it was. The columns you enable are the columns the table draws, in the order the dialog lists them.
Tree Table View
The tree table view puts the repository's folder tree in a panel beside the table, so you can move between folders without losing the document list. Select a folder in the tree to load its documents, and use the expand control on a folder to open it in place.
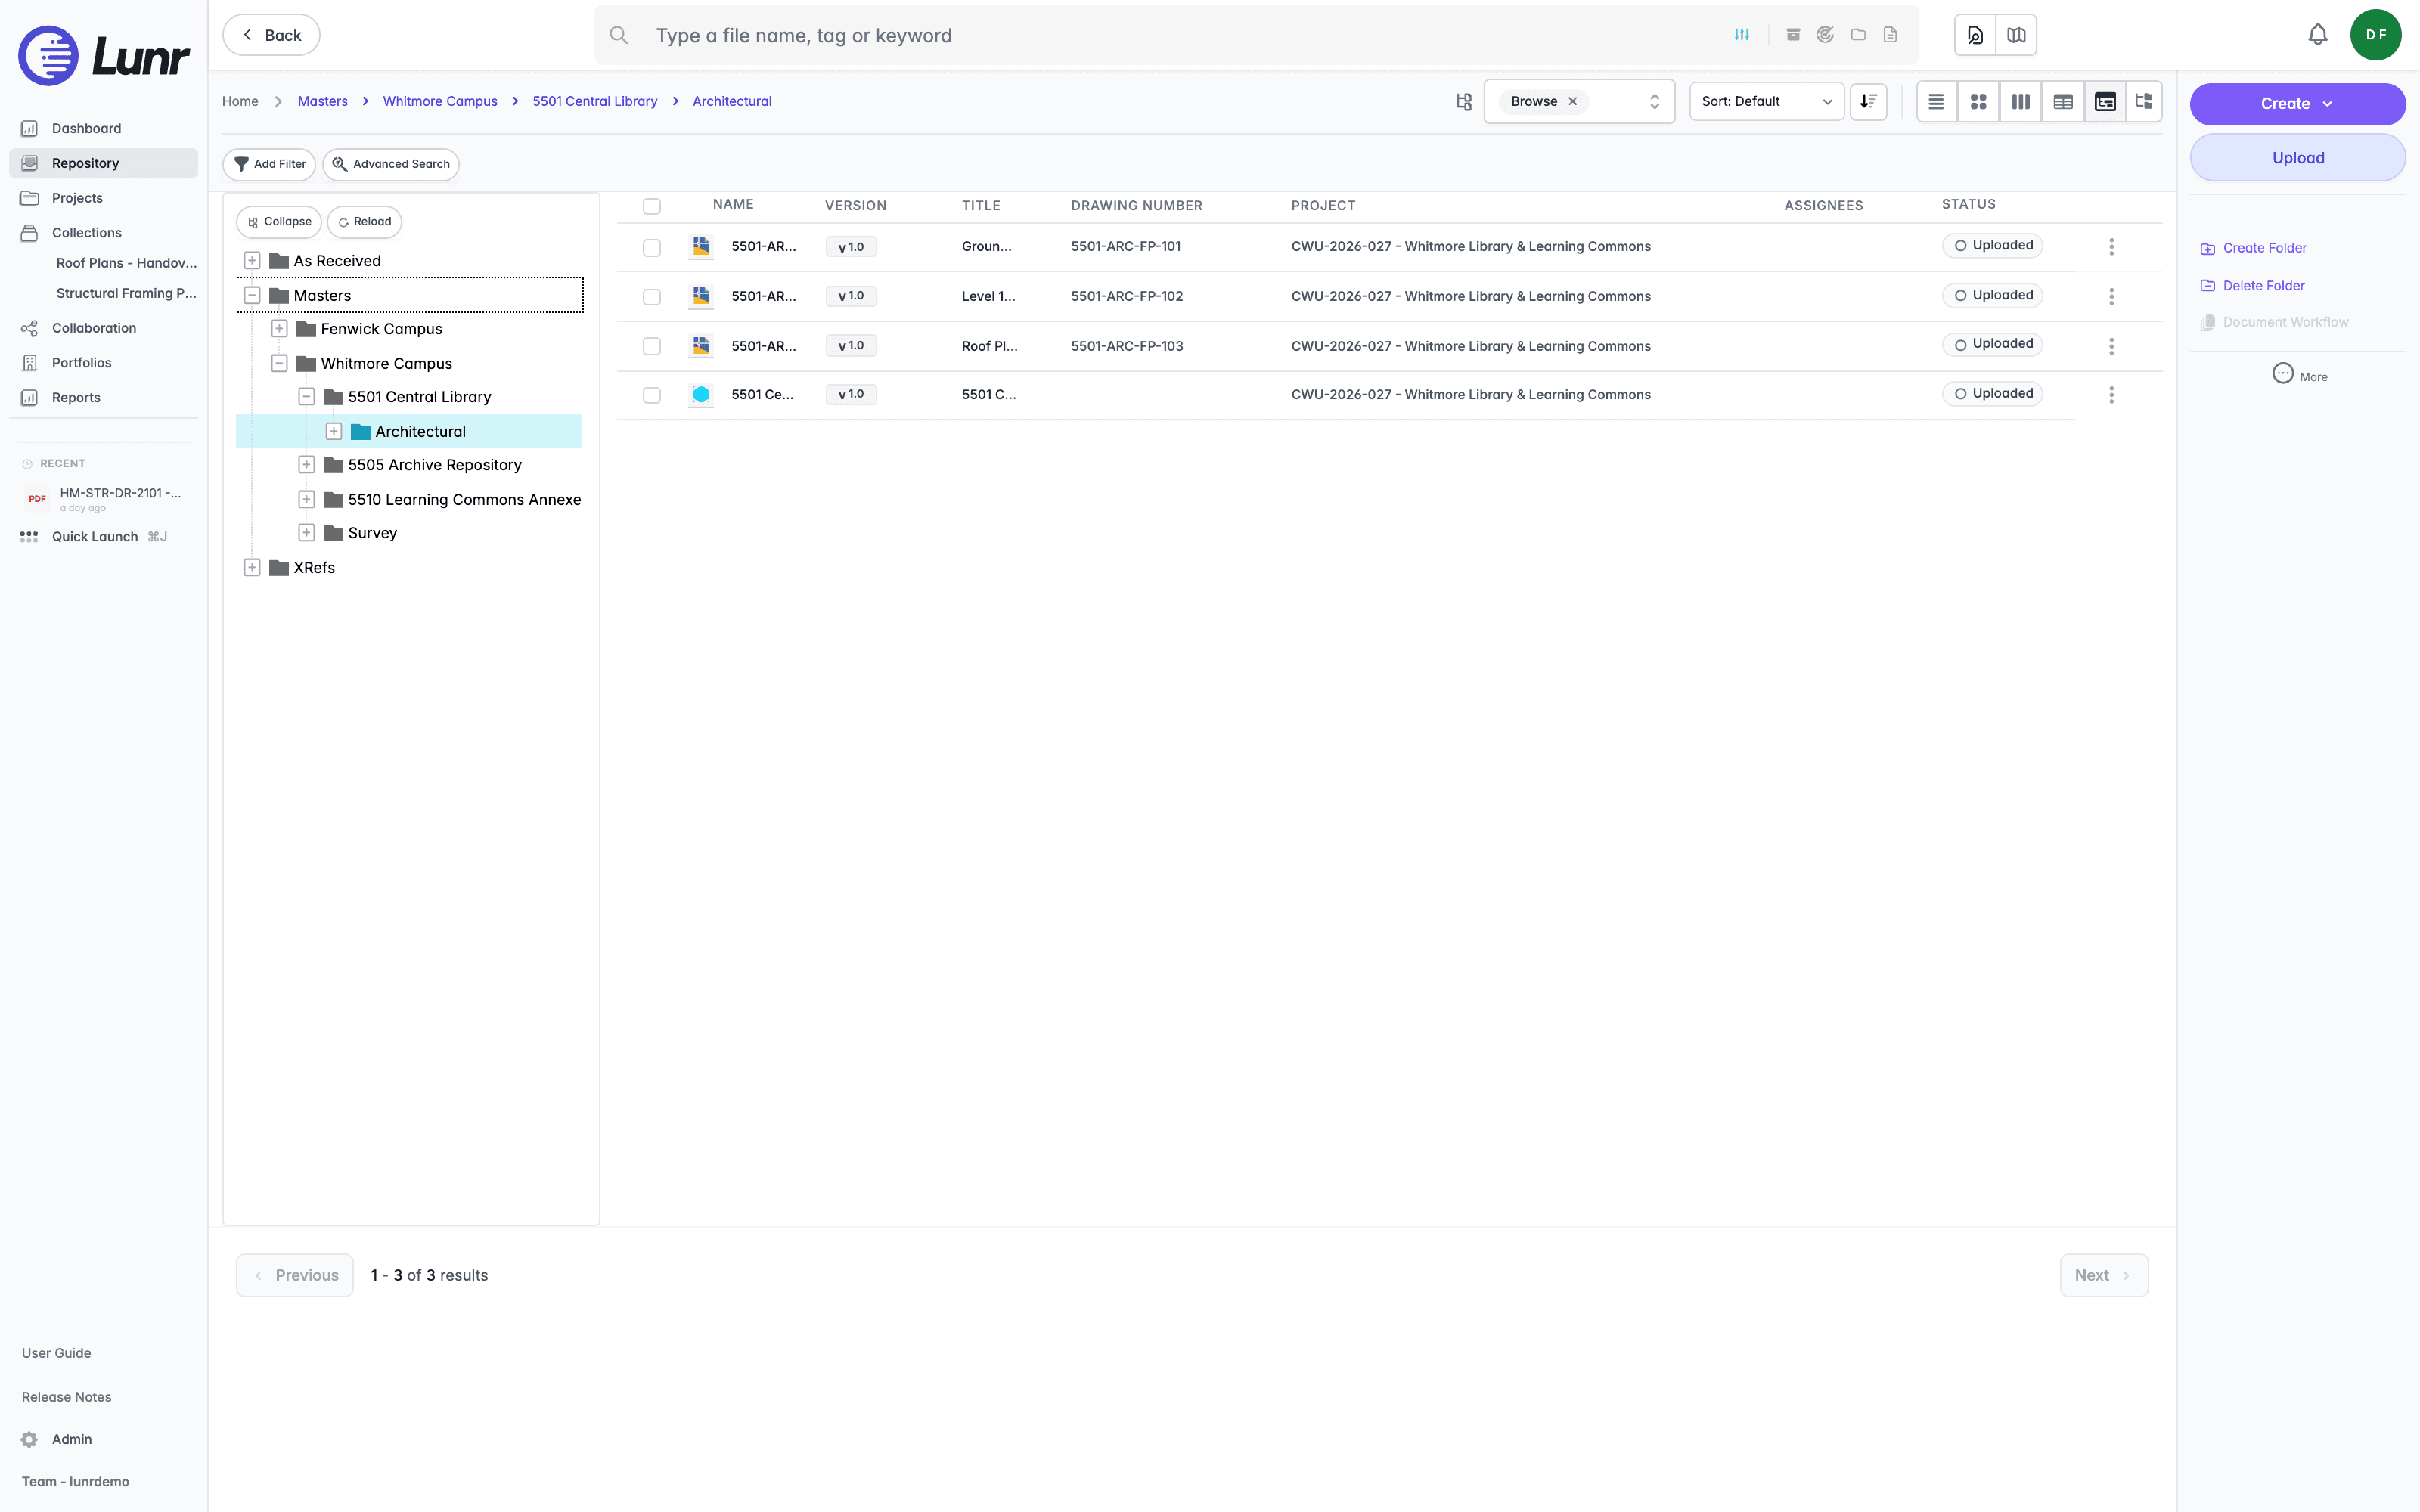
The panel carries Collapse to close every expanded folder at once, and Reload to fetch the tree again.
Tree Thumbnails View
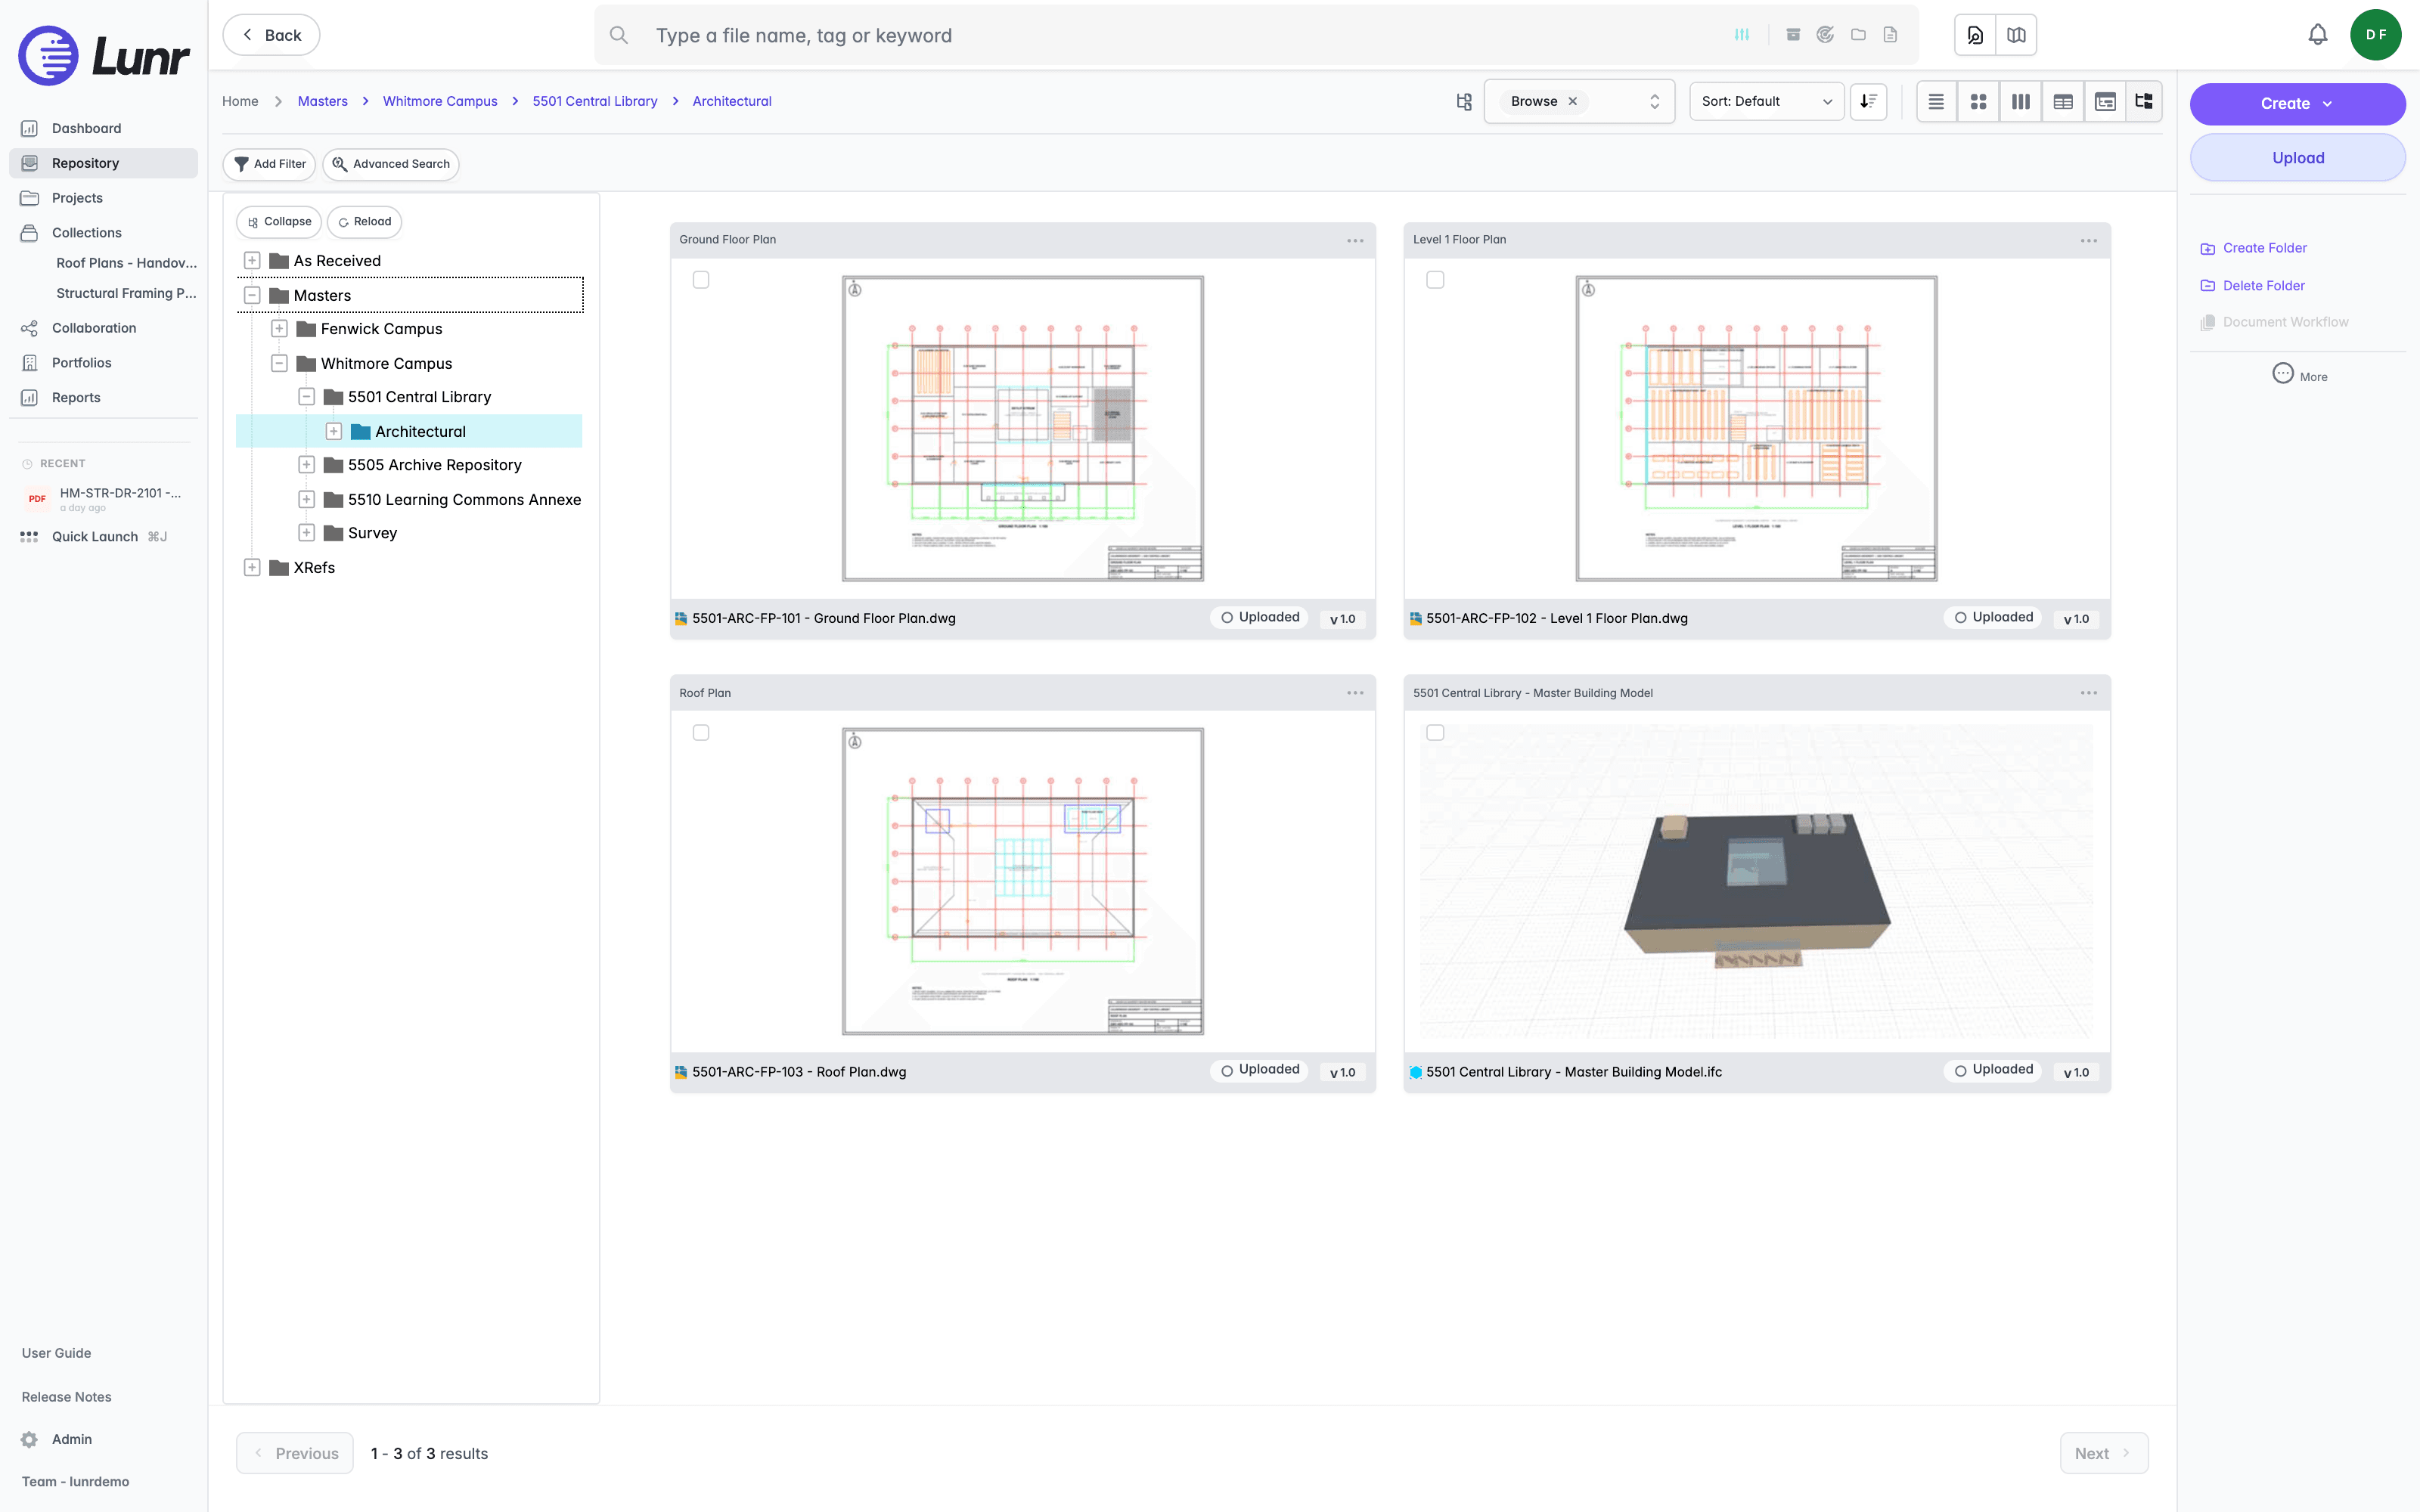
The tree thumbnails view pairs the same folder tree with preview cards instead of a table, which helps when you are moving through folders looking for a document you would recognise by its appearance.
Selecting Documents
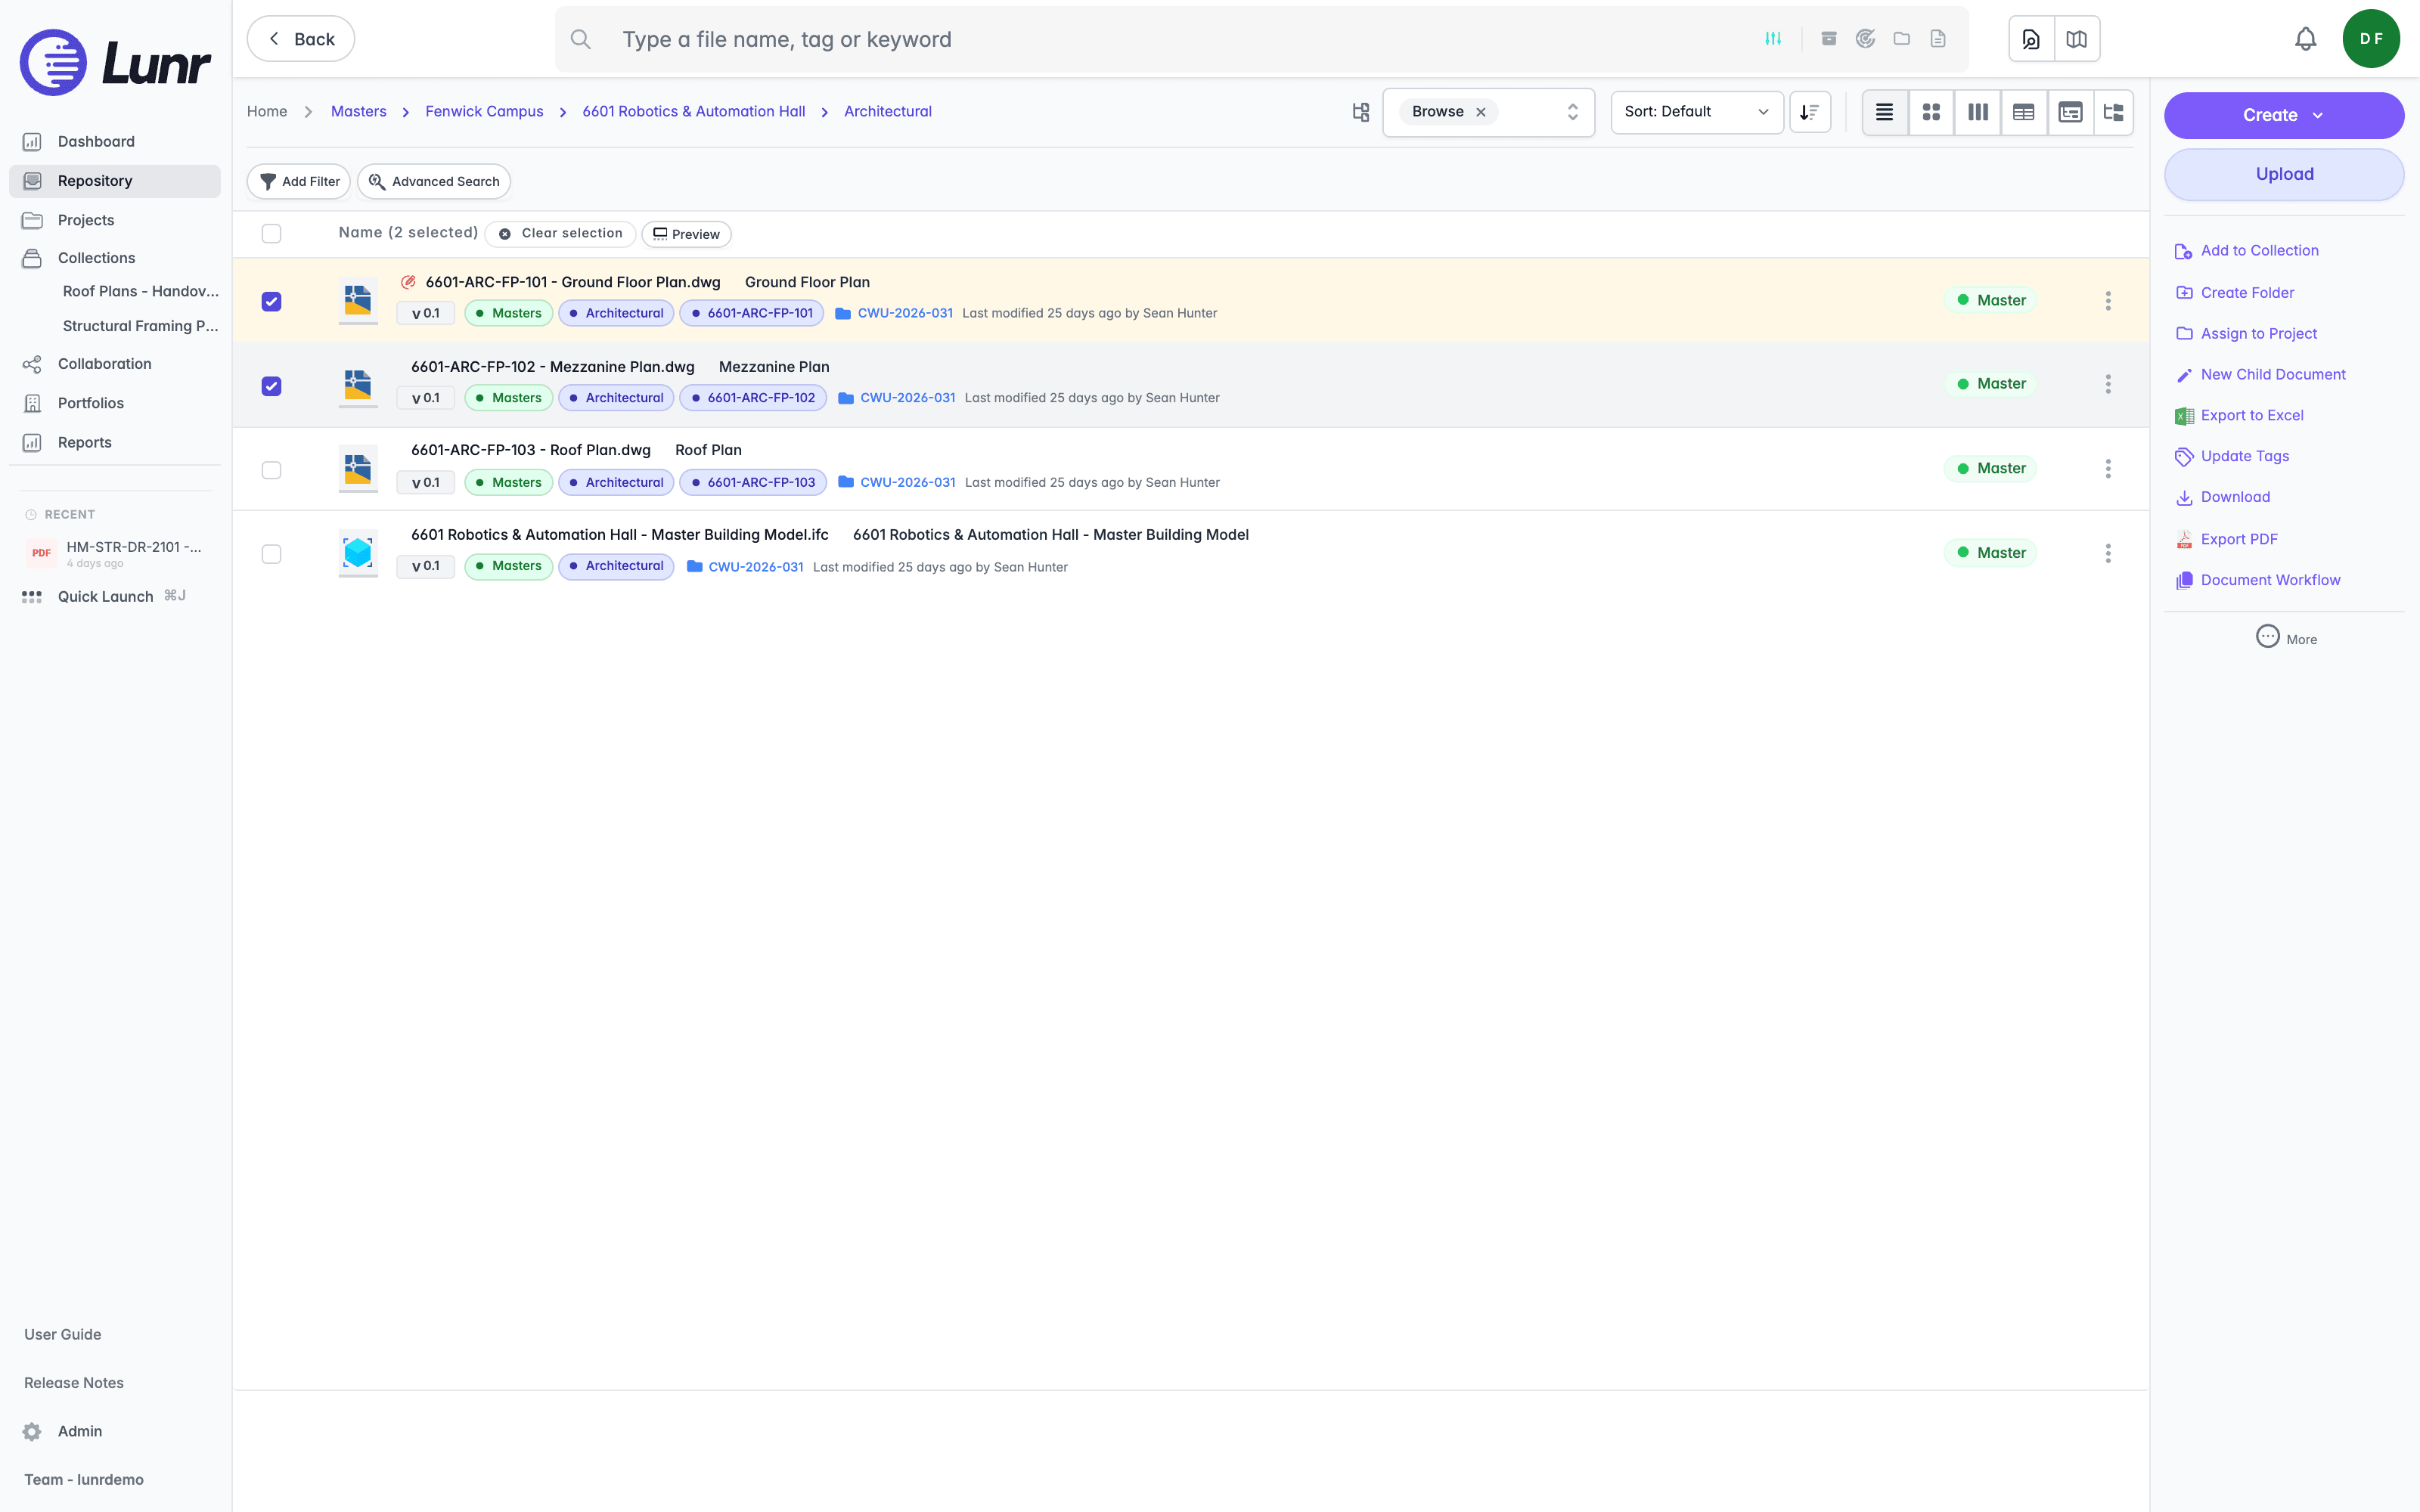
Every row carries a selection box, and the box in the list header selects everything on the page. Selecting one or more documents replaces the header with a count, for example "Name (2 selected)", followed by Clear selection and Preview.
Selecting documents also changes the Action Pane on the right from folder actions to actions on your selection. It offers Add to Collection, Assign to Project, New Child Document, Export to Excel, Update Tags, Download, Export PDF, and Document Workflow, alongside the Create, Upload, and Create Folder actions that are always present. More at the foot of the pane opens the grouped menu of actions for your selection, covered in Document Actions.
Opening a Document
Open a document to see its overview page, which gathers the document preview, its metadata, version history, and workflow in one place.
In the document list, a single click on a document's name or file-type icon opens its overview page, while a single click on a folder opens the folder instead. You can also double-click anywhere on a document row to open it. The same applies from the thumbnail, table, and tree views and from search results: select a card to open the document, and large thumbnail cards also carry an Open button overlay.
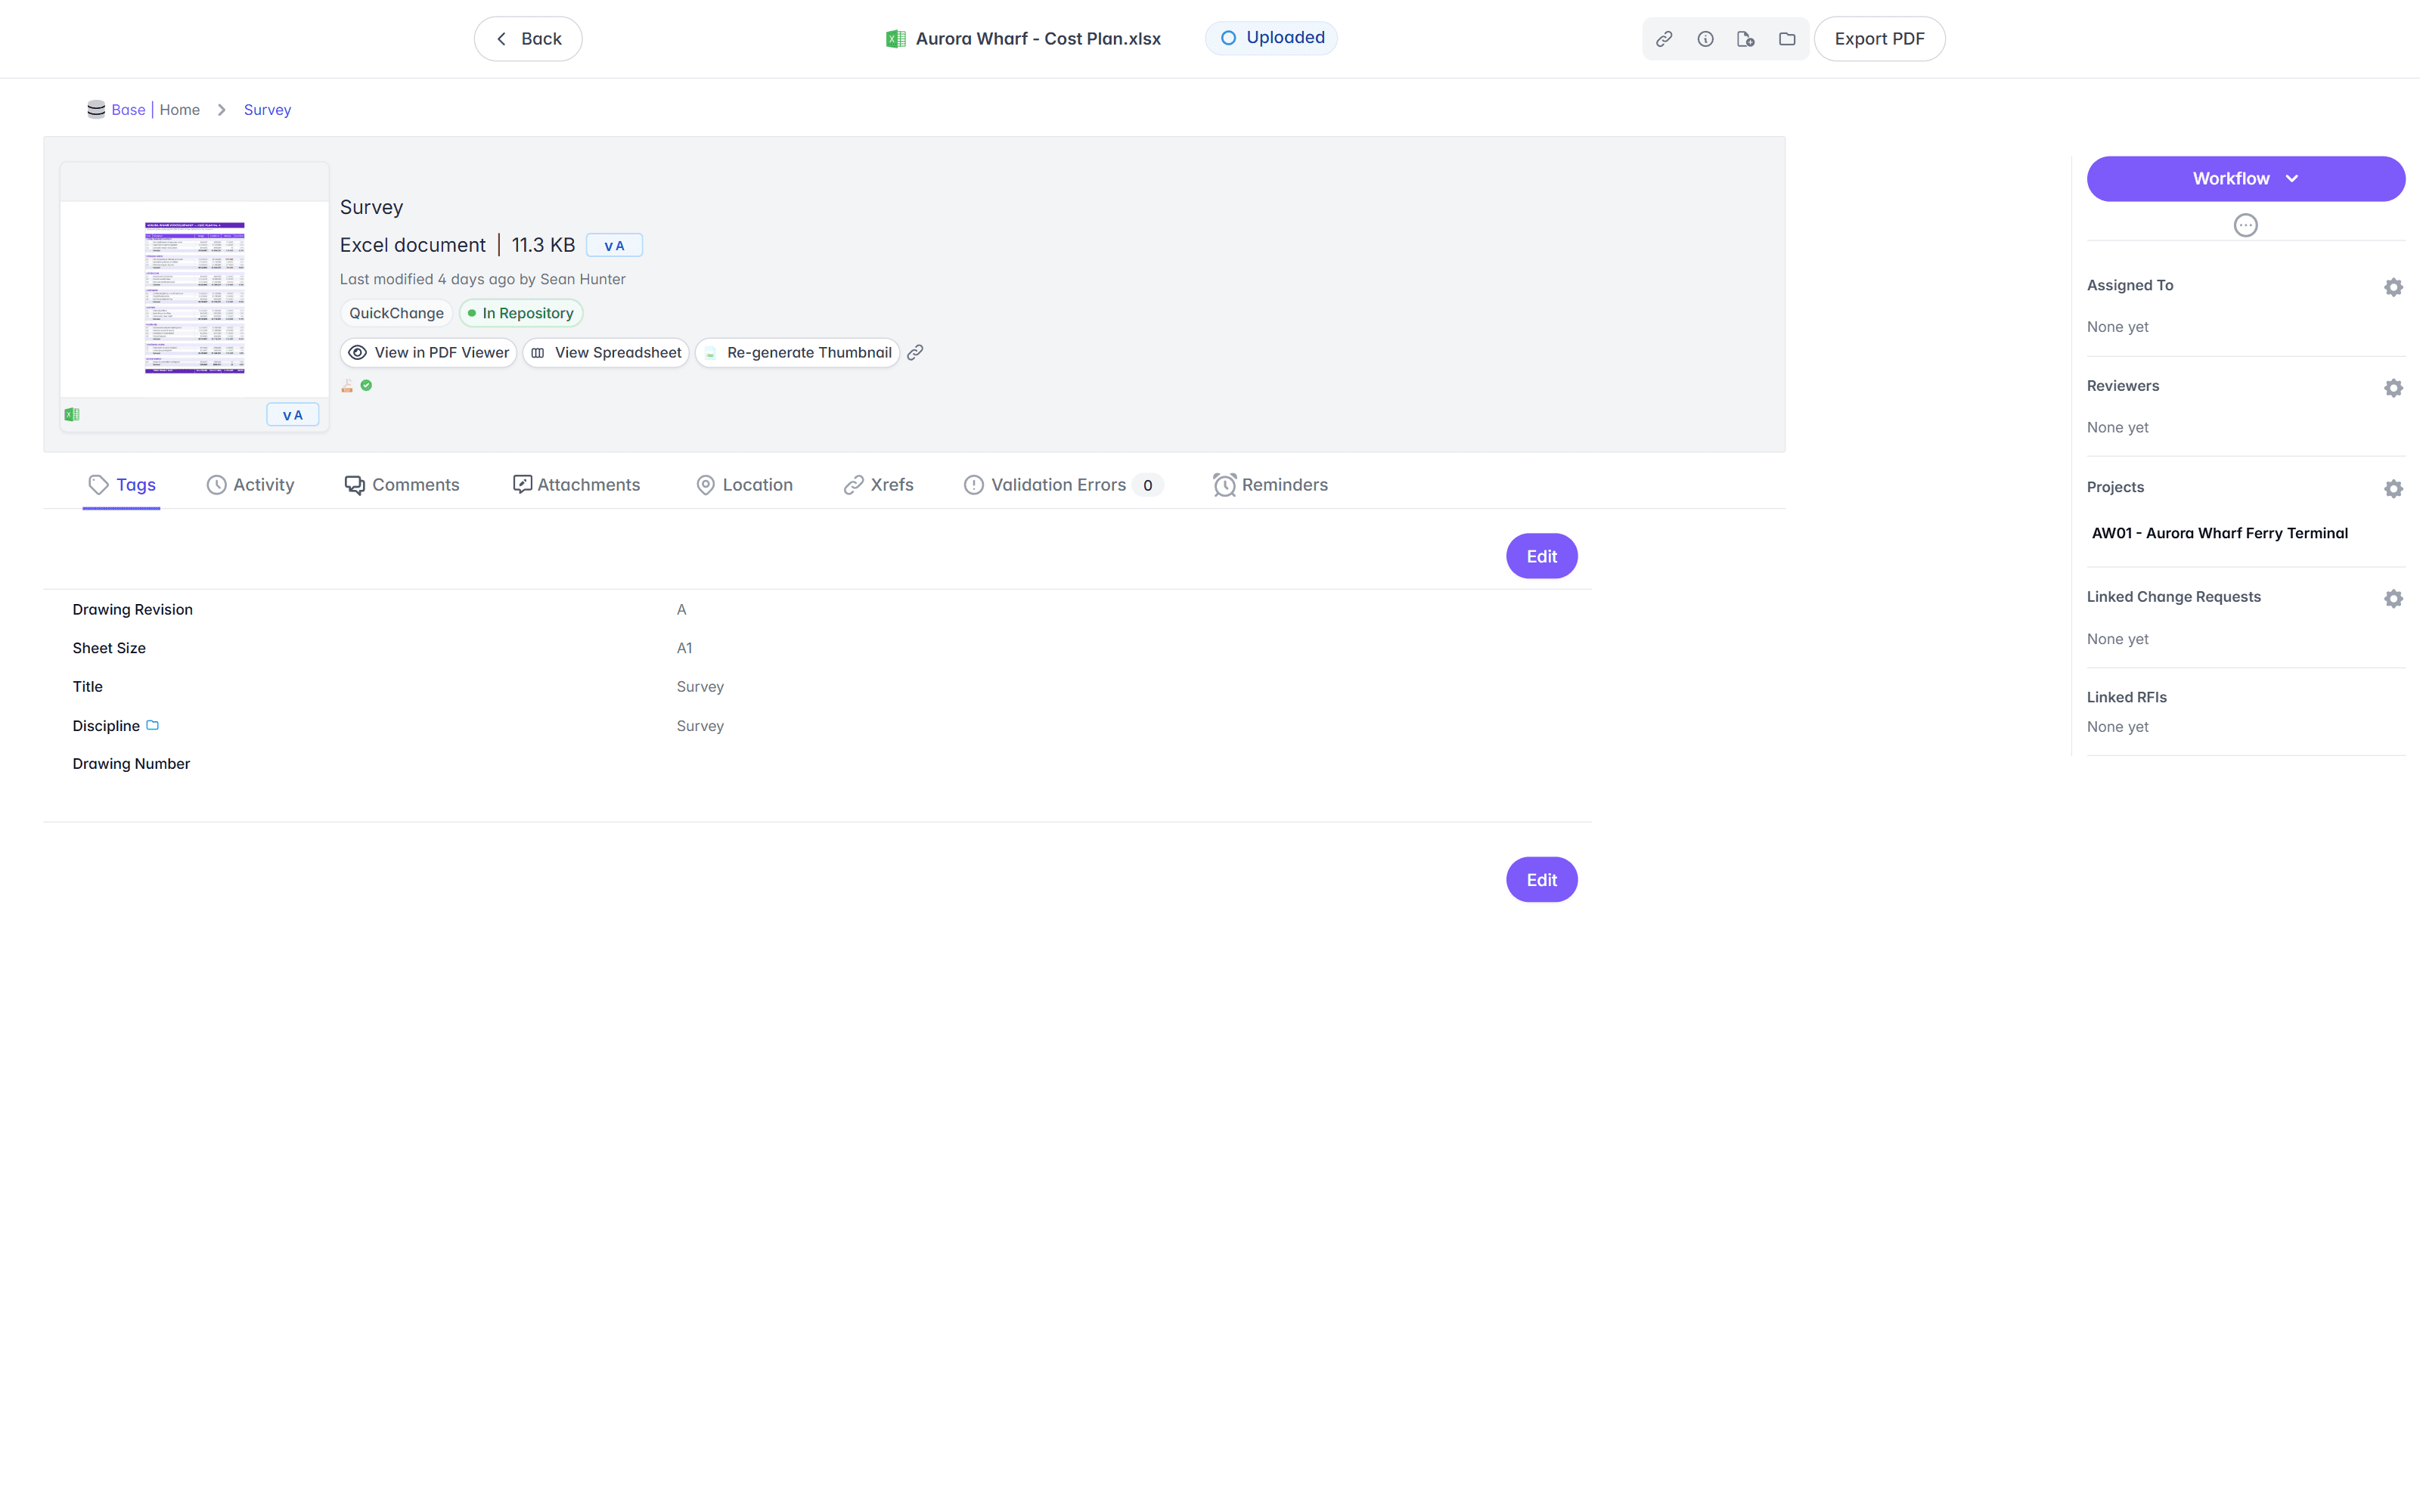
The overview page shows the document preview thumbnail, title, status, version badge, and last modified information. Buttons such as Export PDF, View in PDF Viewer, and View Spreadsheet let you export or open the document, and the available viewer buttons vary by file type; see Viewing Documents for what each viewer offers.
The Tags tab lists the metadata fields, including Drawing Revision, Sheet Size, Title, Discipline, and Drawing Number, with further tabs for Activity, Comments, Attachments, Location, and more. The Action Pane shows the workflow, assignment, and linked projects.
The repository can also be searched from the search bar at the top of the page. For live suggestions, the results page, metadata filtering, and full-text search, see Searching for Documents.
Recent Documents
A Recent panel sits at the foot of the sidebar, below the main navigation, listing the five documents you opened most recently. It is the shortest way back to something you were just looking at.
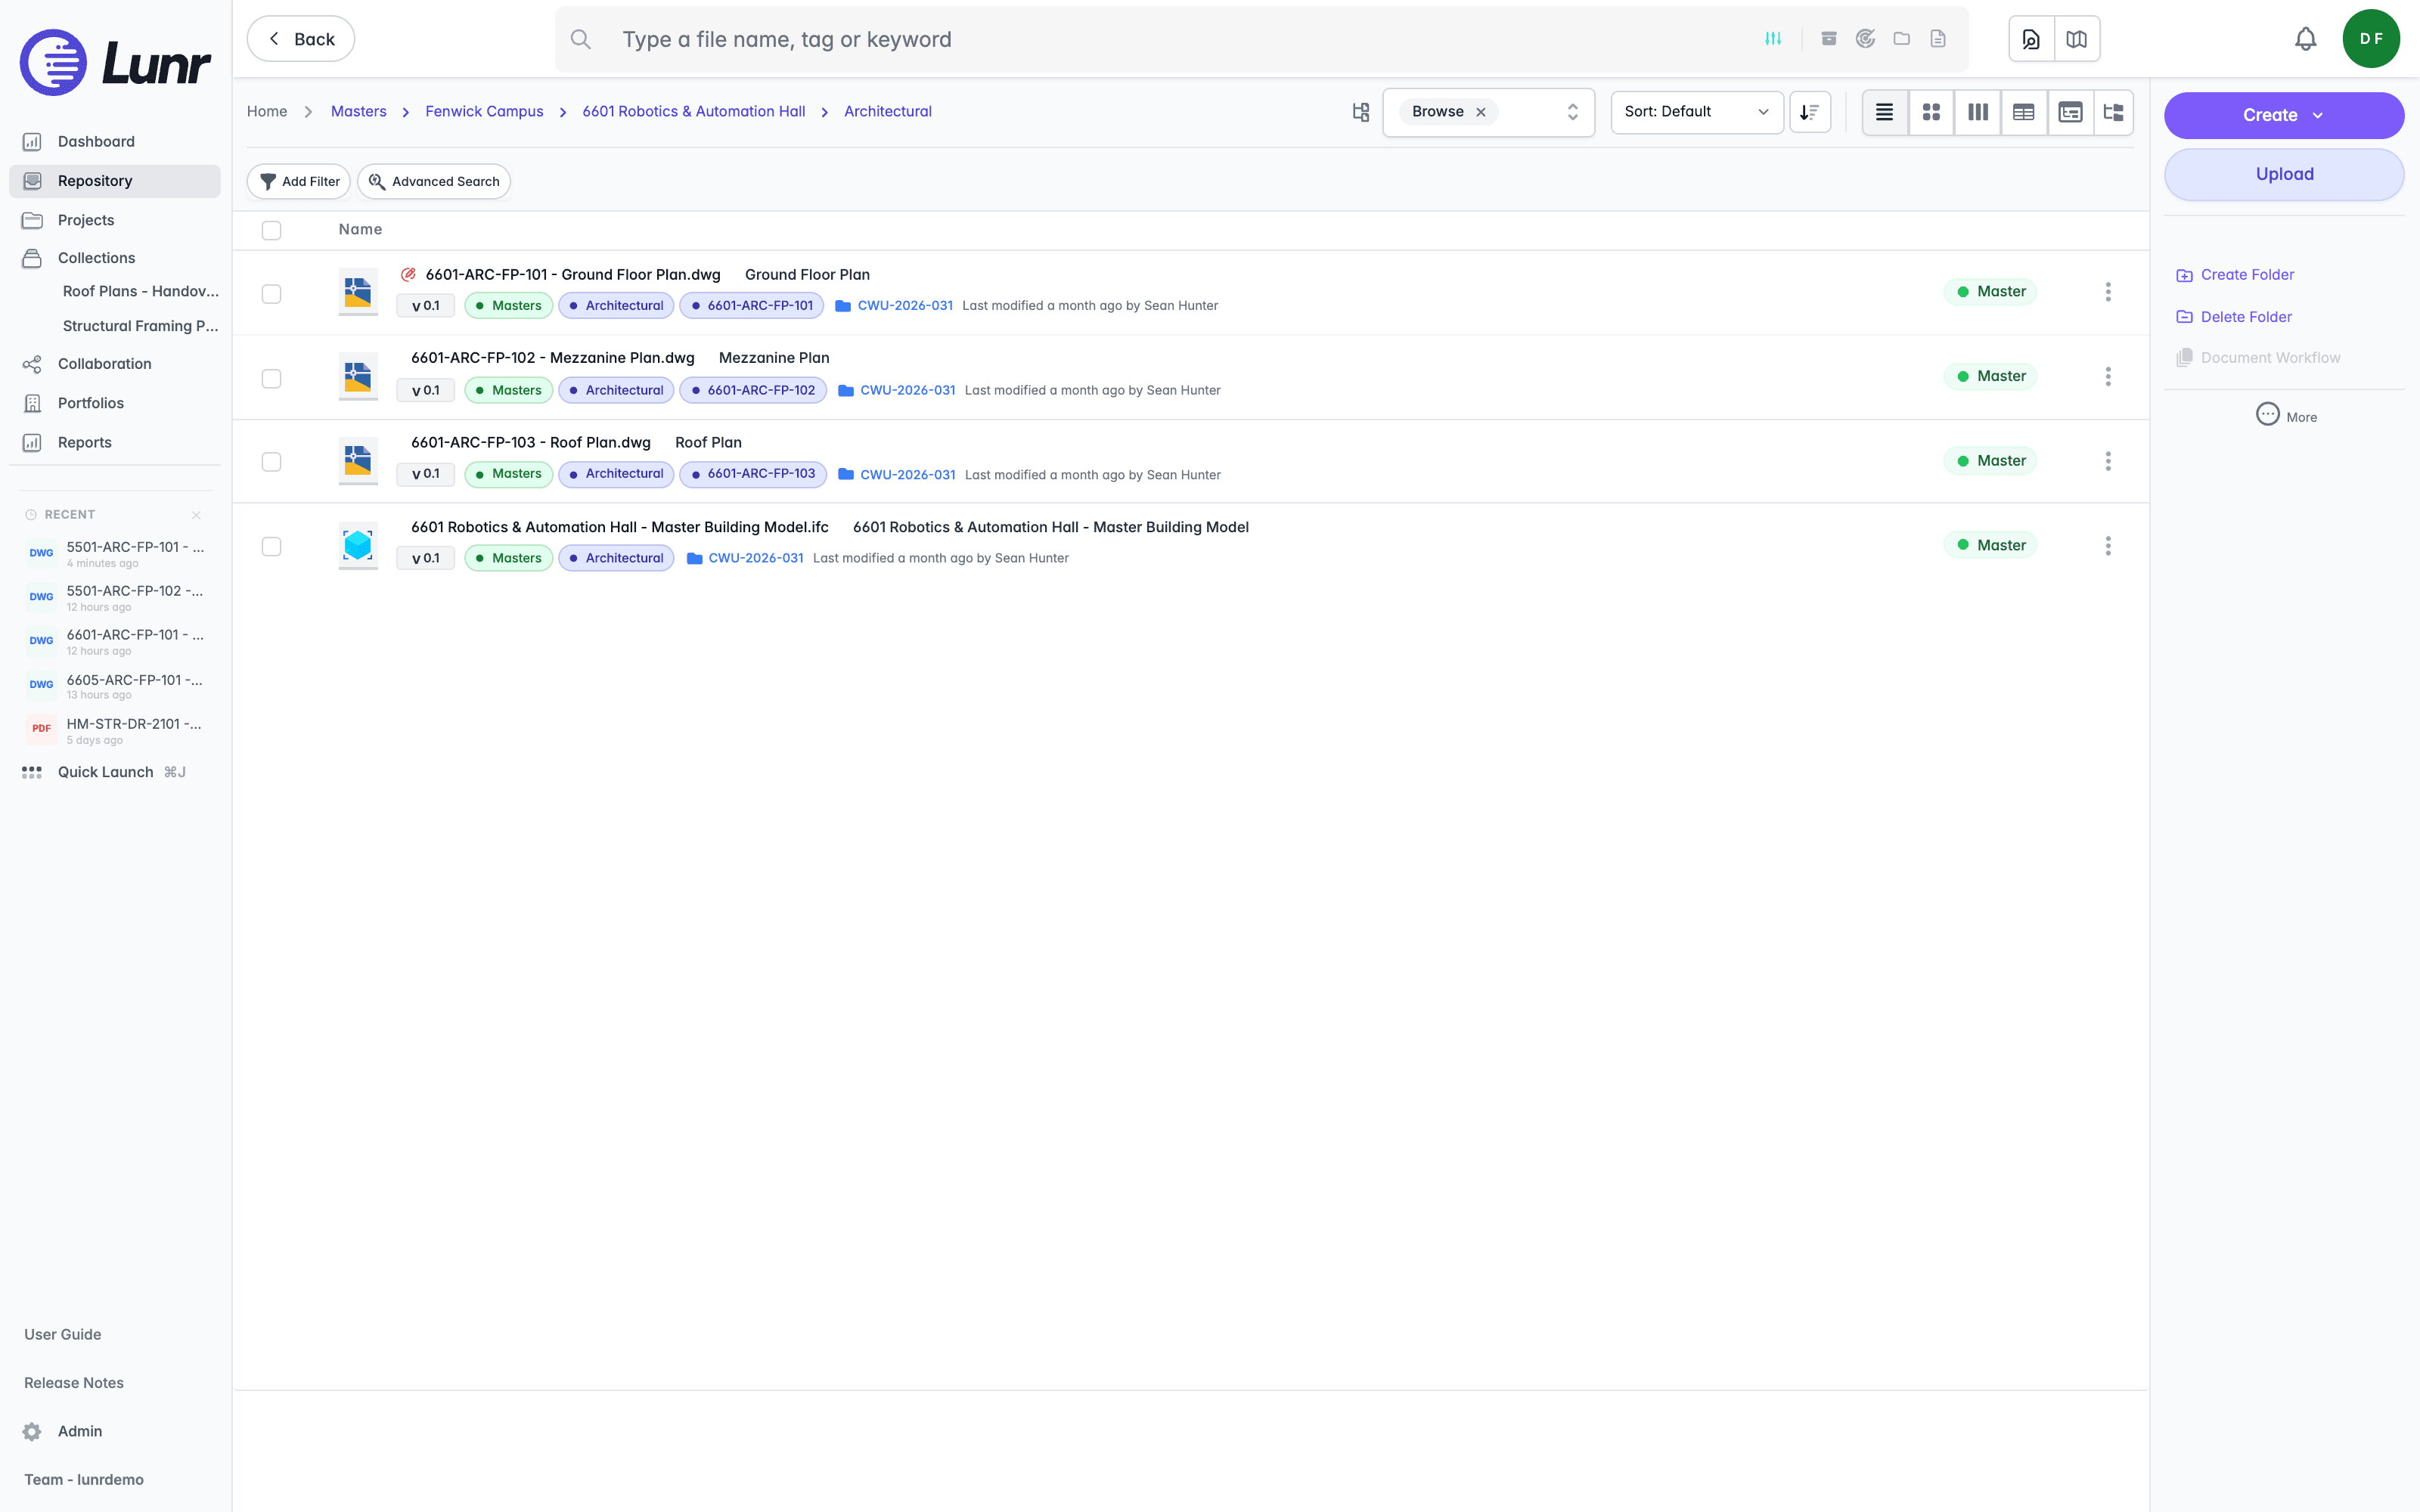
Each entry carries a file-type badge such as DWG or PDF, the document name, and how long ago you viewed it. Long names are shortened to fit, so point at an entry to read the full name. Select an entry to open that document.
Point at the panel and a cross appears beside the Recent heading, with the tooltip Clear recent documents. Select it to empty the list.
The panel appears only once you have opened a document, and it is hidden entirely if you have enabled Hide Recent Documents panel in your Preferences.
Map View
On the Repository page, select the map icon in the top navigation bar to switch to the map-based view. The icon sits in a two-button search-mode toggle, and its tooltip reads Map Search. The map opens on a street basemap and plots documents by their location tags.
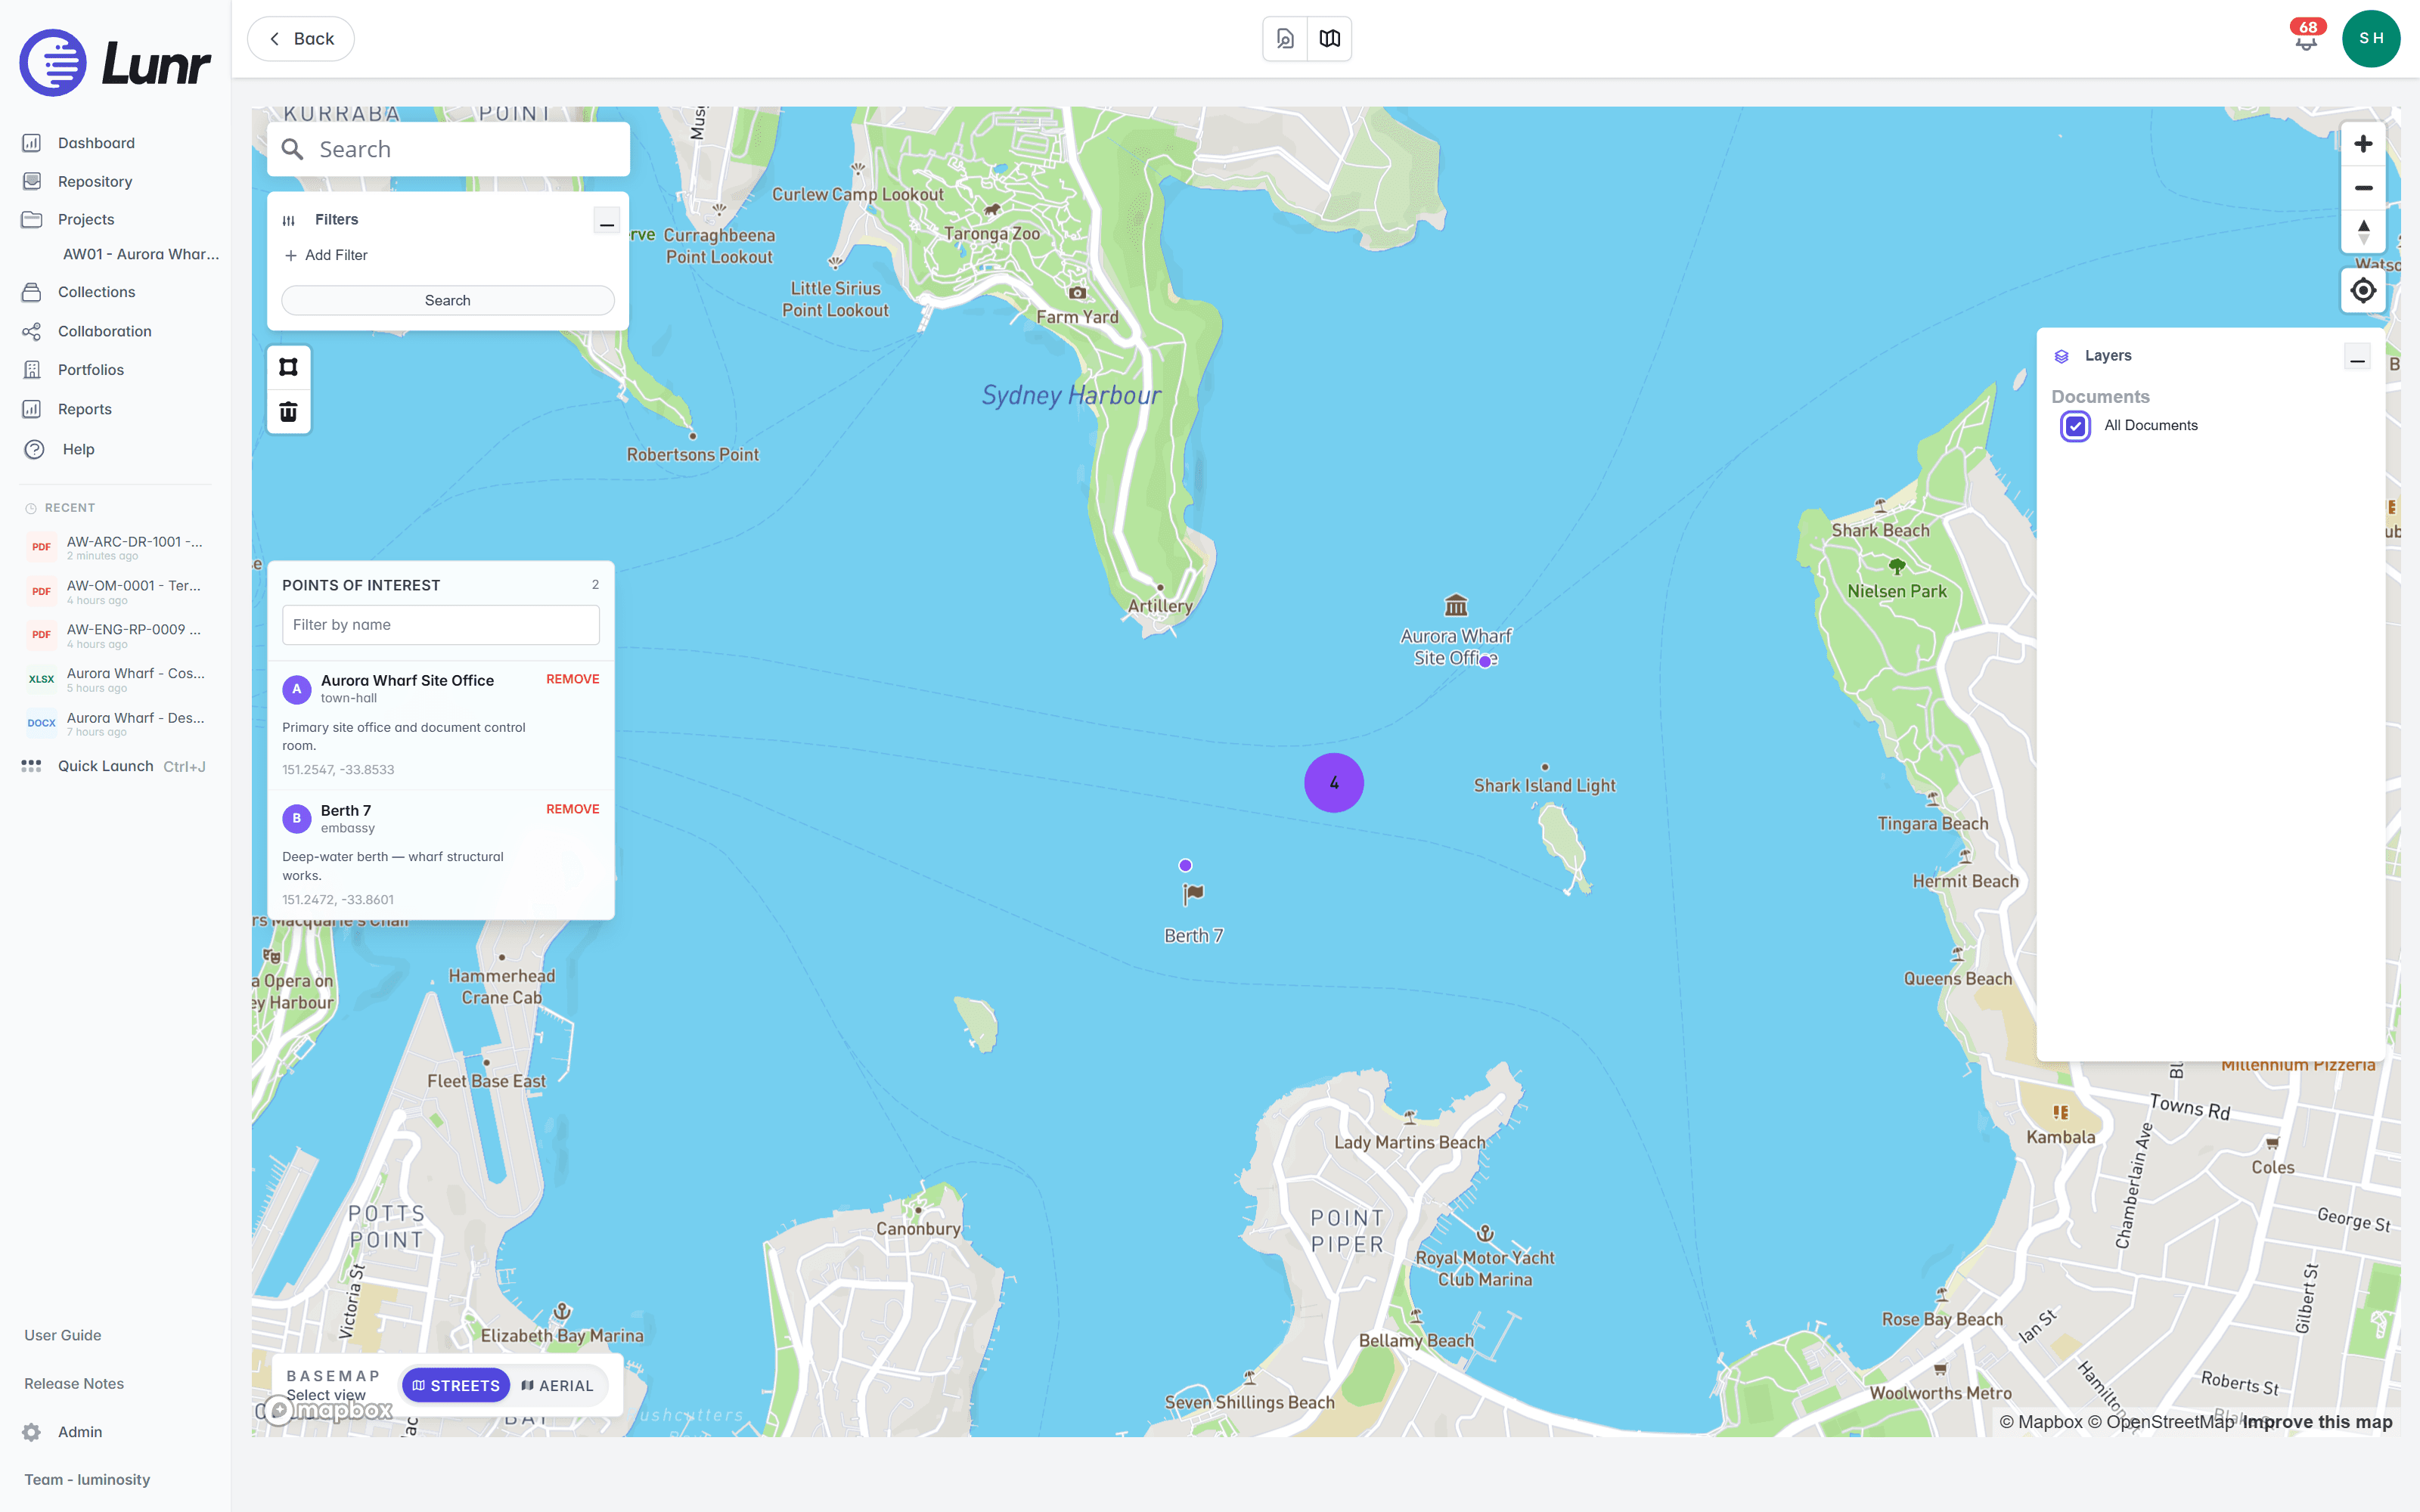
Document markers come from the All Documents layer, which is off by default. In the Layers panel at the top-right, open the Documents group and select the All Documents box to plot every document tagged with a location. Where several documents sit close together, they group into a purple cluster labelled with a count, such as the cluster of four shown in central Sydney Harbour. Zoom in to break a cluster apart into its individual document points.
The surrounding panels refine and reframe the map. The Filters panel at the top-left narrows the plotted documents: choose Add Filter, set your conditions, then choose Search. The polygon-draw and delete tools below it restrict results to an area you draw on the map, and the zoom, compass, and locate controls sit at the right. At the bottom-left, the Basemap toggle switches between the Streets and Aerial views.
The Points of Interest panel lists named markers, such as Aurora Wharf Site Office and Berth 7, alongside a count and a Filter by name field. These are user-added locations, distinct from document markers, and are added to the map by administrators.
Select the collapse control in the panel's header to minimise it to its header bar, freeing the map beneath it. The panel stays minimised as you move between documents and back.
Introduction
Understand what the Lunr document repository holds, how tags file documents into its folder structure automatically, what each document carries, and which page to use to browse, search, or download.
Searching for Documents
Find documents using basic search, your recent searches, advanced search, tag filters, XRAY, Quick Search, Quick Launch, wildcard and boolean operators, archived document searches, and metadata export.