Uploading Assemblies
Upload an Inventor or SolidWorks assembly into a project with Upload Assembly, covering the pre-upload check of its parts, how folders are kept, the upload progress, and the 3D model Lunr builds from it.
Overview
An assembly is a CAD file that is made up of other CAD files, its parts and sub-assemblies. Upload Assembly uploads the assembly together with those parts in one step, links them to each other, and builds a 3D model of the whole assembly for the 3D viewer.
It accepts Inventor assemblies and parts (.iam and .ipt) and SolidWorks assemblies and parts (.sldasm and .sldprt).
Before anything is uploaded, Lunr reads the assembly and checks which parts it needs. You see what is included, what is already in Lunr, and what is missing, and you can fix problems before you start.
Where to Find It
Open a project and select the Documents tab. Upload Assembly sits beside Upload above the document list.
Uploading at the root of a project needs permission to upload there. Without it, open a folder in the project first and upload from there.
Uploading an Assembly
- Select Upload Assembly.
- Select Choose folder and choose the folder that holds the assembly and its parts. You can also drag the folder onto the dialog.
- Review the check Lunr runs on the assembly, covered in Reviewing the Check.
- Select the Upload button at the bottom right of the dialog. It reads, for example, "Upload 12 files".
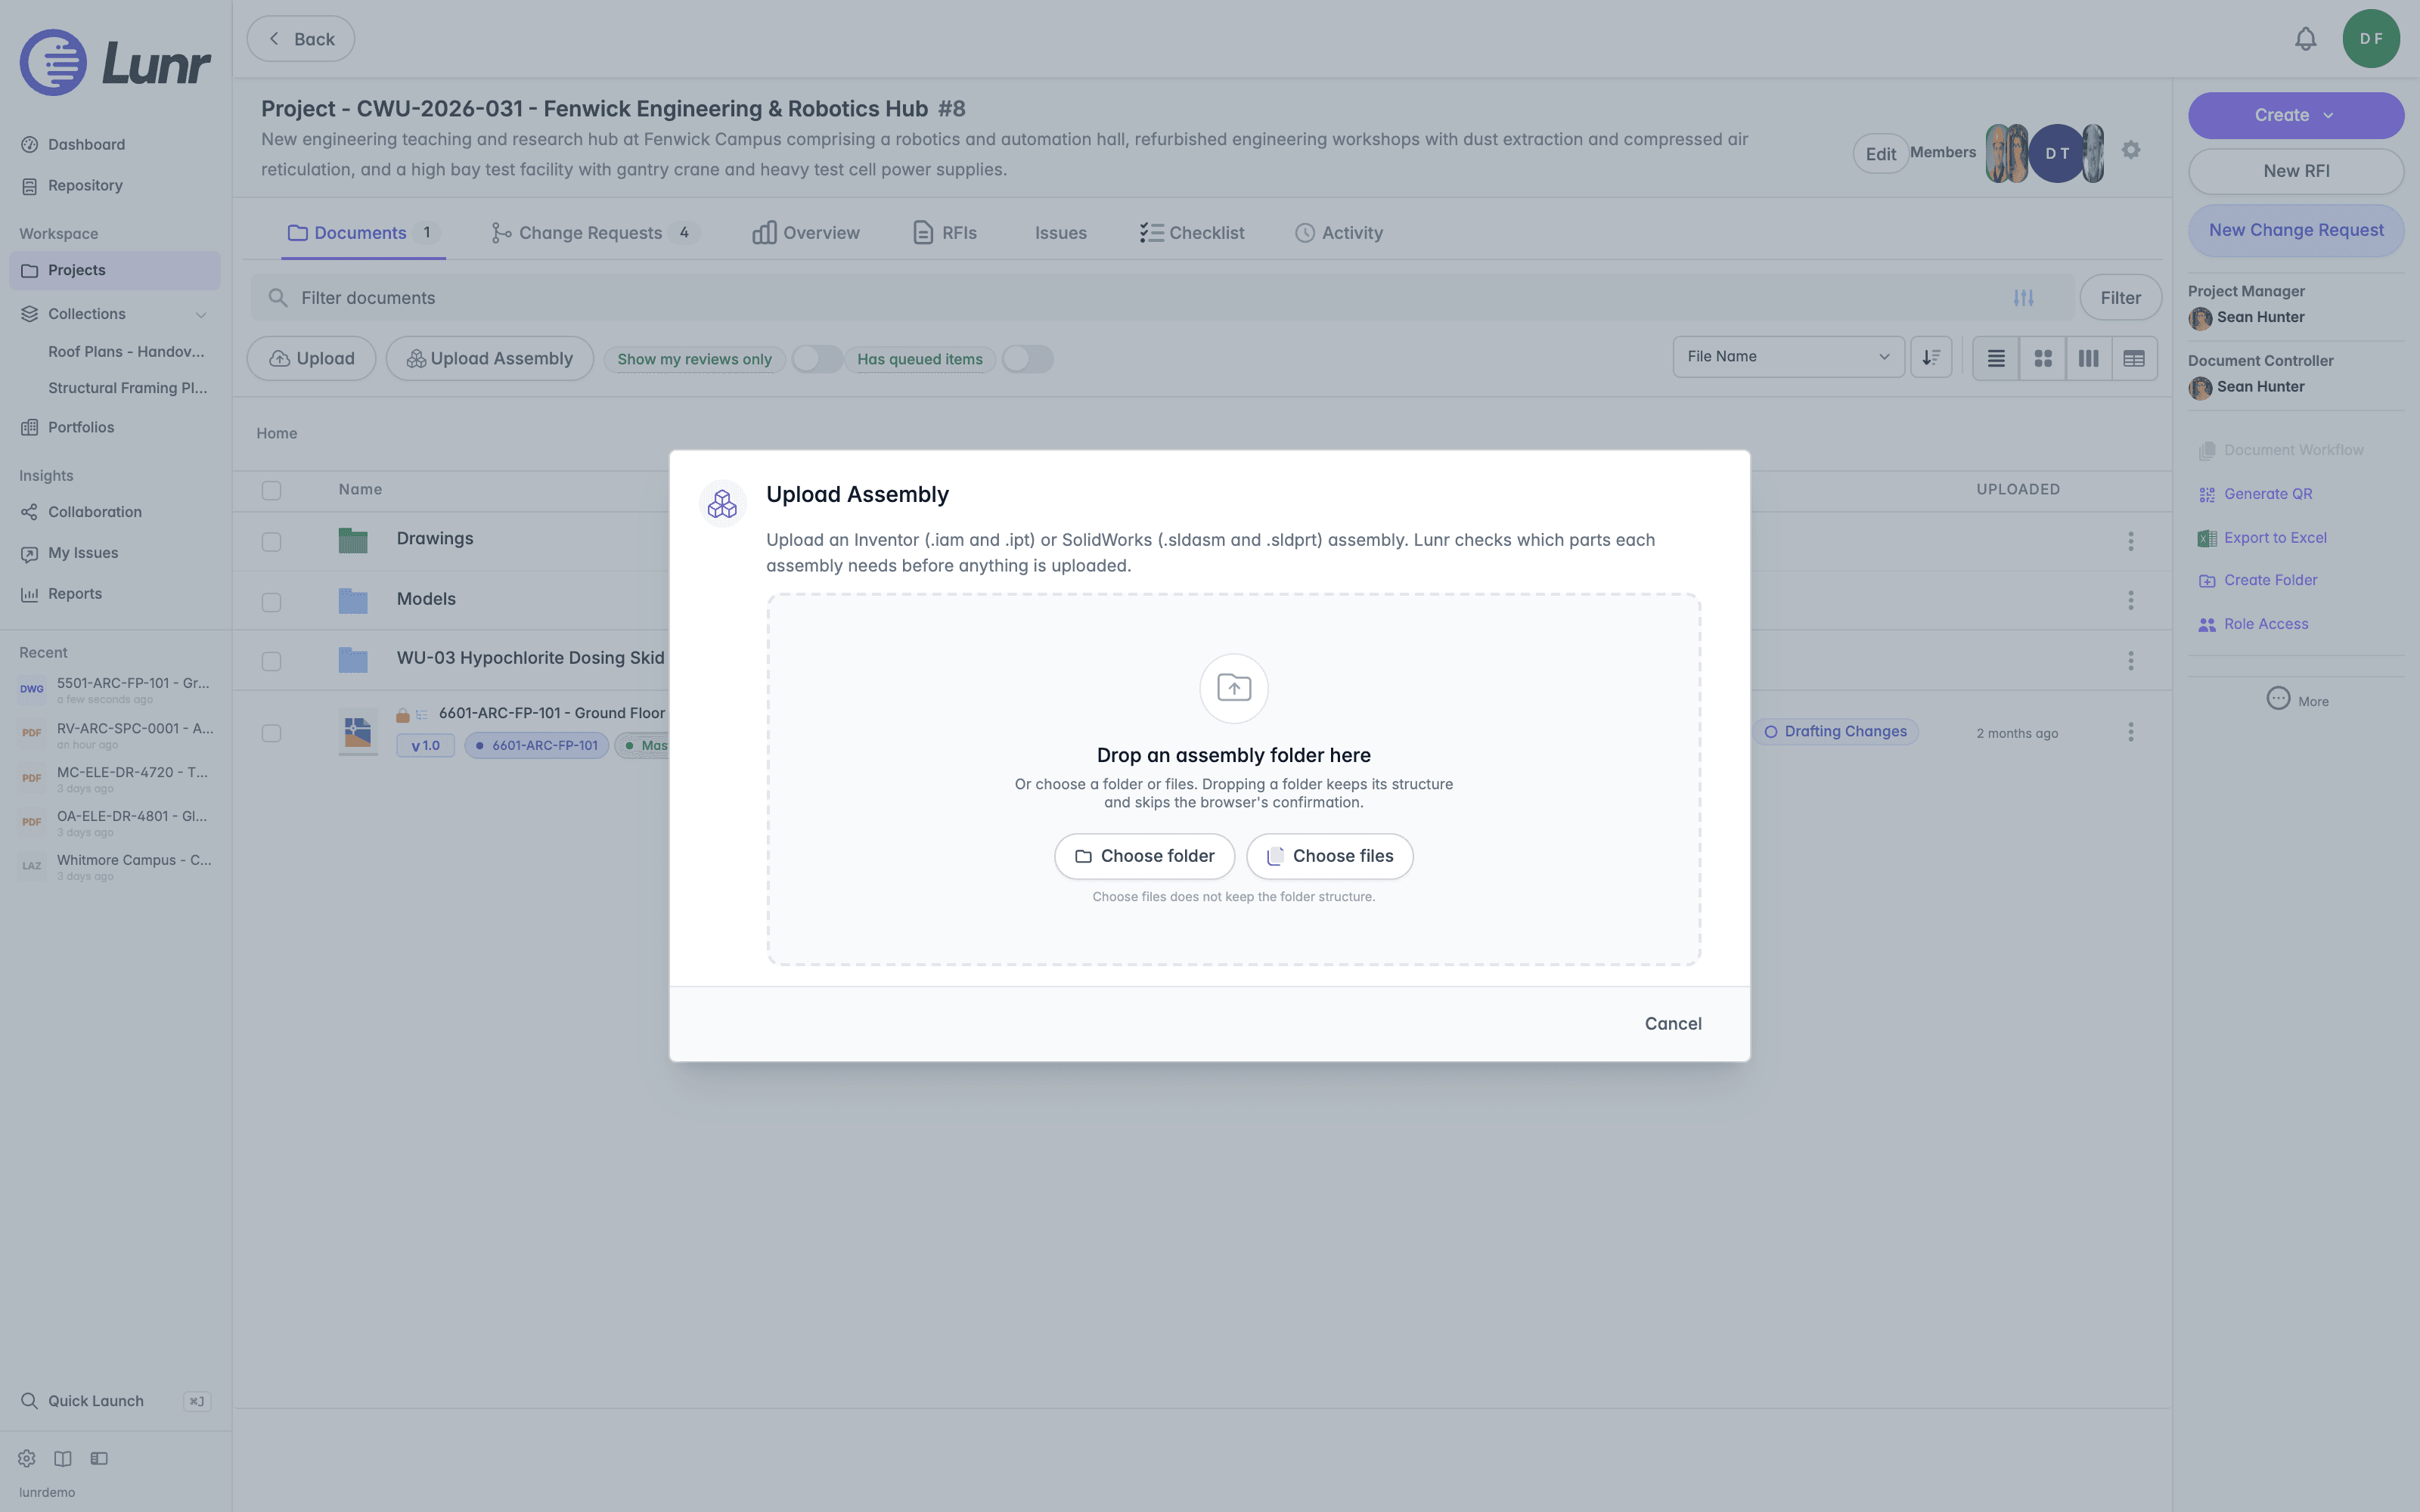
Choose or drop a folder to keep the layout of the folders inside it, so parts that the assembly finds by their folder are found in the same way. Choose files selects individual files instead and does not keep the folder structure, so use it to add a file that is missing rather than as the main way to upload.
Include every part the assembly uses in the folder you choose. Lunr checks the parts before it uploads, but a part that is not in the selection and not already in Lunr is reported as missing.
Reviewing the Check
Once the files are read, the dialog reports what it found along the top, for example "1 assembly", "1 sub-assembly", and "10 parts", followed by how many parts are in this upload, already in Lunr, or missing.
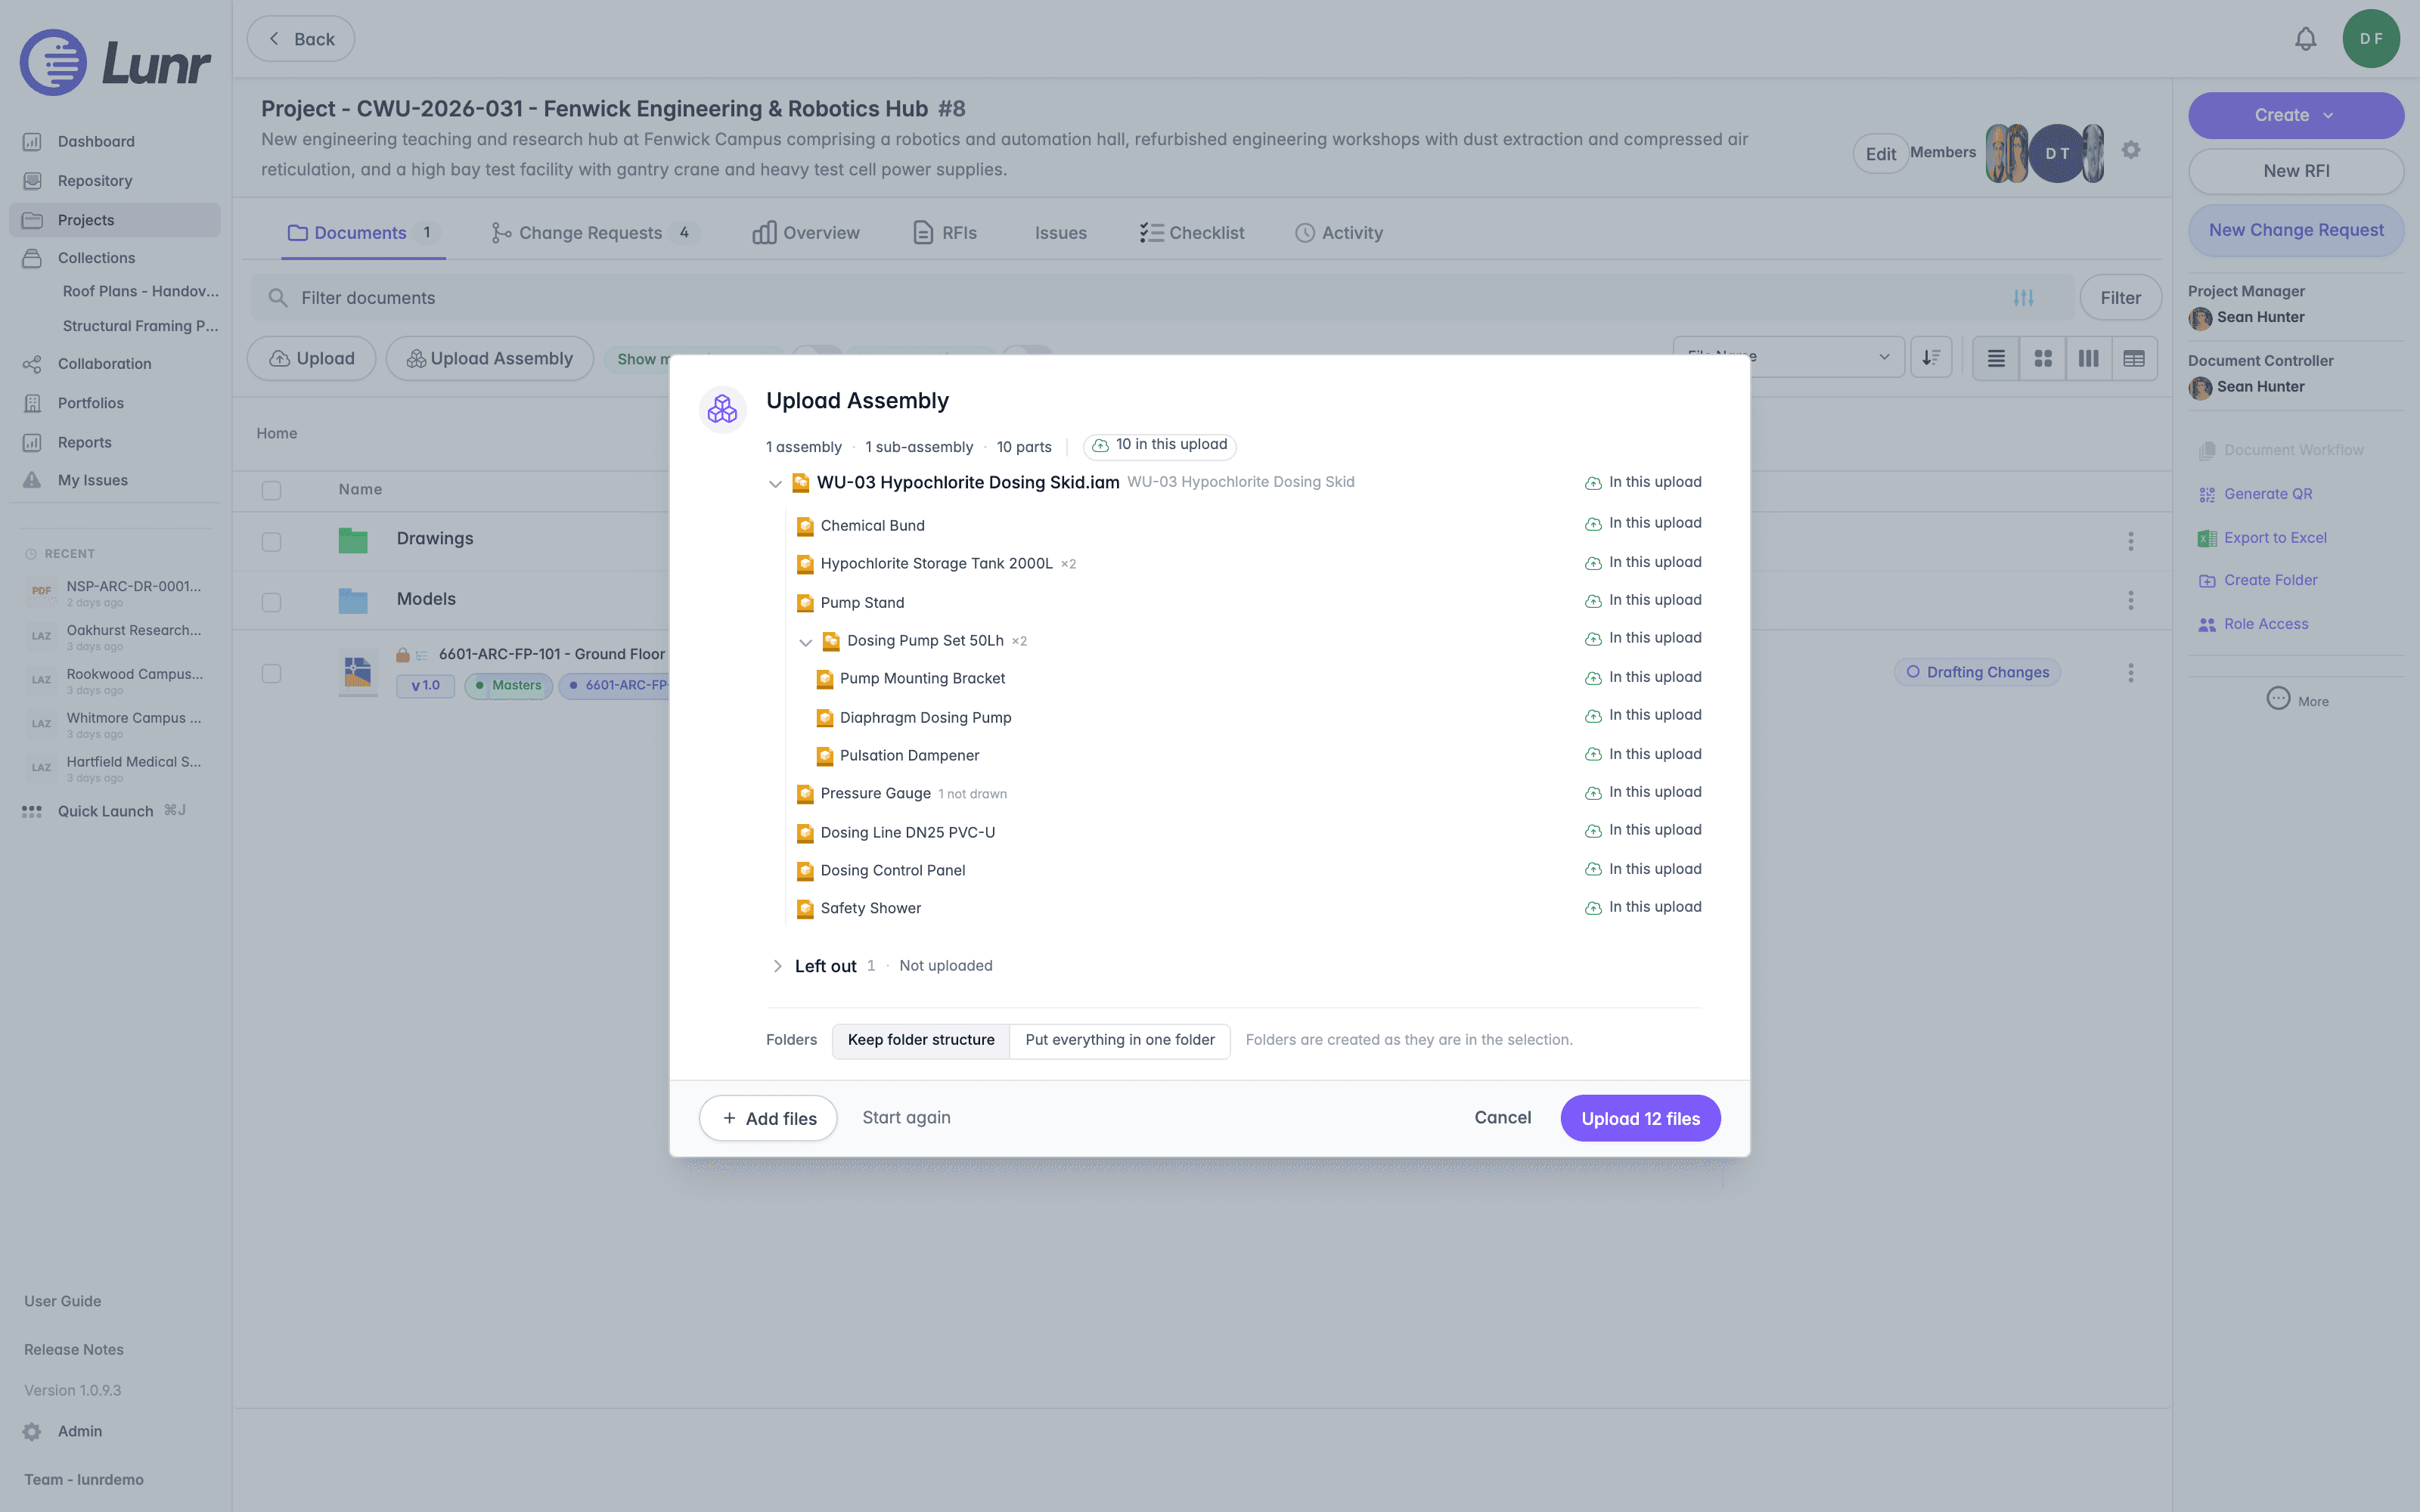
The assembly is listed as a tree. Each sub-assembly can be expanded to show its own parts, and a part that the assembly uses more than once shows how many times, for example "x2". Each row carries a status:
- In this upload means the file is in the folder you chose and will be uploaded.
- Already in Lunr means a document for this part already exists in Lunr.
- Missing means the assembly needs the part but it is in neither the upload nor Lunr.
- Stored in assembly means the part is held inside the assembly file itself.
- Suppressed and Not drawn mark parts that the assembly includes but does not draw in its 3D model. A part can also show a count beside its name, for example "1 not drawn".
- Could not be read means the file could not be opened to check it.
Where a row needs a decision, a dropdown on the row lets you choose what to do with it. For a missing part, you can add the file with Add files at the bottom left, or find a document of that name already in Lunr.
If more than one file has the same name, the assembly uses the one it resolves to by its folder, the same way the CAD application does. Lunr lists the copies so you can see which is which, and you cannot pick a different one here.
Left Out
Files that are not CAD files Lunr can use are listed under Left out and are not uploaded. Each shows the reason, for example "File type not supported" for the hidden .DS_Store file that macOS adds to folders.
Folders
When the files sit in folders, choose how they are filed in the project:
- Keep folder structure creates the folders as they are in your selection.
- Put everything in one folder files every document together.
Keeping the folder structure needs permission to create the folders. If you do not have it, the dialog says so and you can put everything in one folder instead.
To start over with a different folder, select Start again. To leave without uploading anything, select Cancel.
Upload Progress
After you select Upload, each assembly and sub-assembly in the dialog shows its parts moving through Waiting, Uploading, and Uploaded, with a count such as "0 of 3 parts uploaded".
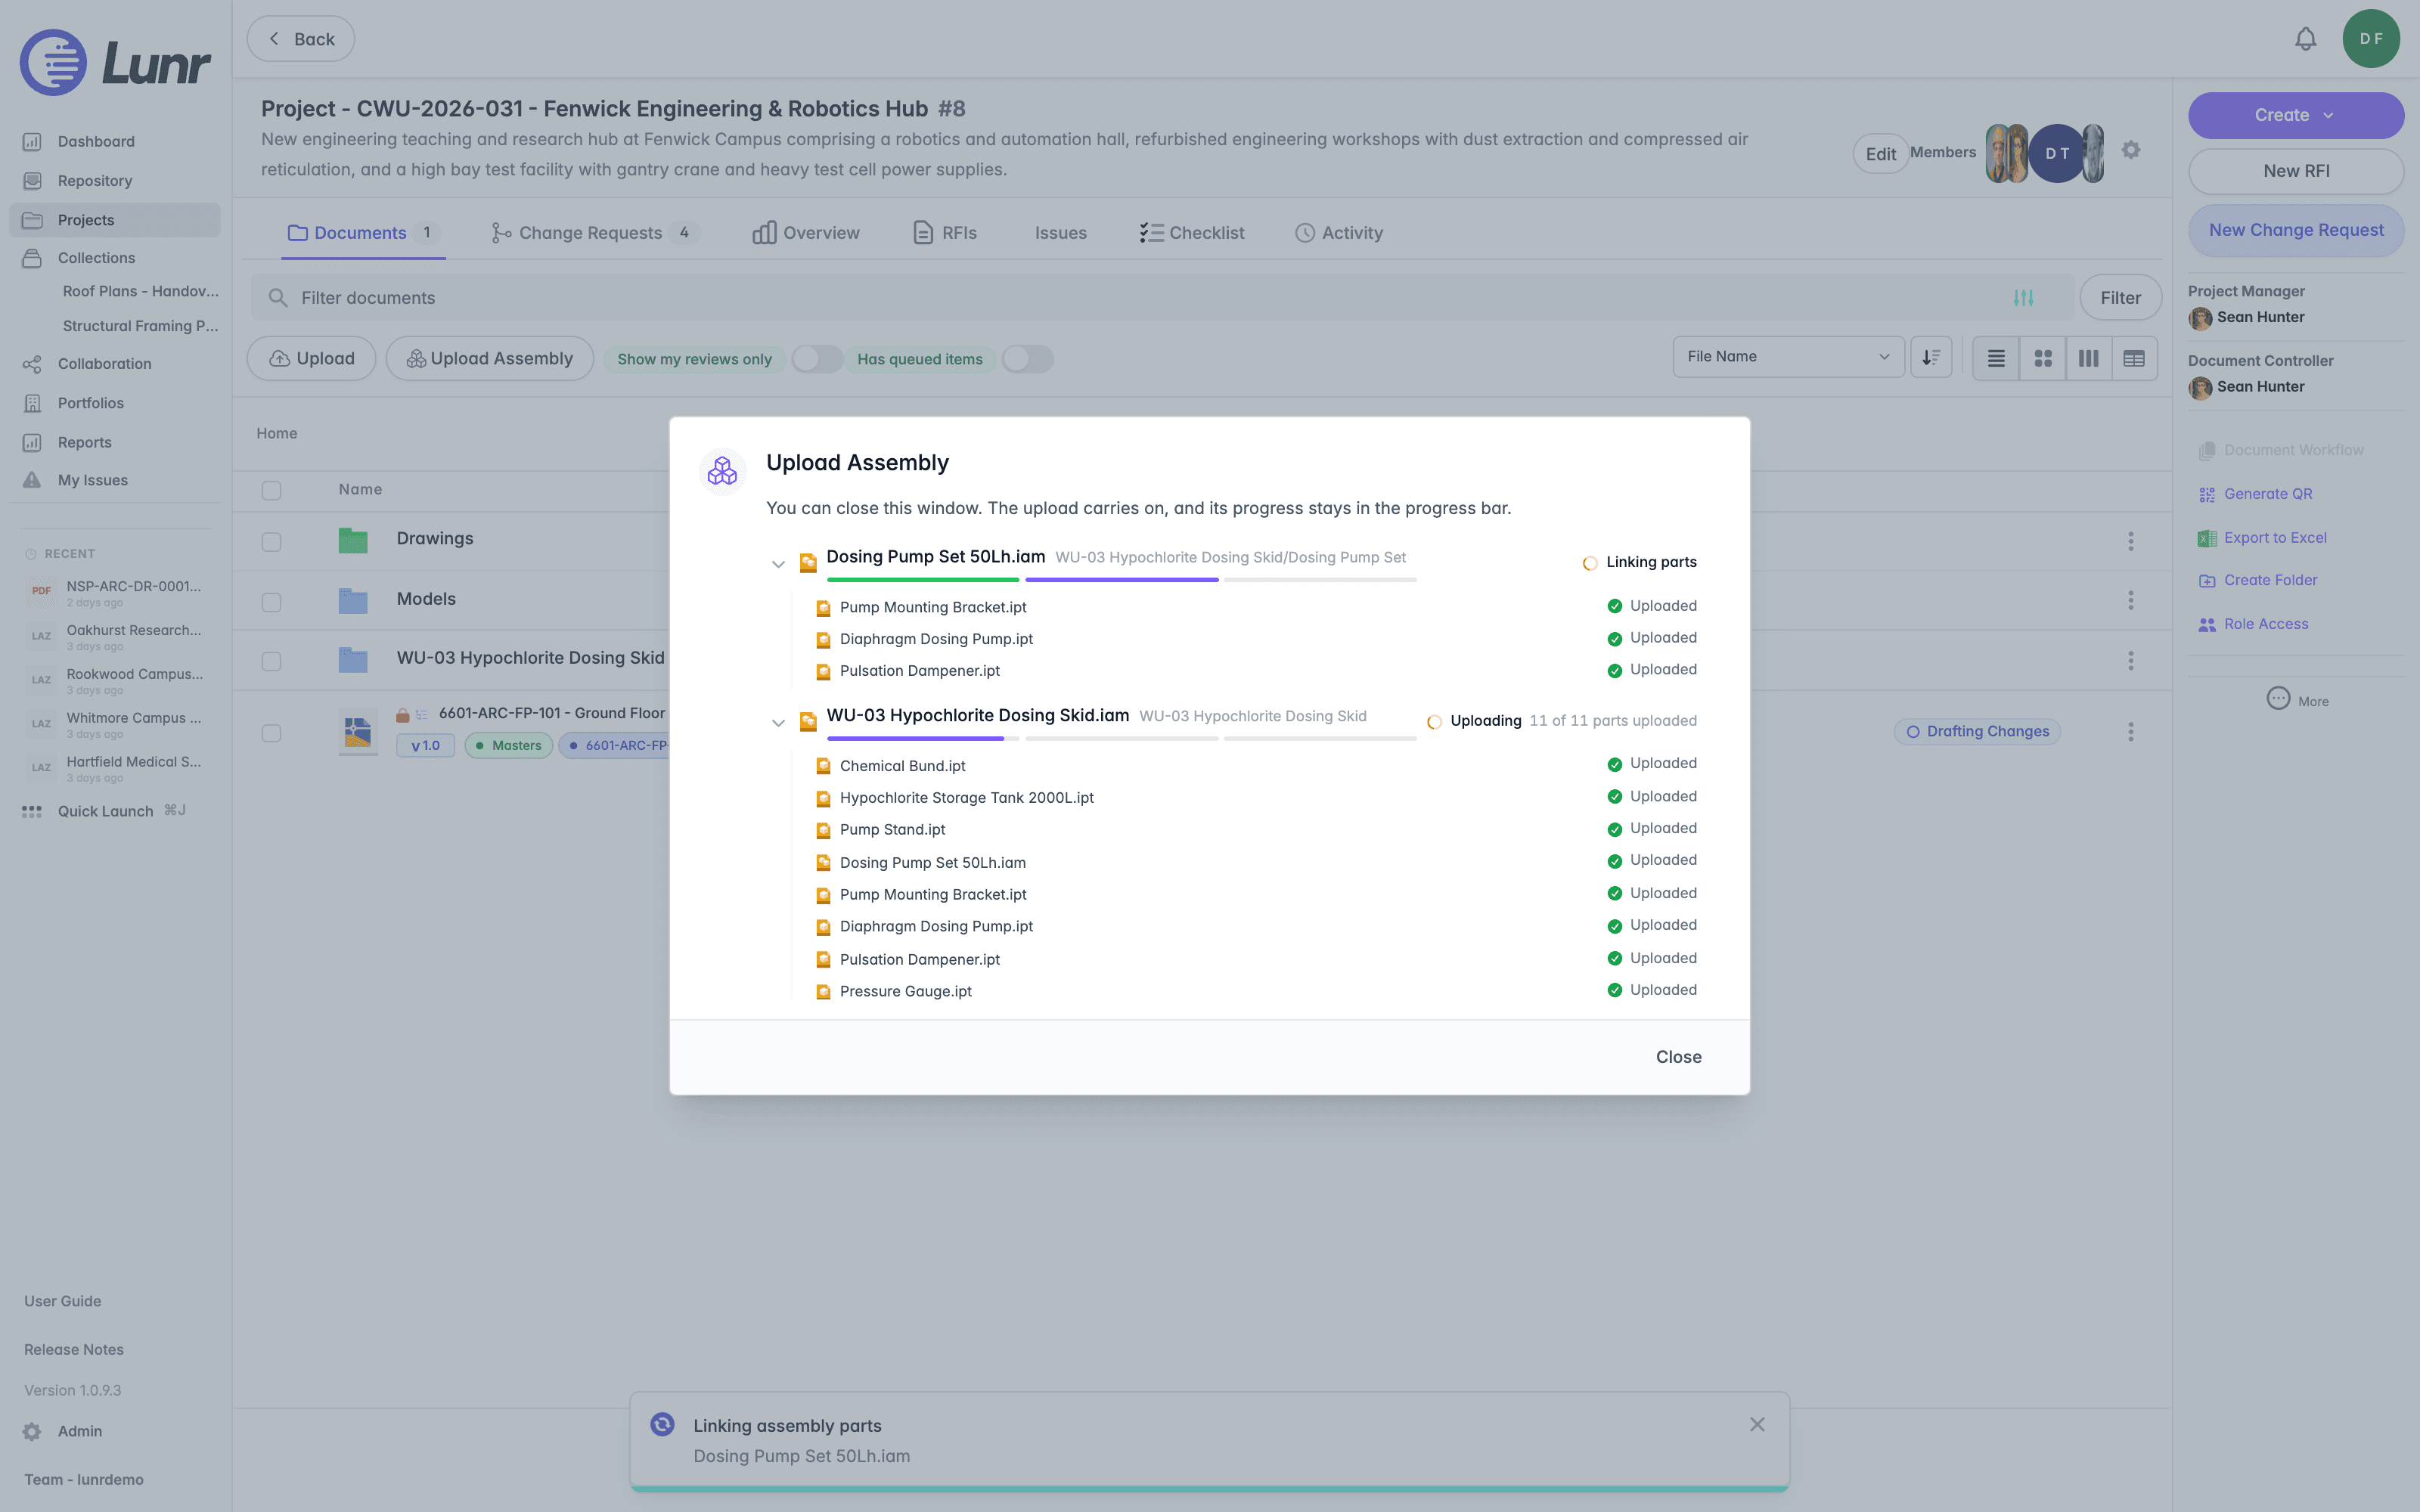
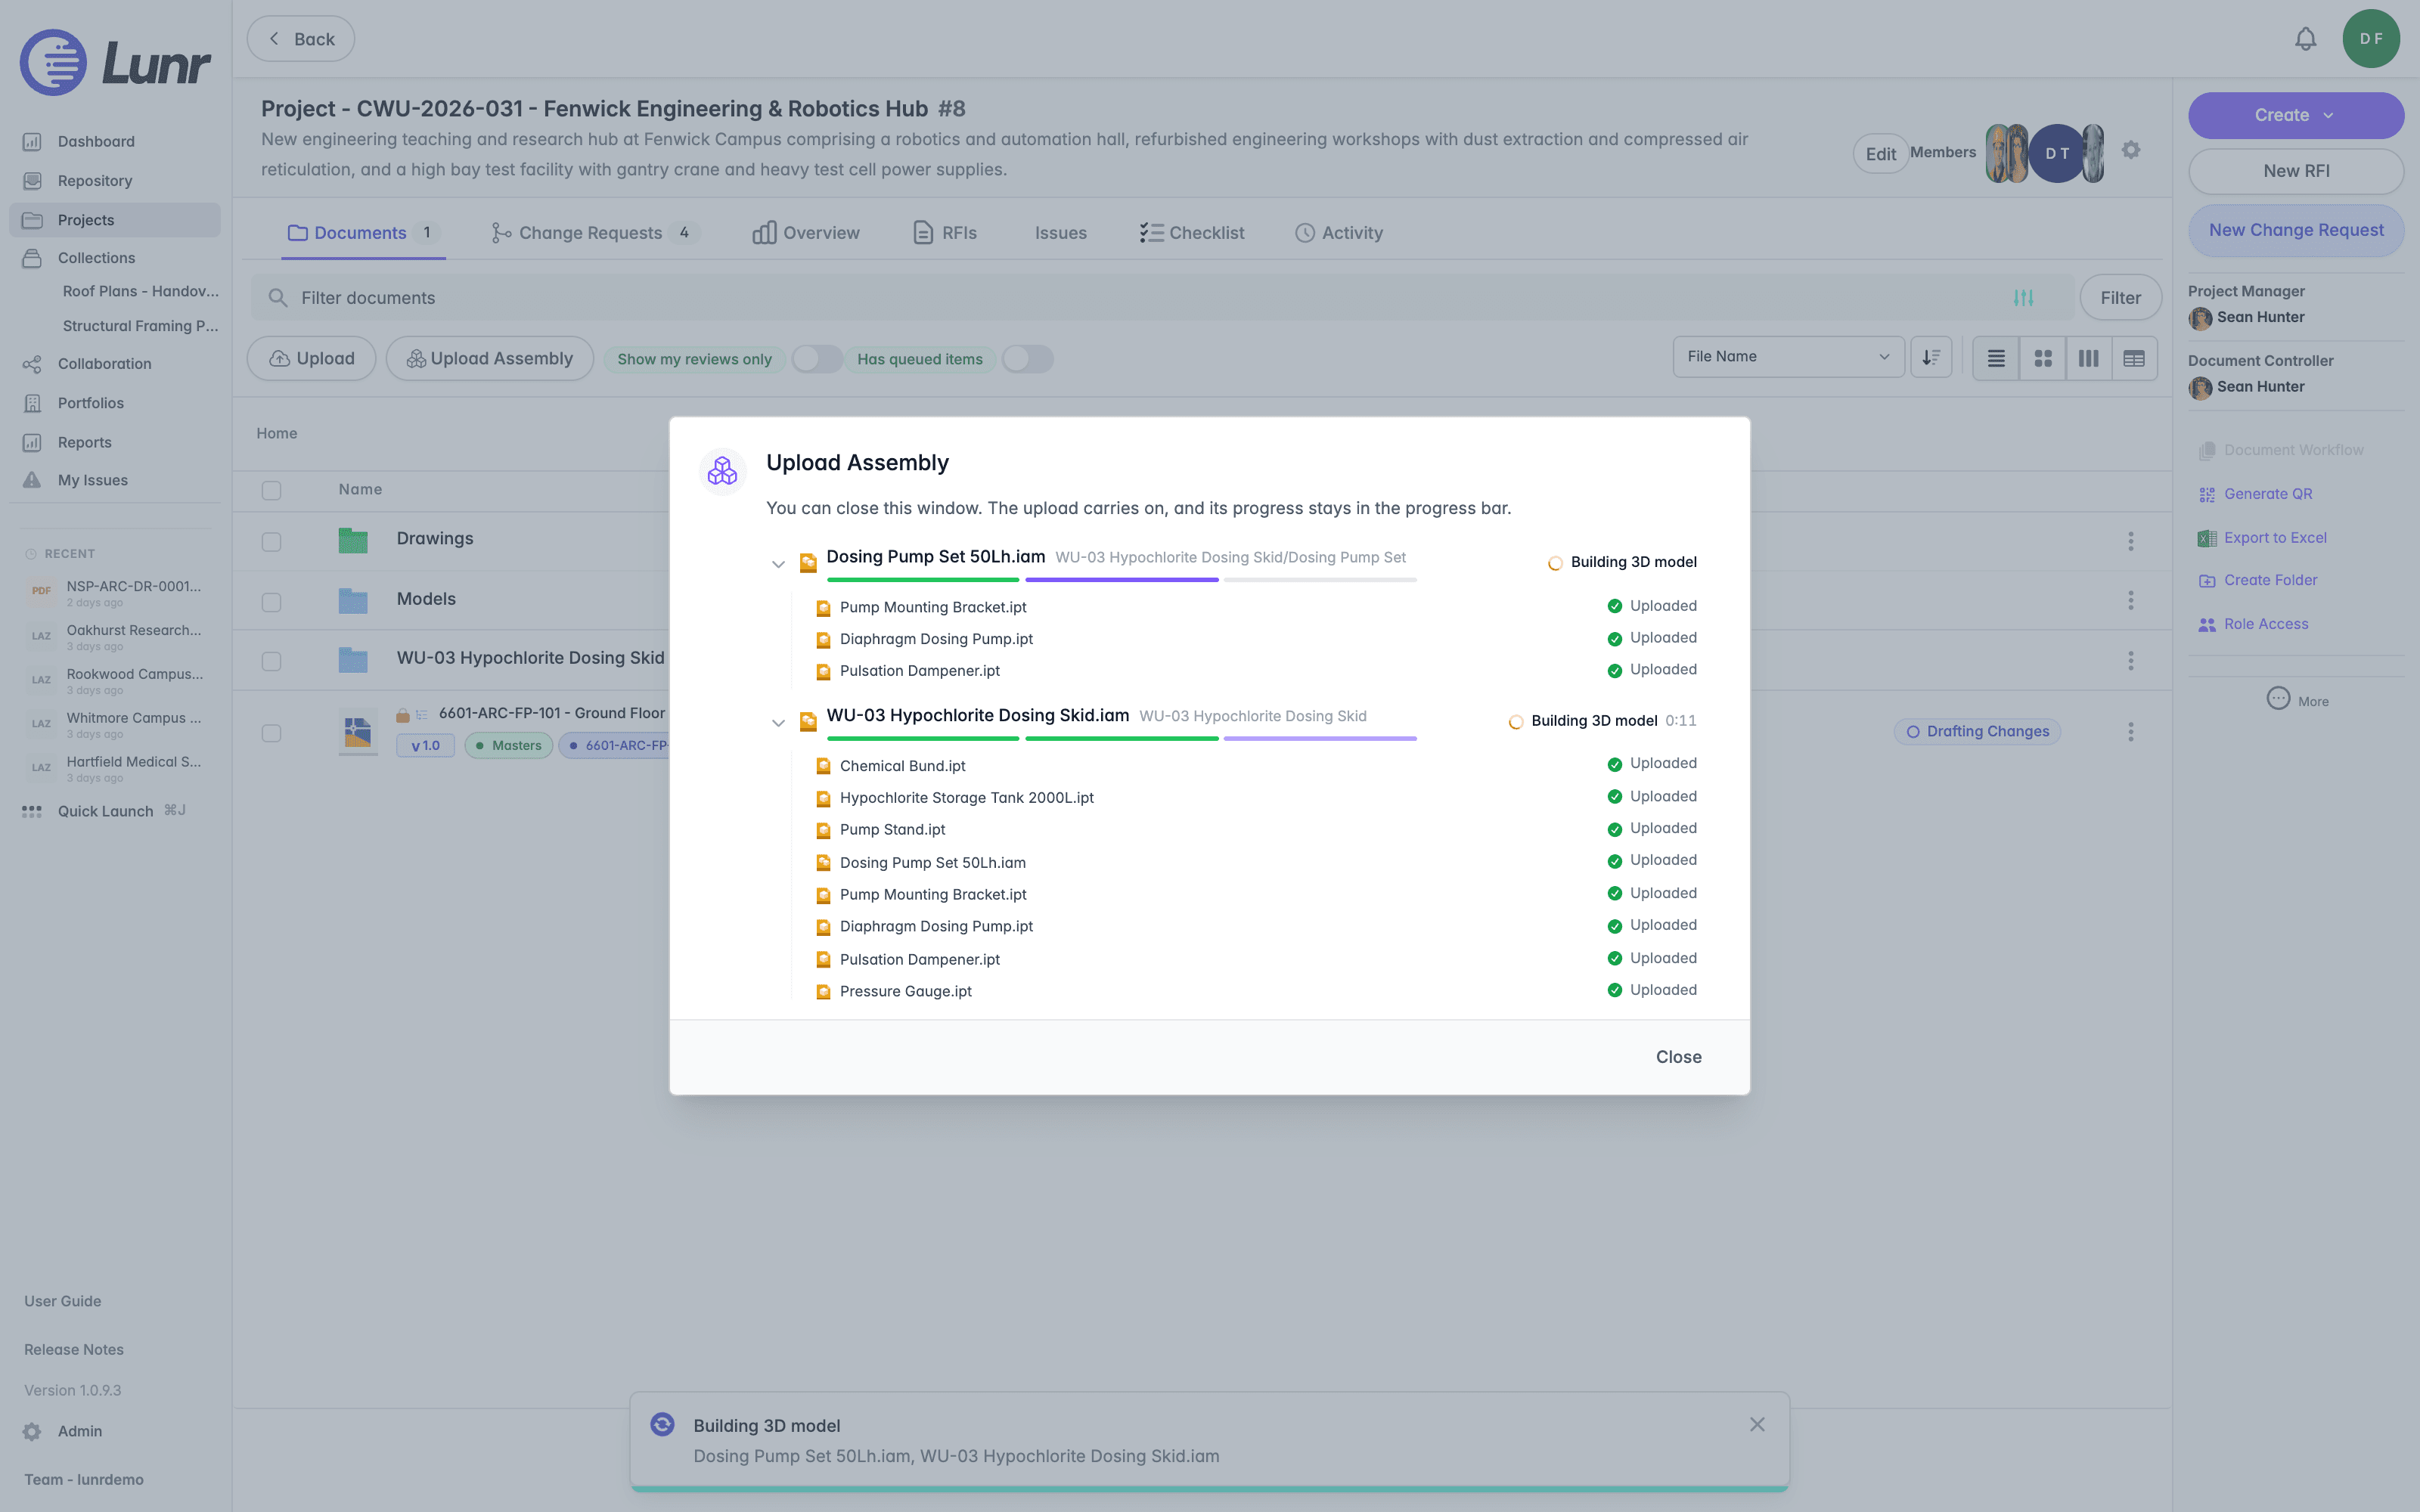
Once the parts are uploaded, Lunr links them to their assembly and then builds the 3D model. The assembly's row reads Building 3D model while this runs, with a timer beside it.
When everything has finished, the dialog reads "Upload complete." and each assembly shows 3D model ready.
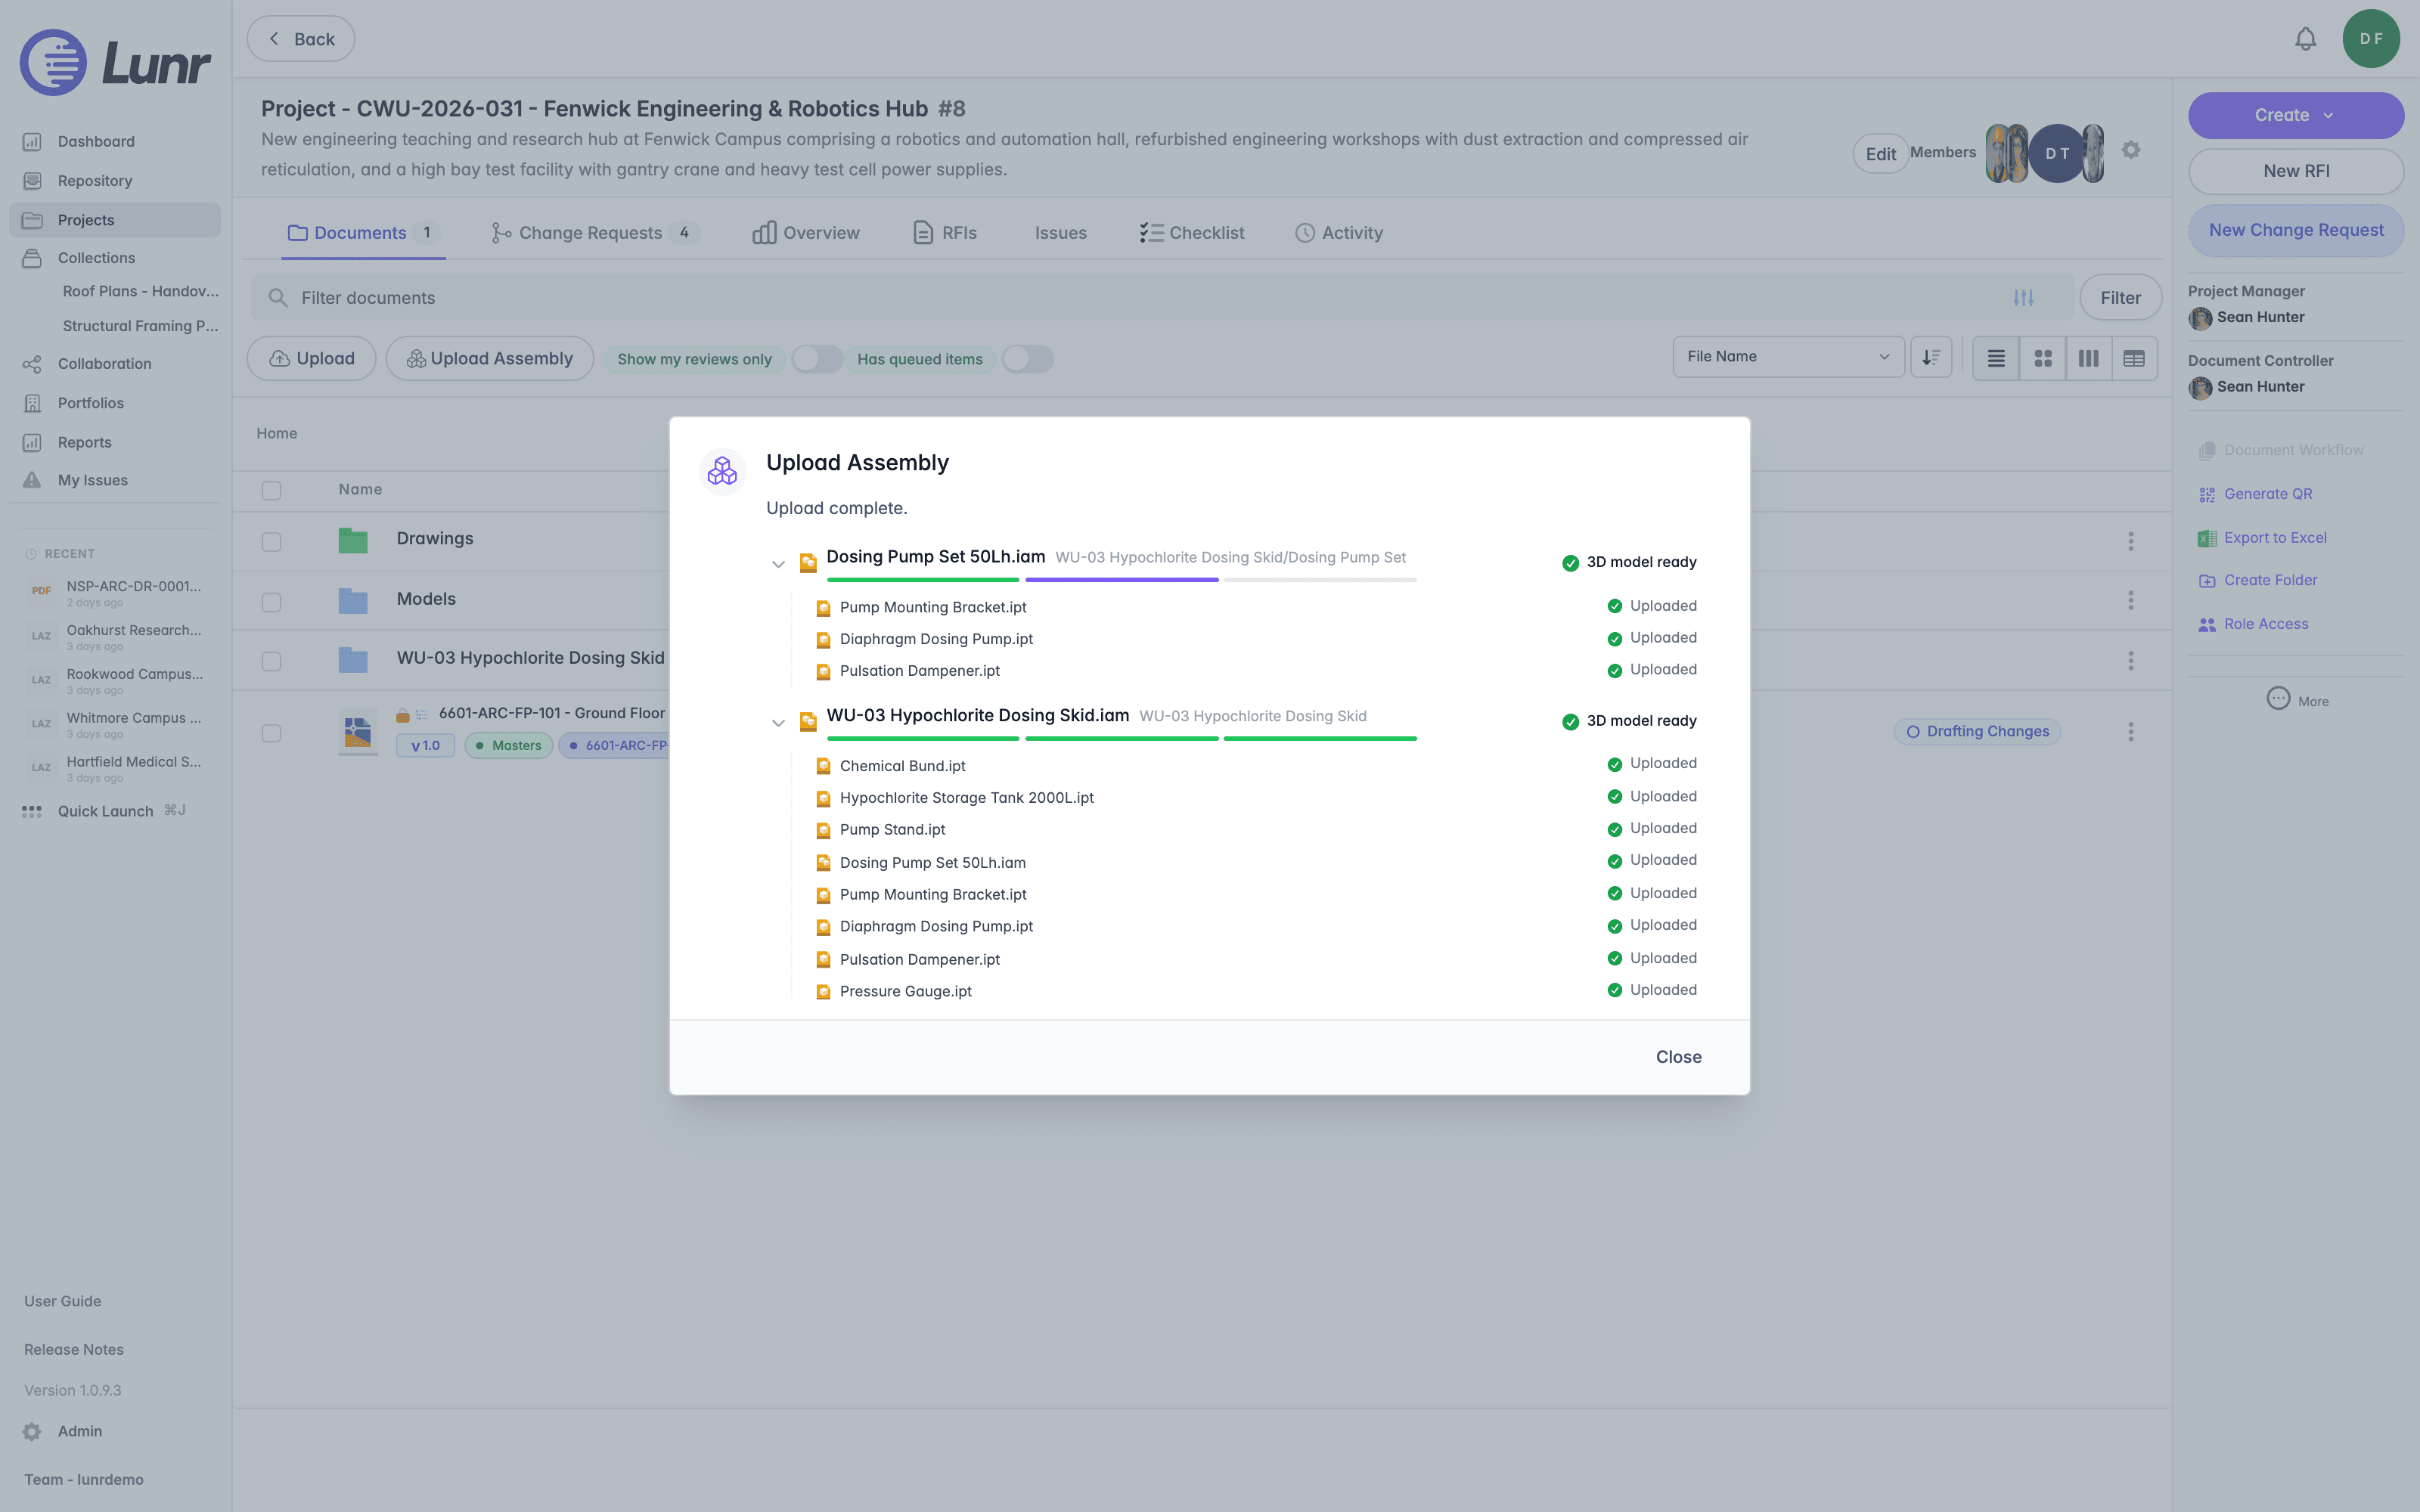
You can close the dialog while this is running. The upload carries on, and its progress stays in the progress bar.
After the Upload
The assembly and its parts are now documents in the project. With Keep folder structure chosen, they sit in a folder named after your assembly folder, with sub-folders matching the ones you uploaded.
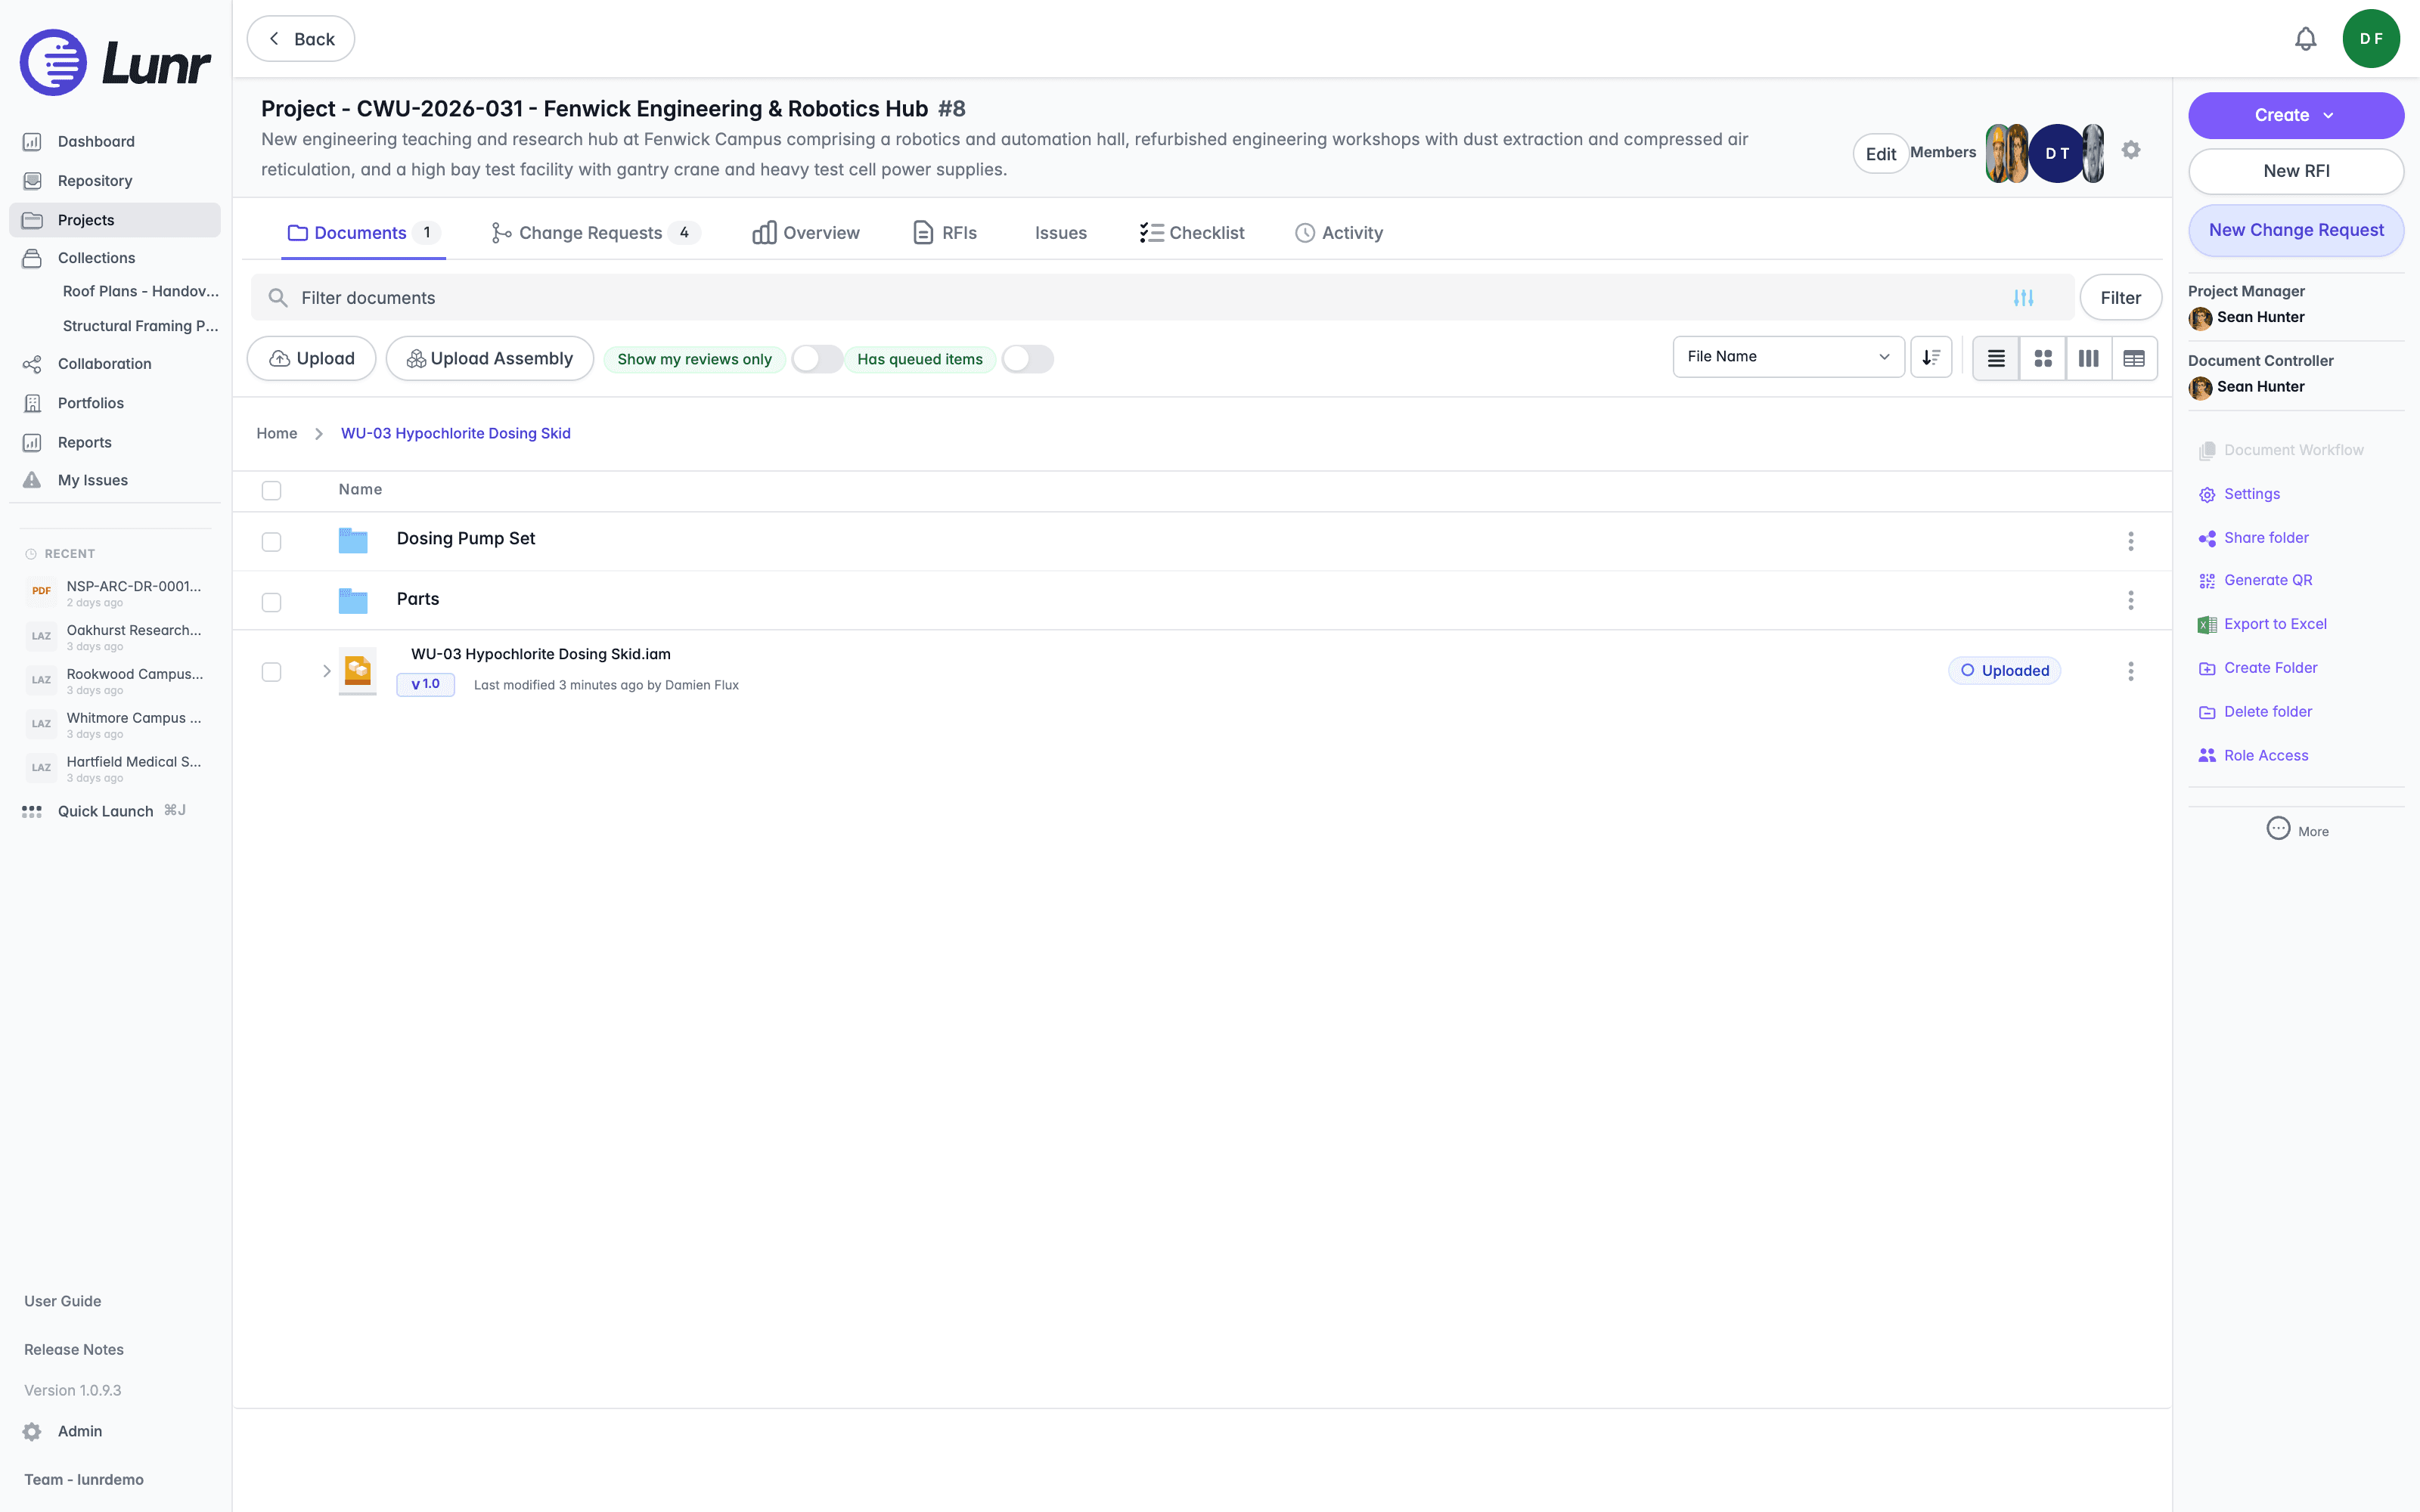
Parts in the Document List
An assembly's row in the document list has an arrow at its left edge. Select it to show the assembly's parts directly beneath the row, and select it again to hide them. The label for the arrow reads "Show the parts of" followed by the assembly's name.
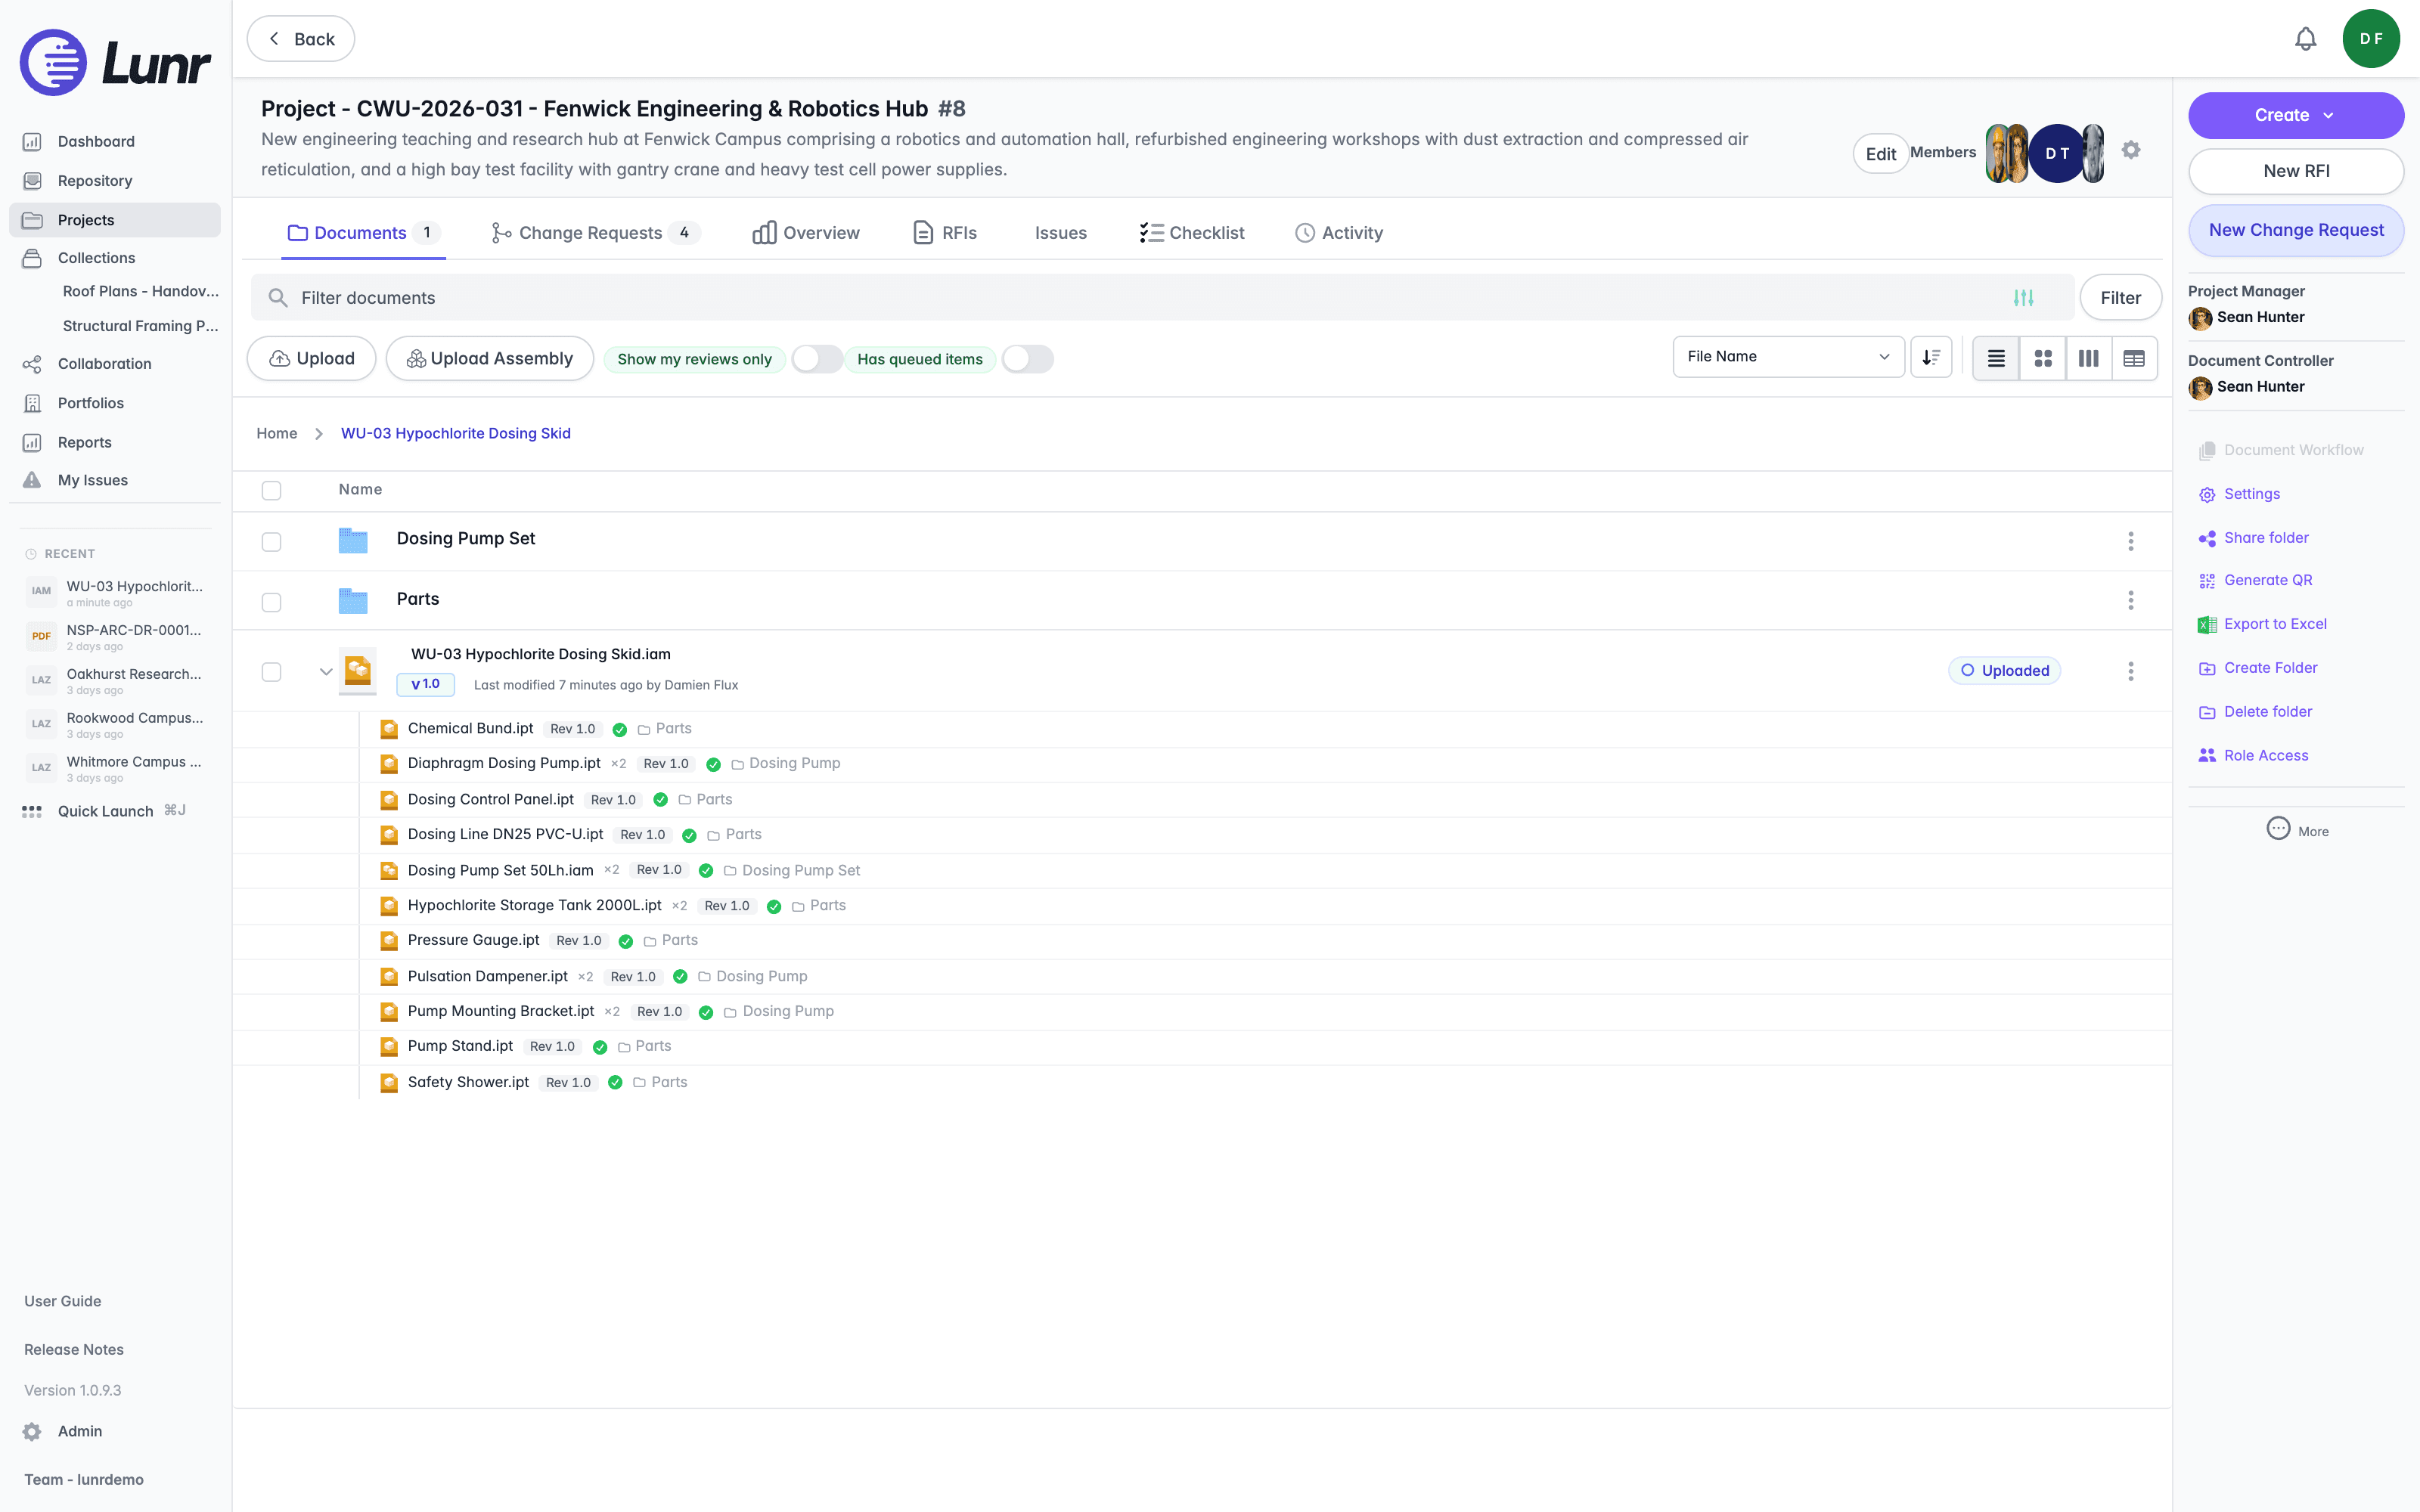
Each part has its own line, showing:
- The part's name, with a ×2 beside it where the assembly uses the part more than once. Select the name to open the part's document, where it can be opened.
- The revision of the part the assembly is linked to, for example Rev 1.0.
- A green tick where the part is present. A part that is not present shows a status label instead, and pointing at it explains why.
- The folder the part is filed in.
The list is flat. A sub-assembly such as Dosing Pump Set 50Lh appears as a line of its own, alongside the parts of the assembly and of its sub-assemblies.
While the parts are loading, placeholder lines appear. If they cannot be loaded, the list reports the problem and offers a retry button.
The Assembly Document
Open the assembly as you would any other document. Its page shows a thumbnail of the 3D model Lunr built, and any tags the project requires are still to be filled in, in the same way as for other uploads.
Viewing the Assembly
Select the thumbnail on the document page to open the assembly in the 3D viewer. The viewer lists the assembly's parts beside the model, covered in Assemblies.
To change which documents hold an assembly's parts later, use Link parts from the document's actions, covered in Document Actions.
Importing Documents
Bring in many documents and their tags at once inside a change request, with an import package or an import spreadsheet, and build the spreadsheet that drives them.
Uploading Point Clouds
Upload LAS and LAZ point clouds into Lunr like any other document, covering what to expect while Lunr prepares a cloud for viewing, how to open it, and how to view several point clouds together in a scene.