Users
Manage the people who can sign in to Lunr, invite internal and external users, and control the roles and document permissions each person holds.
Overview
Each Lunr user can be assigned to groups, roles, and companies. This facilitates restricting a user's access to certain documents or projects.
- A User is assigned to one or more Groups.
- A Group is granted one or more Roles.
- A Role defines the appropriate permissions.
Access rights are never granted to a person directly. A role bundles a set of access rights, groups are granted roles, and users belong to groups, so changing what someone can do usually means changing their group membership rather than editing the person. See Groups and Roles.
The Users page lets you perform the following tasks.
- Invite new users
- Search for users
- Manage user roles, permissions, and access
The Users Page
The Users page presents a comprehensive list of Lunr users. Use the search bar to quickly find a particular user, or use the Active, Invitation Pending, and Disabled filters to filter the list by user status. The Company dropdown list filters the list to a single company. Select the user to see more detailed information.
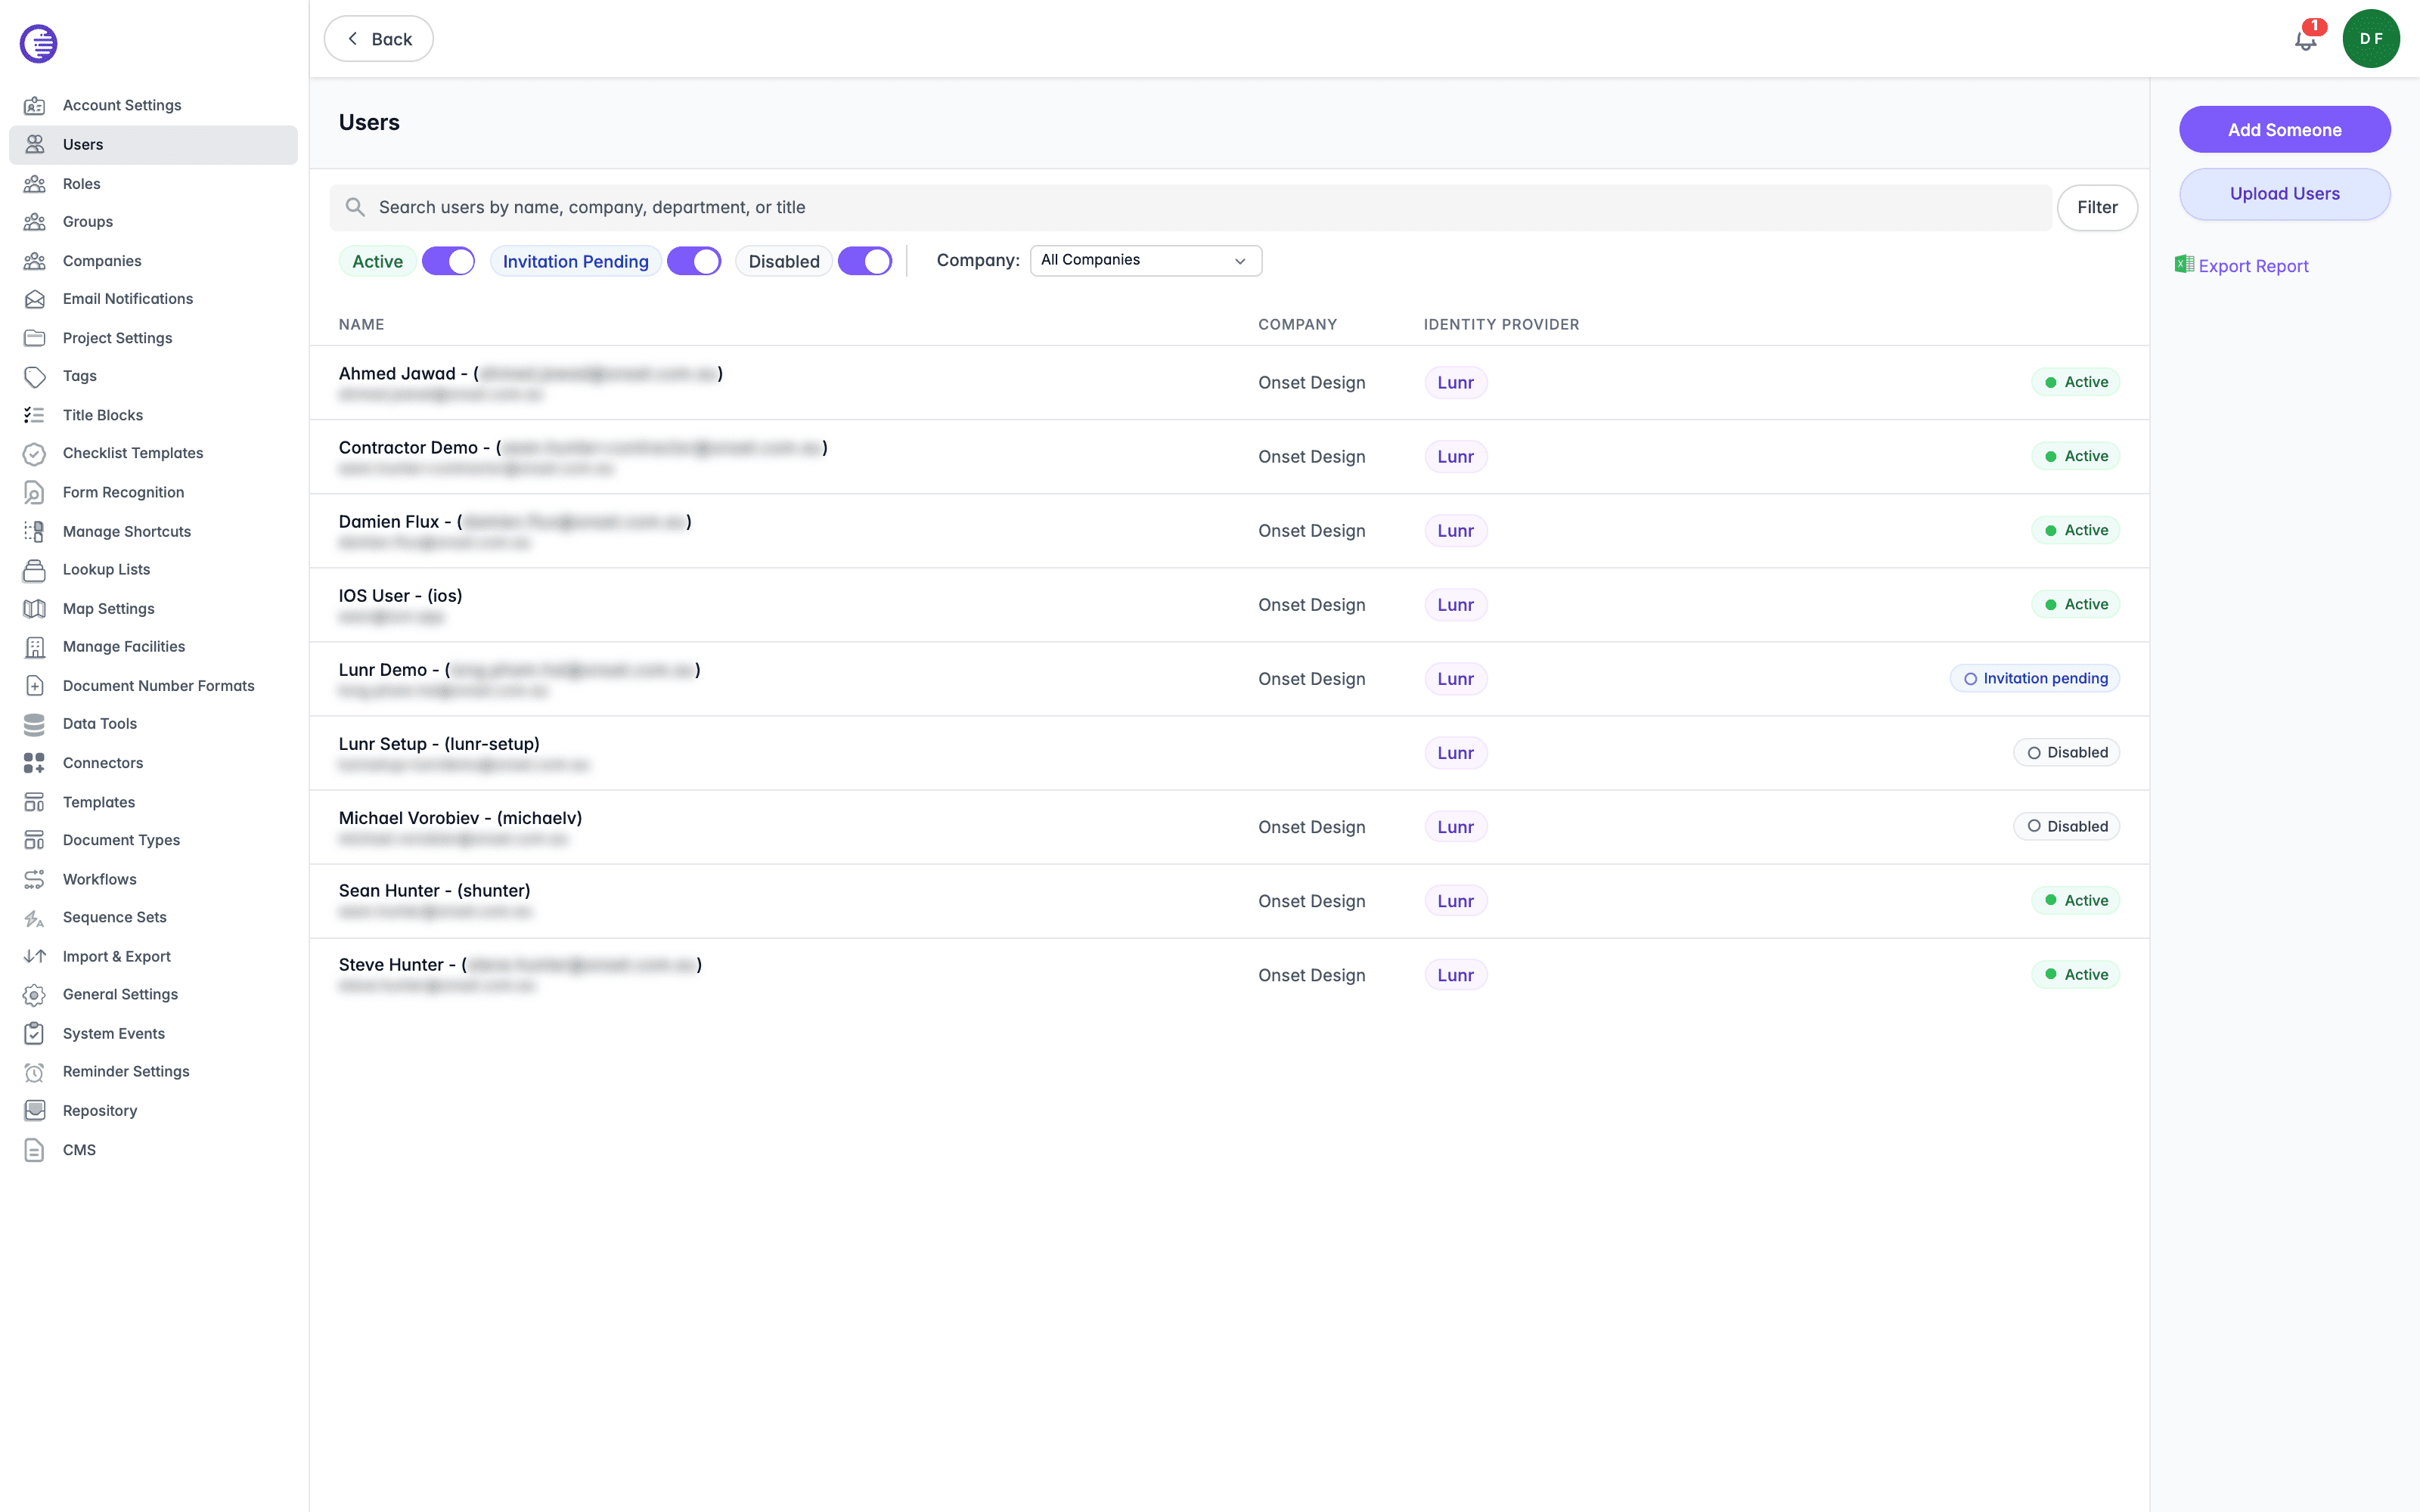
The list also shows an Identity Provider column, badged Lunr for users who sign in with a Lunr username and password, or SSO for users who sign in through your identity provider.
Select Export Report to download a report of the users in the list.
Bulk User Upload
Select Upload Users to add or update many users at once from a spreadsheet, rather than inviting each one individually. The upload accepts .xlsx files only. This option is only visible to users holding the Administration Pages access right; holding Manage Users alone is not enough to see it.
While the upload is processing, a progress banner shows live counts of users added, updated, renamed, activated, deactivated, and skipped. On success, the banner dismisses automatically after 10 seconds. If the upload fails, the banner stays open so you can review the error.
Users and Companies both support bulk upload, but not with the same file type. Users takes an .xlsx file; Companies takes a .txt file. Check the format before you prepare a file for upload.
Invite a New Internal User
Internal users are managed by IT using Active Directory (AD) Groups. These users can log in without a username or password by using the SSO button. To add an internal user, follow your existing company policies for granting access to applications.
Invite a New External User
External users are generally employed by third-party organisations and receive access only to the areas of Lunr necessary for their job functions. These individuals must use a username and password, in addition to providing a multi-factor authentication code to further enhance security.
- Select the Add Someone button to invite a new user to Lunr.
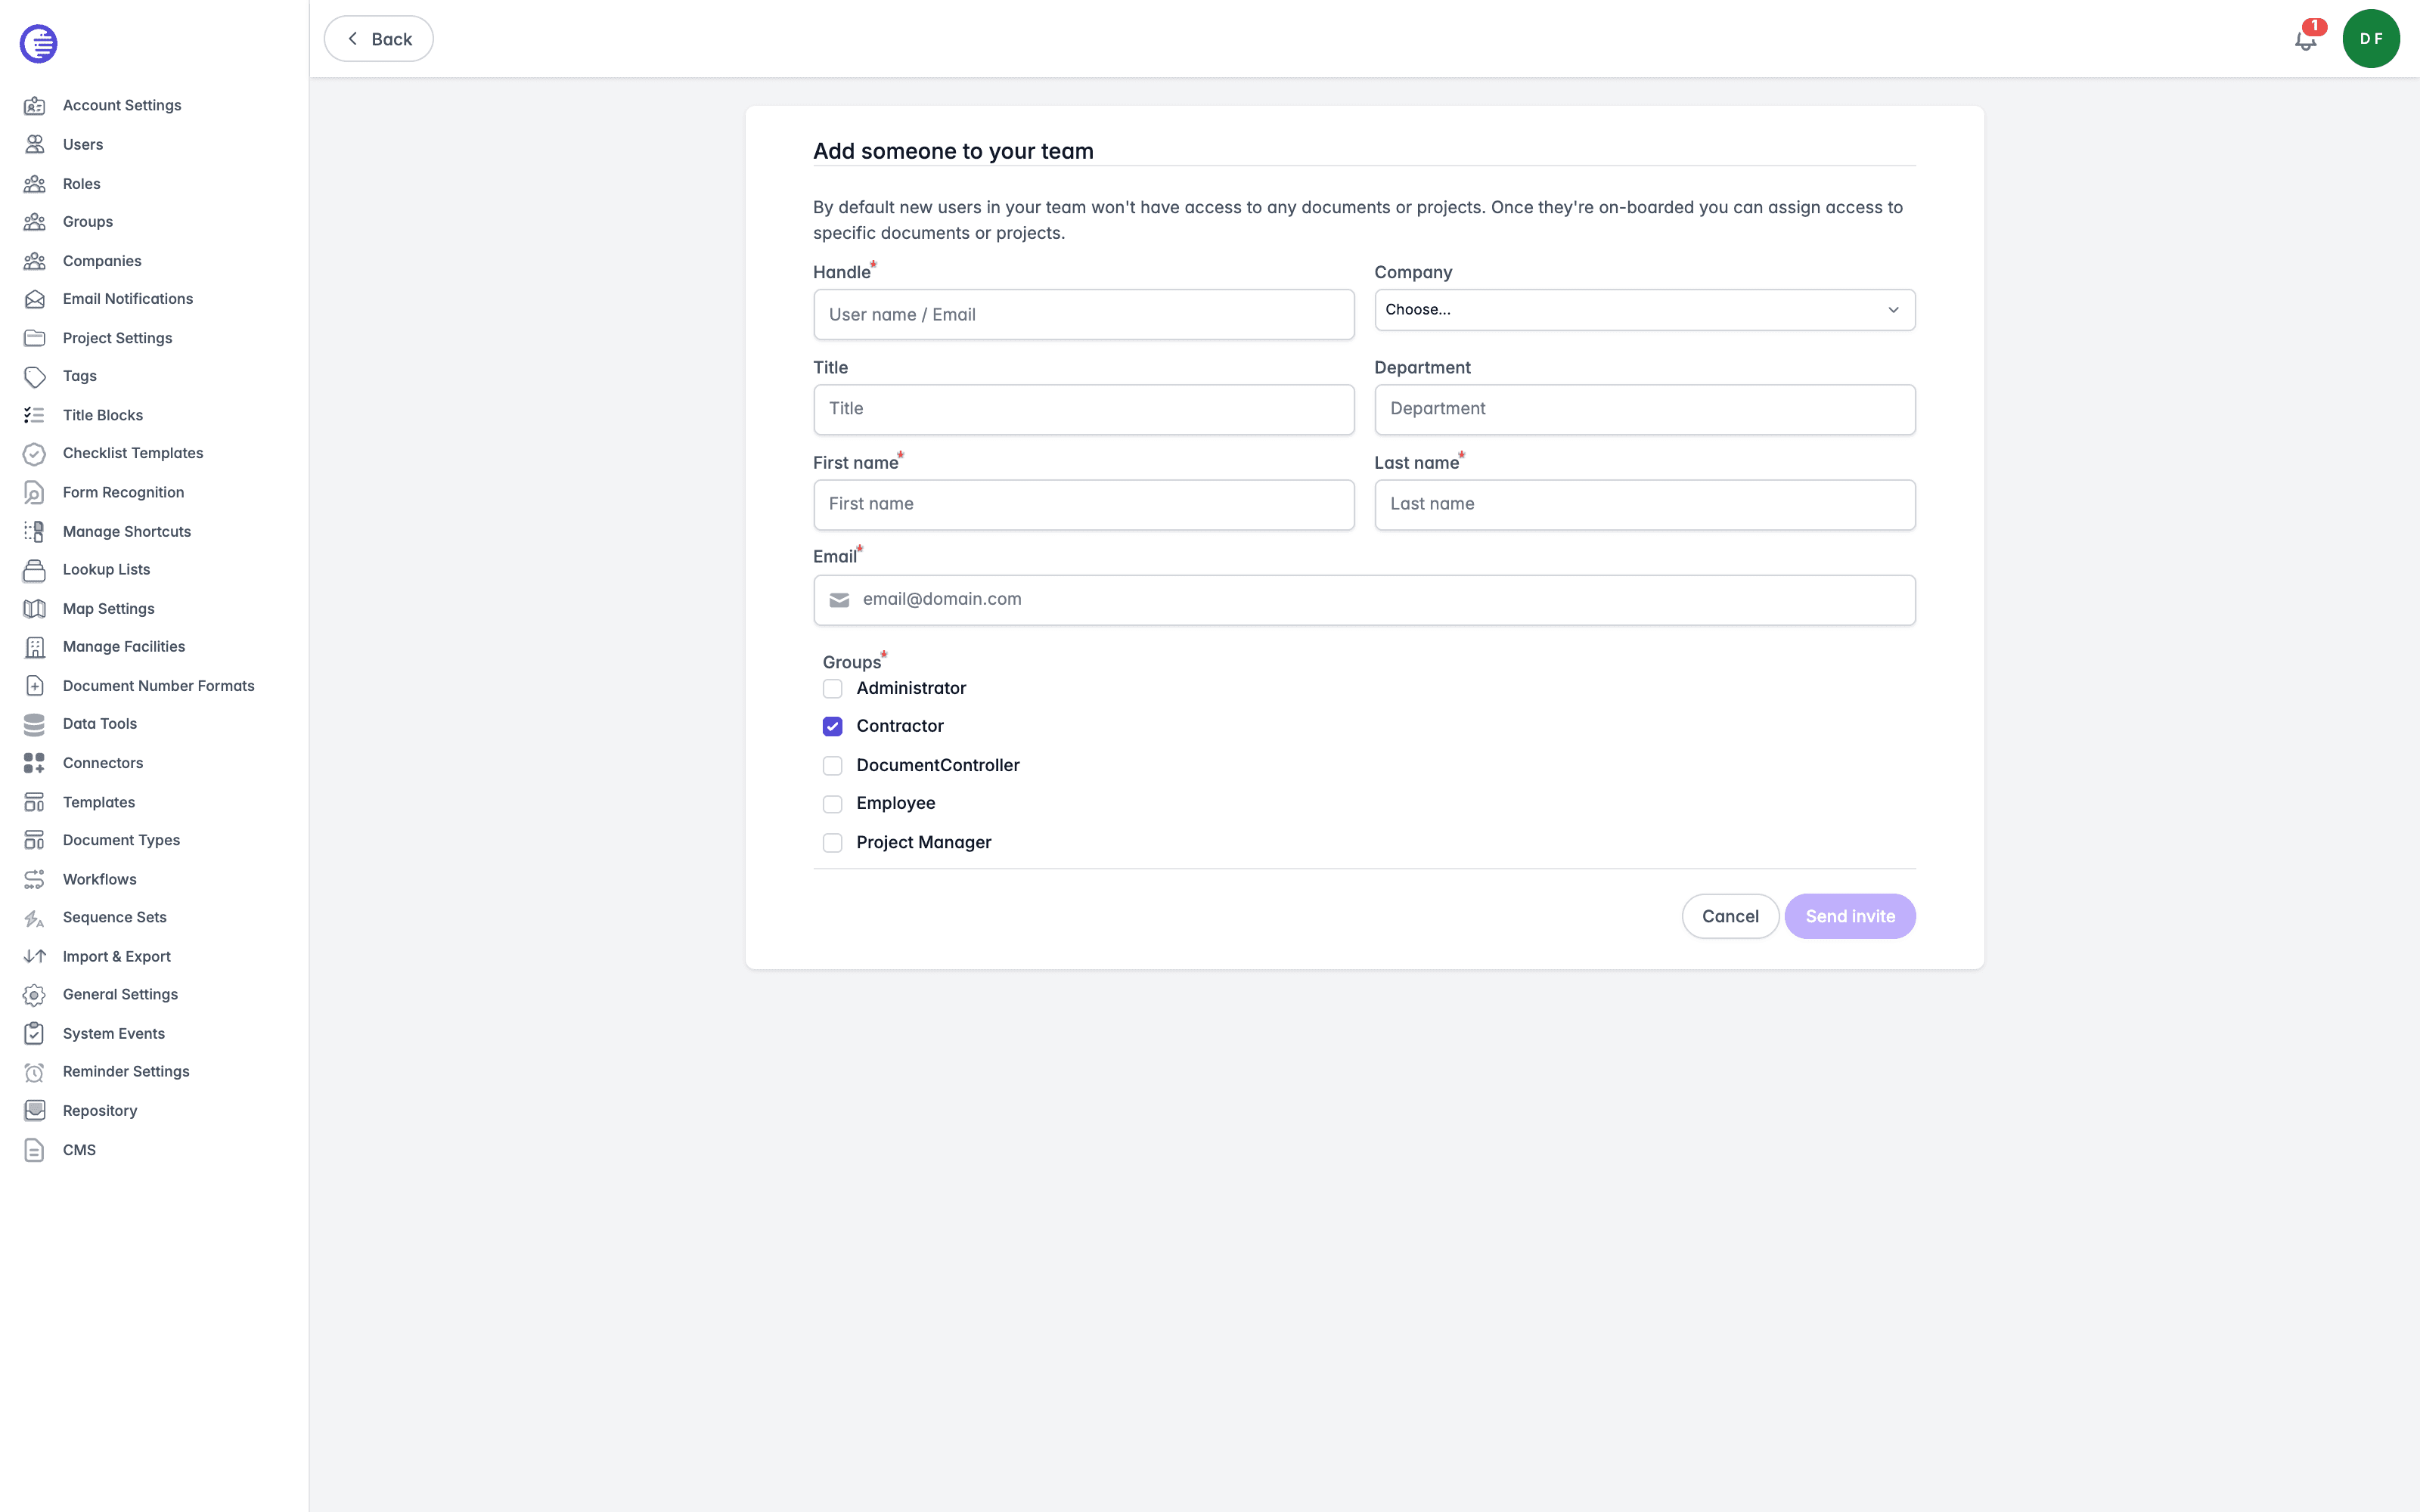
- Complete the fields and choose which groups the user should belong to.
- Handle is the user name or email the person signs in with, and is required.
- Company is the company the person belongs to.
- Title is the person's job title.
- Department is the person's department.
- First name is required, up to 26 characters.
- Last name is required, up to 26 characters.
- Email is required, and is the address the invitation is sent to.
- Groups requires at least one selection, and determines the person's access rights.
- External Contractor grants access to only the projects or Change Request folders that the user is assigned to as part of the Change Request process.
- External Repository Access should be limited to long-term contractors as it allows view access to the master repository, like internal users.
- Once complete, select the Send invite button. The user will receive an email containing a link to create their password and log in for the first time.
If no group is selected, Lunr shows "Please select at least one group for the user." and blocks the invite. If your organisation has reached its licensed user count, Lunr shows a licence-limit error instead; check the Team members figure on Account Settings before inviting more users.
Manage Users
Select anywhere on a user line in the search results to open their Details page. From here, you can edit their details or modify the Roles and Document permissions that they have been granted.
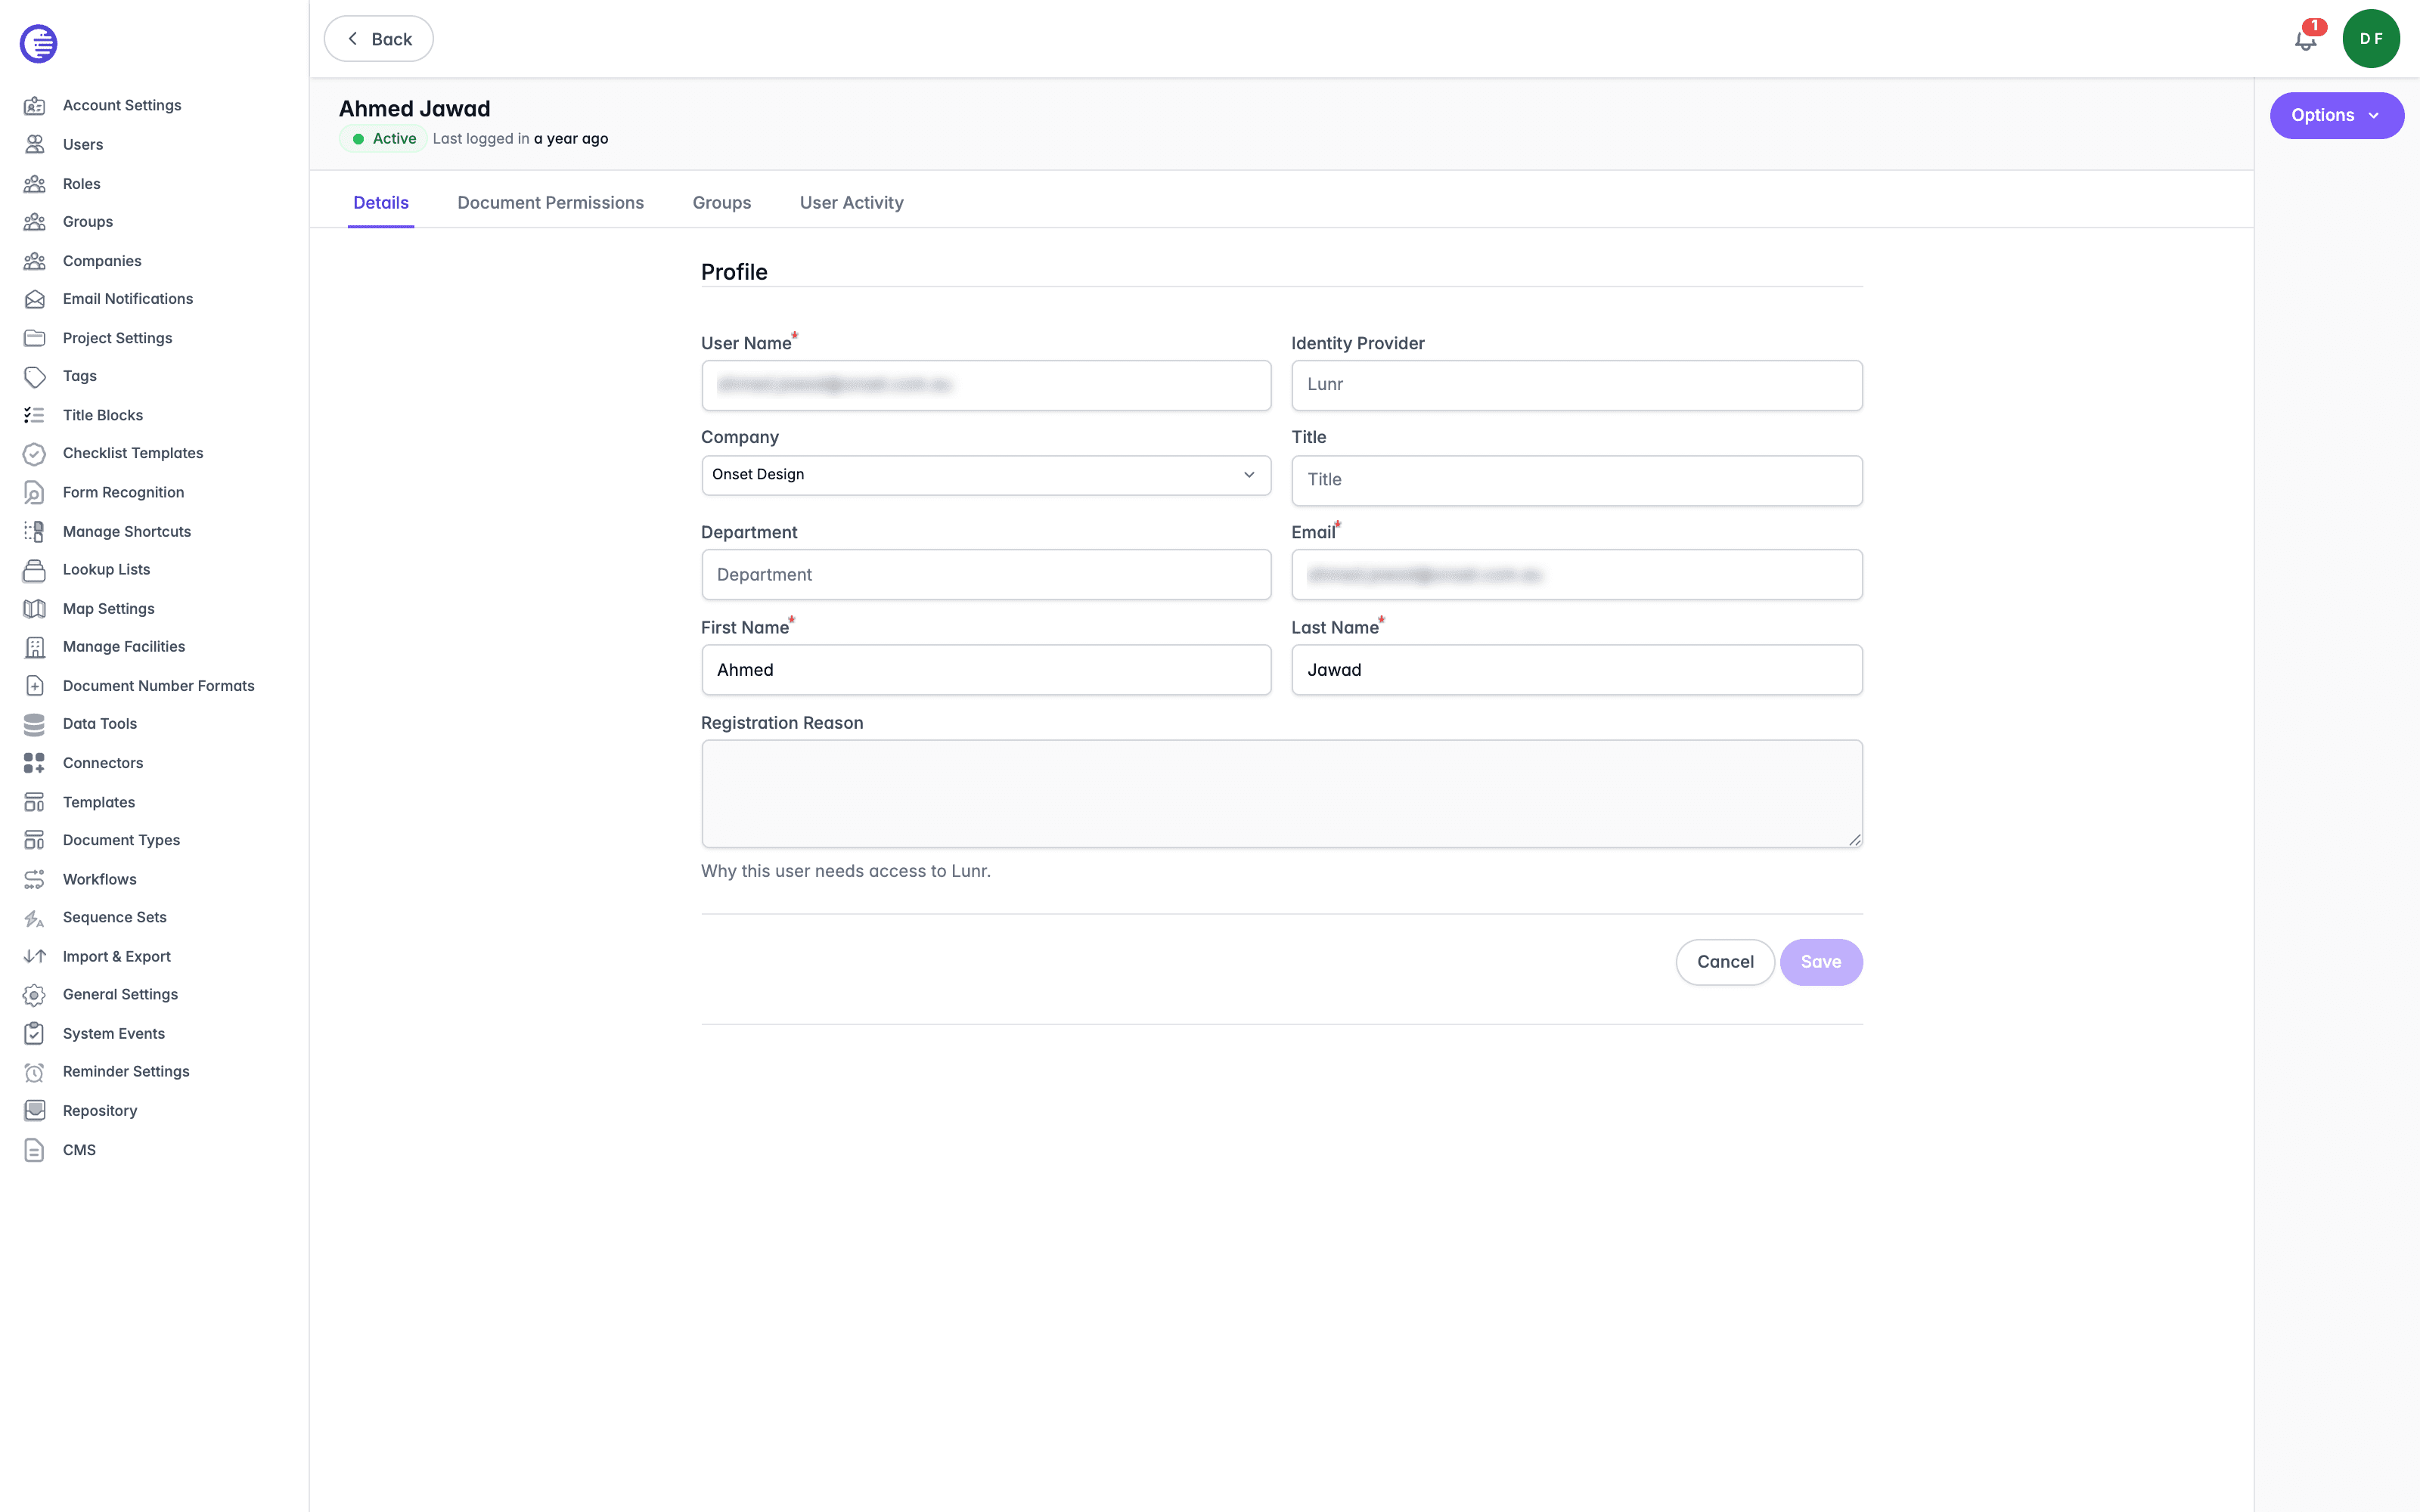
To edit a user's details, change the information in the fields and select the Save button.
An Options dropdown list on the details page offers further account actions:
- Disable account and Enable account disable or re-enable the user's ability to sign in, with a confirmation dialog before disabling.
- Reset user's MFA clears the user's multi-factor authentication enrolment so they can register a new device, with a confirmation dialog.
- Re-send invite sends the invitation email again to a user who has not yet completed registration.
For a pending self-registration, Approve and Reject buttons appear so you can decide whether the person joins the organisation. If the person registered with a company name that does not match an existing company, an amber Company assignment required alert appears, offering suggested matches, a dropdown list to assign an existing company, and an option to create a new company from the name they entered. A Reactivation request banner appears when a disabled user has asked to have their account re-enabled.
A user's page carries four tabs:
| Tab | What it shows |
|---|---|
| Details | The user's own details, editable in place. |
| Document Permissions | Direct, per-document access overrides granted to this user, separate from the rights they inherit through their groups. |
| Groups | The groups the user belongs to, which is what determines their access rights. |
| User Activity | A full audit trail of the user's actions. |
Removing a user's last group
Clearing a user's last remaining group on the Groups tab opens a confirmation dialog warning that this may prevent the user from logging back in and cannot be undone.
Shortcuts
Define saved, tag-based virtual folder hierarchies that let users browse documents by metadata such as discipline or building, instead of the physical project and folder structure.
Groups
Group users with similar responsibilities, assign the roles that determine what members can do, control which document repositories a group can access, and manage a group's membership and RFI visibility settings in Lunr.