Checklist Templates
The tenant library of checklist templates, each with its own sections and items, that can be attached to change requests and projects to track or gate their completion.
Overview
Select Checklist Templates in the admin main menu to open the tenant's checklist template library. A template is a named set of sections and items that can later be attached to a change request or a project. Editing or deleting a template here never changes a checklist that has already been attached elsewhere, because each attached checklist keeps its own copy of the template's content from the moment it was attached.
Reaching this page requires the Manage Checklist Templates access right, or the Administration Pages access right, and the tenant setting Are Checklists Enabled? on the Checklist tab of Project Settings must also be enabled. With that setting disabled, the entire checklist feature is unavailable, not just this page: every checklist screen, including this one, returns a not-found error instead of loading. No existing checklist data is deleted while the setting is off; it simply becomes unreachable until you enable the setting again.
Creating, editing, and deleting templates, and their sections and items, all require the Manage Checklist Templates access right specifically. Two further access rights govern a checklist once it has been attached to a change request or project, rather than on this page:
- Verify Checklist Items lets a user verify, reject, or mark a checklist item not applicable.
- Edit Checklists lets a user attach checklists and edit their items.
The Checklist Templates Page
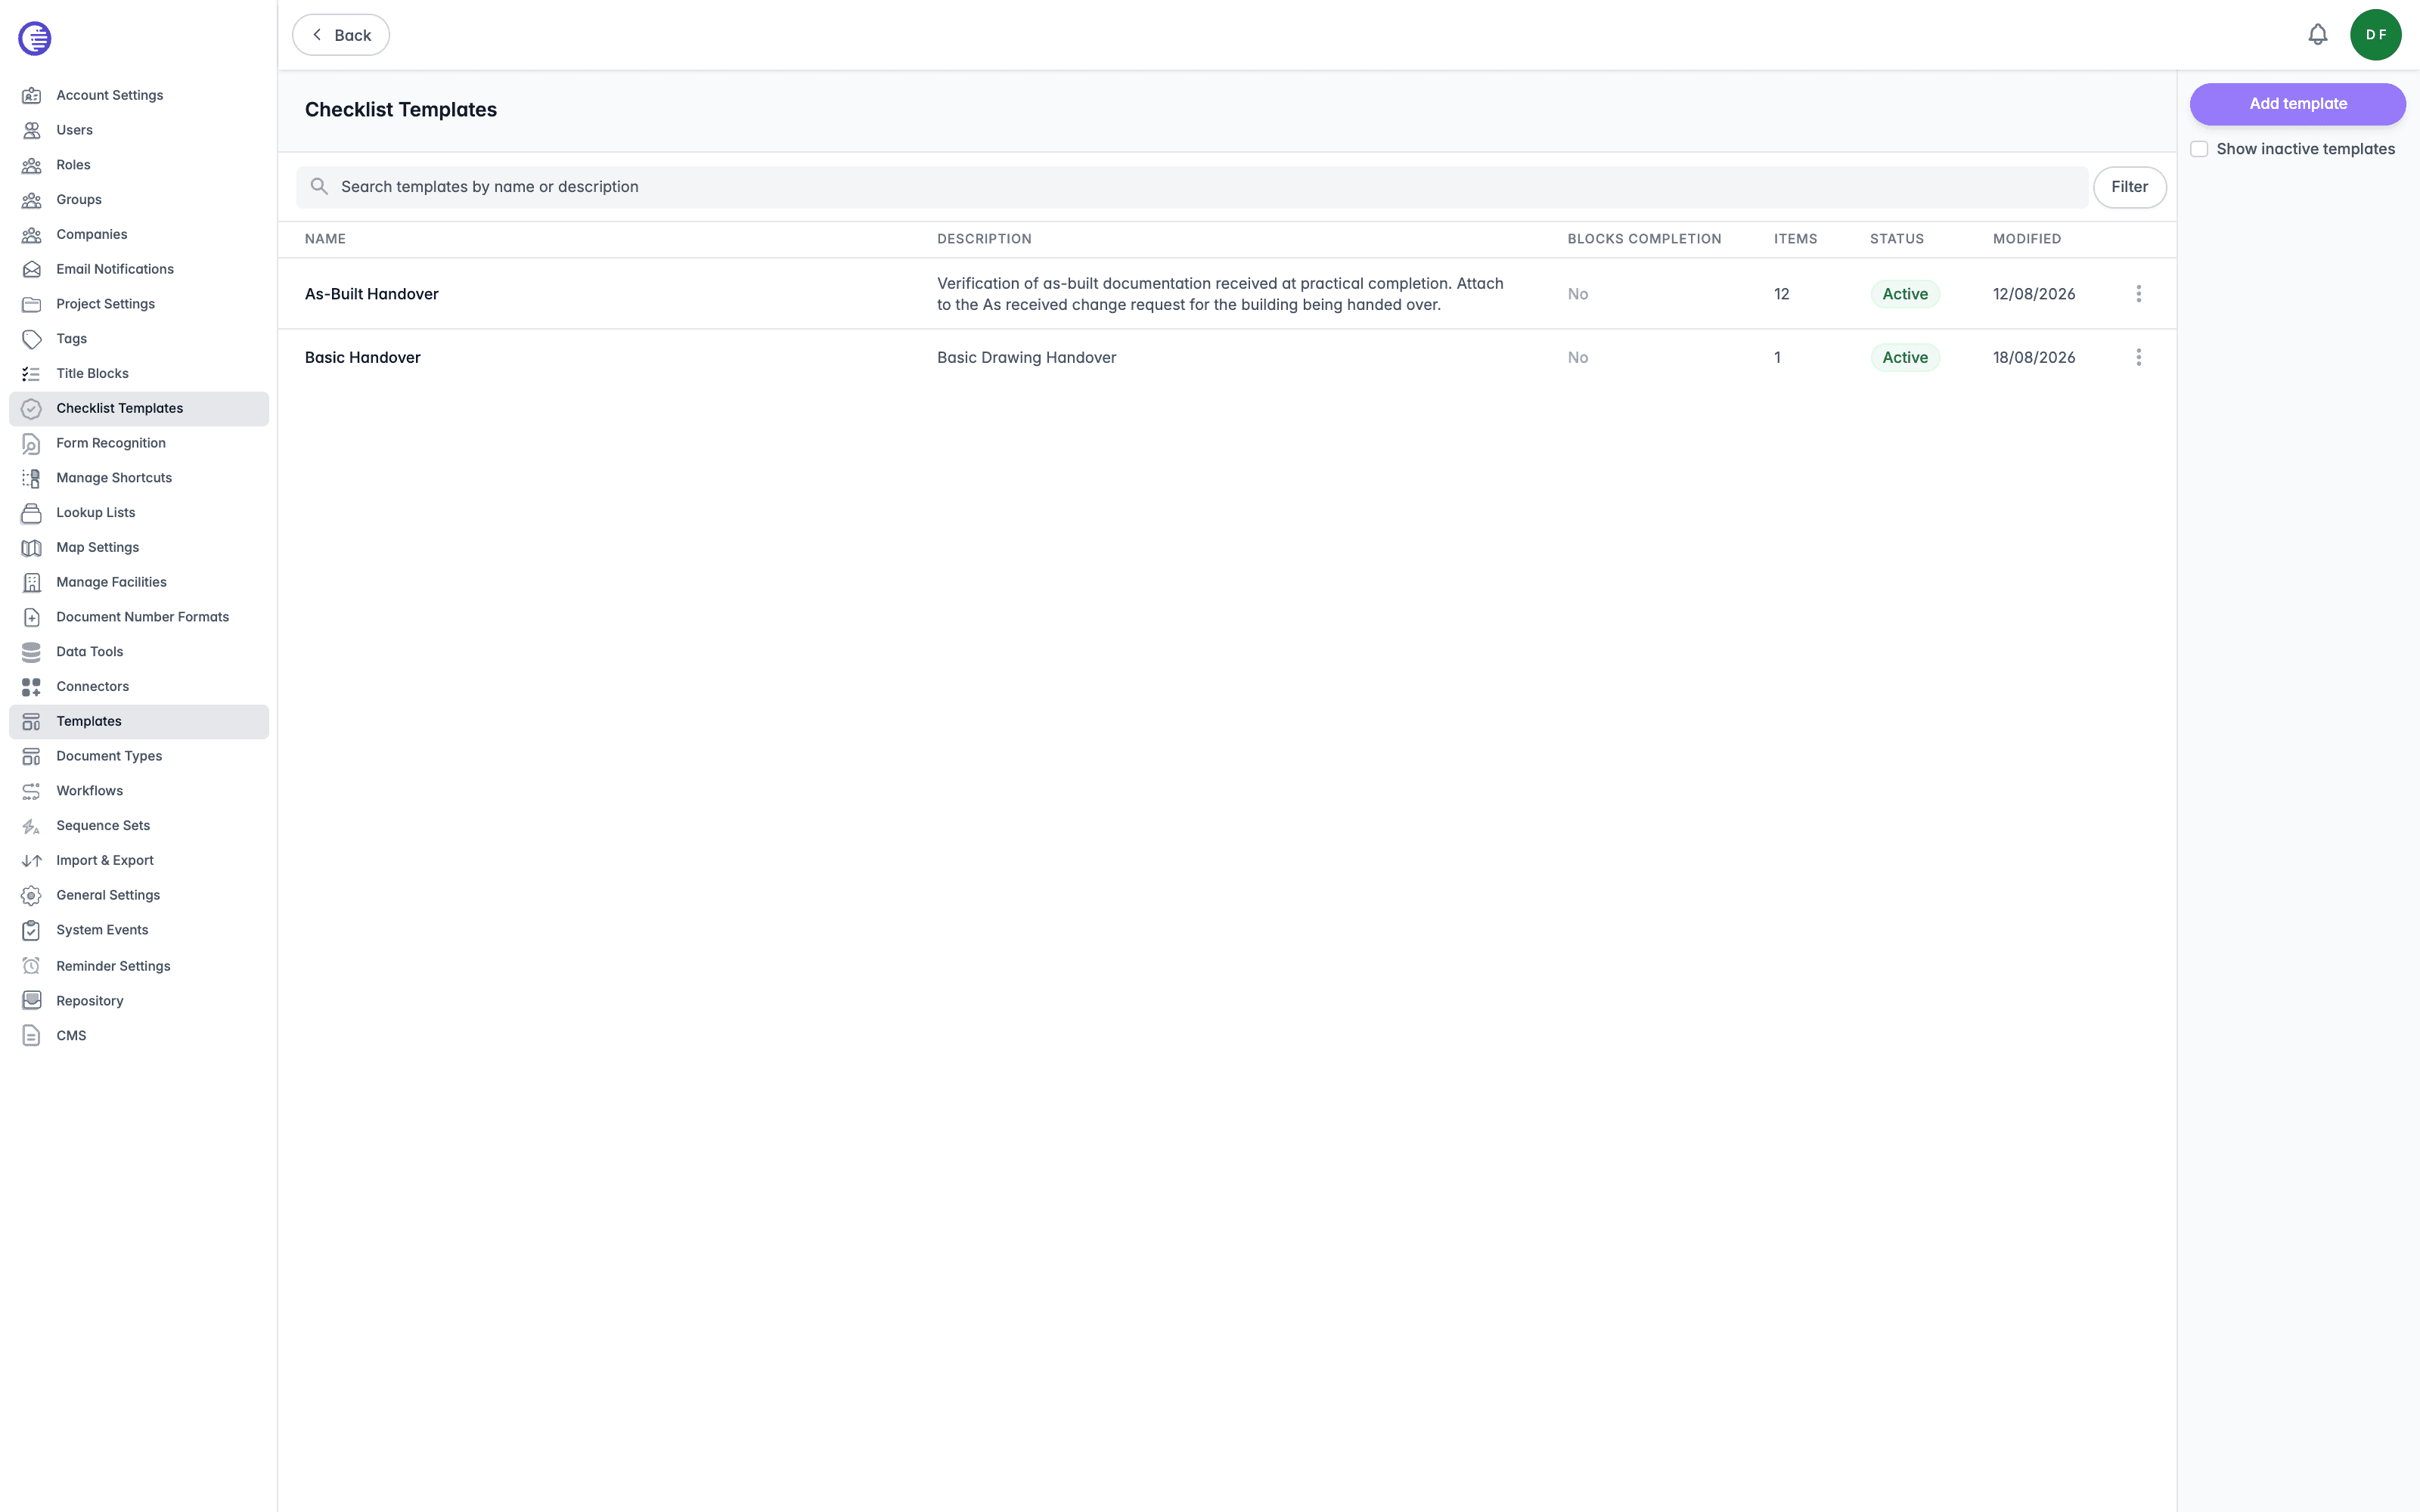
The page lists every template in the tenant library with the following columns.
| Column | What it shows |
|---|---|
| Name | The template's name. |
| Description | The template's description, if it has one. |
| Blocks completion | Yes if the template gates workflow completion, No if it is informational only. |
| Items | The total number of items across all of the template's sections. |
| Status | Active or Inactive. |
| Modified | The date the template was last modified. |
Enter search text in the Search templates field to narrow the list by name or description, then select Filter to apply it. By default the list shows only active templates; select Show inactive templates to include inactive ones too.
Selecting a row opens that template's details page. Each row also has a context menu, opened by selecting the three dots at the end of the row, with Edit, Duplicate, and Delete options. Edit opens the same details page as selecting the row; Duplicate is described below; Delete opens a confirmation dialog, since checklists already attached to a change request or project keep their own copy of the content and are not affected.
Creating a Template
Select Add template to open the Add checklist template dialog, then supply the following.
- Name is required.
- Description describes what the checklist is for.
- Blocks completion, when selected, blocks the change request from completing while items on this checklist are open. Items marked not applicable count as closed out.
- Requires verification is selected by default. With it selected, closeout is two steps: an assignee completes each item, then a verifier signs it off. Clear it for a single-step checklist, where completing an item closes it out immediately.
If Blocks completion is selected and Requires verification is cleared, the dialog shows a warning that the checklist gates the workflow but items only need to be completed once, without independent verification.
Selecting Create template creates the template and opens its details page, where you add sections and items. A new template starts active with no sections.
Editing a Template
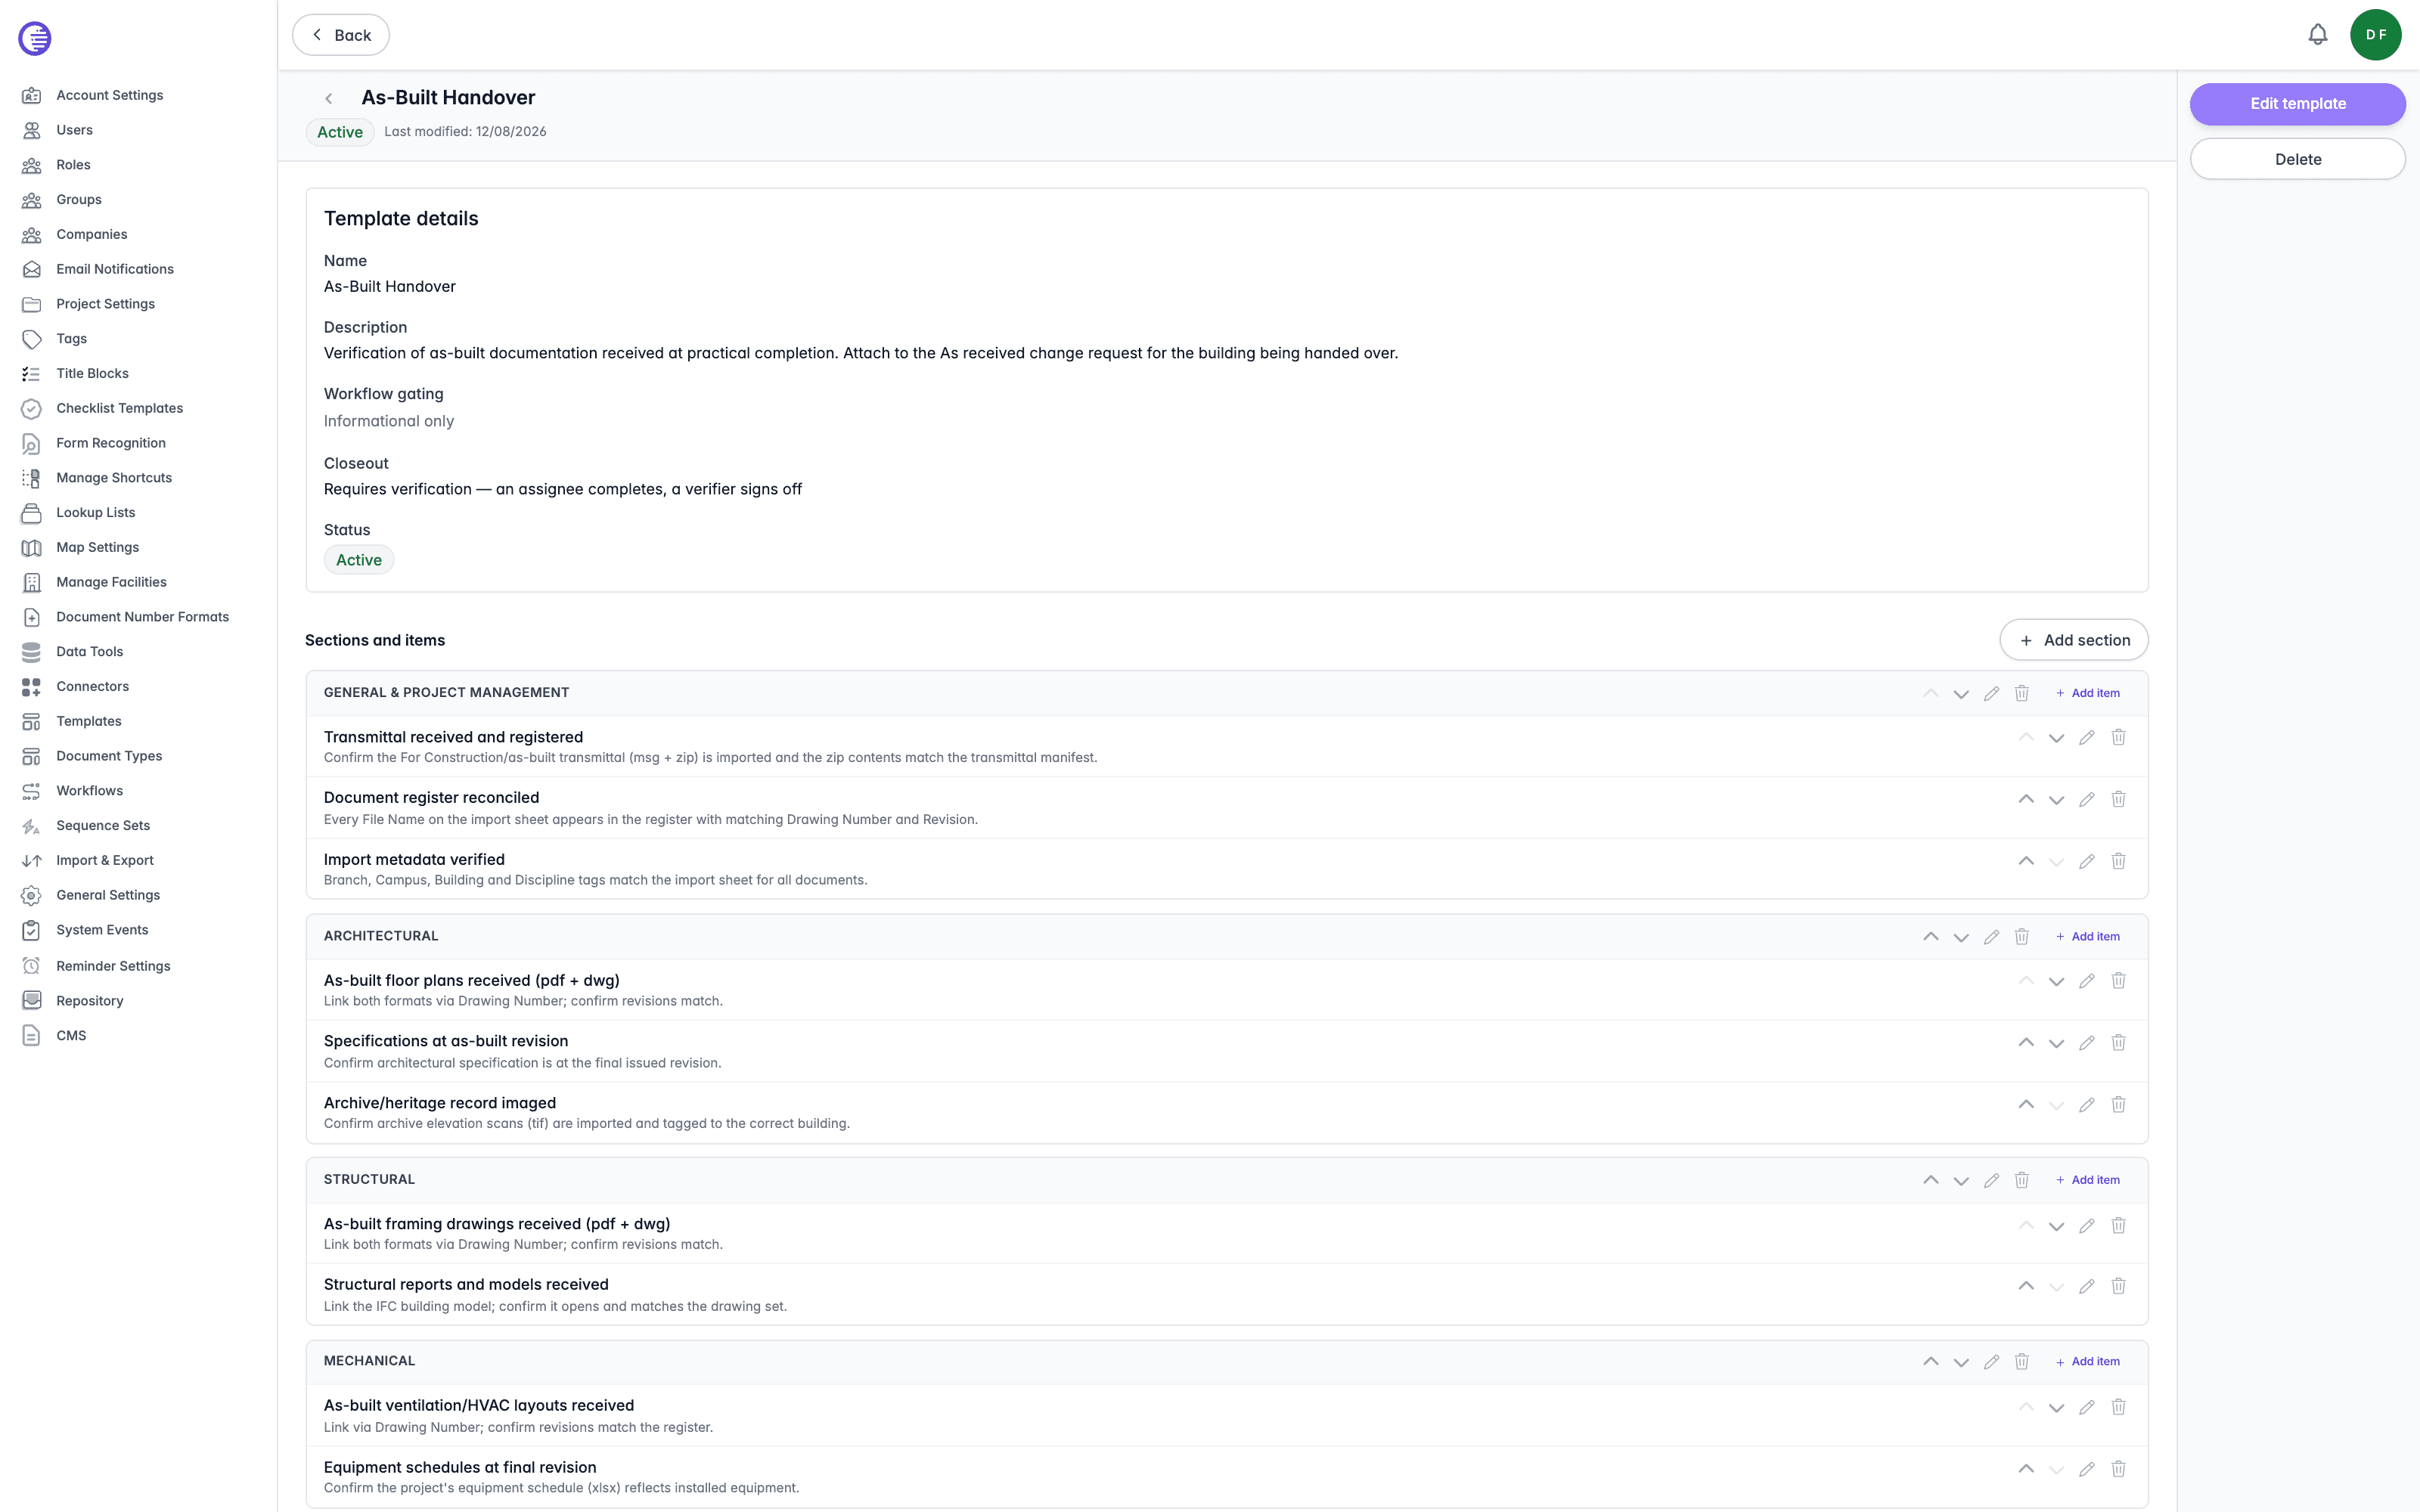
Template Details
The details page opens on a read-only summary of the template's Name, Description, workflow gating, closeout mode, and Status. Select Edit template in the Action Pane to edit these fields, using the same Blocks completion and Requires verification options as the create dialog, plus:
- Active, selected by default. Only active templates can be attached or picked in project configuration; clearing it retires the template without deleting it.
Select Save changes to save, or Cancel to discard your edits.
Changes to gating and verification only affect future attachments
Changing Blocks completion or Requires verification on a template only affects checklists attached from that point onward. A checklist already attached to a change request or project keeps its own copy of both flags as they were at the moment it was attached, and is not updated retroactively.
Sections and Items
Below the template details, Sections and items lists the template's content. Select Add section to add a new section, supplying a Section name. Each section offers buttons to move it up or down relative to its siblings, rename it, delete it, or add an item to it; deleting a section deletes every item inside it.
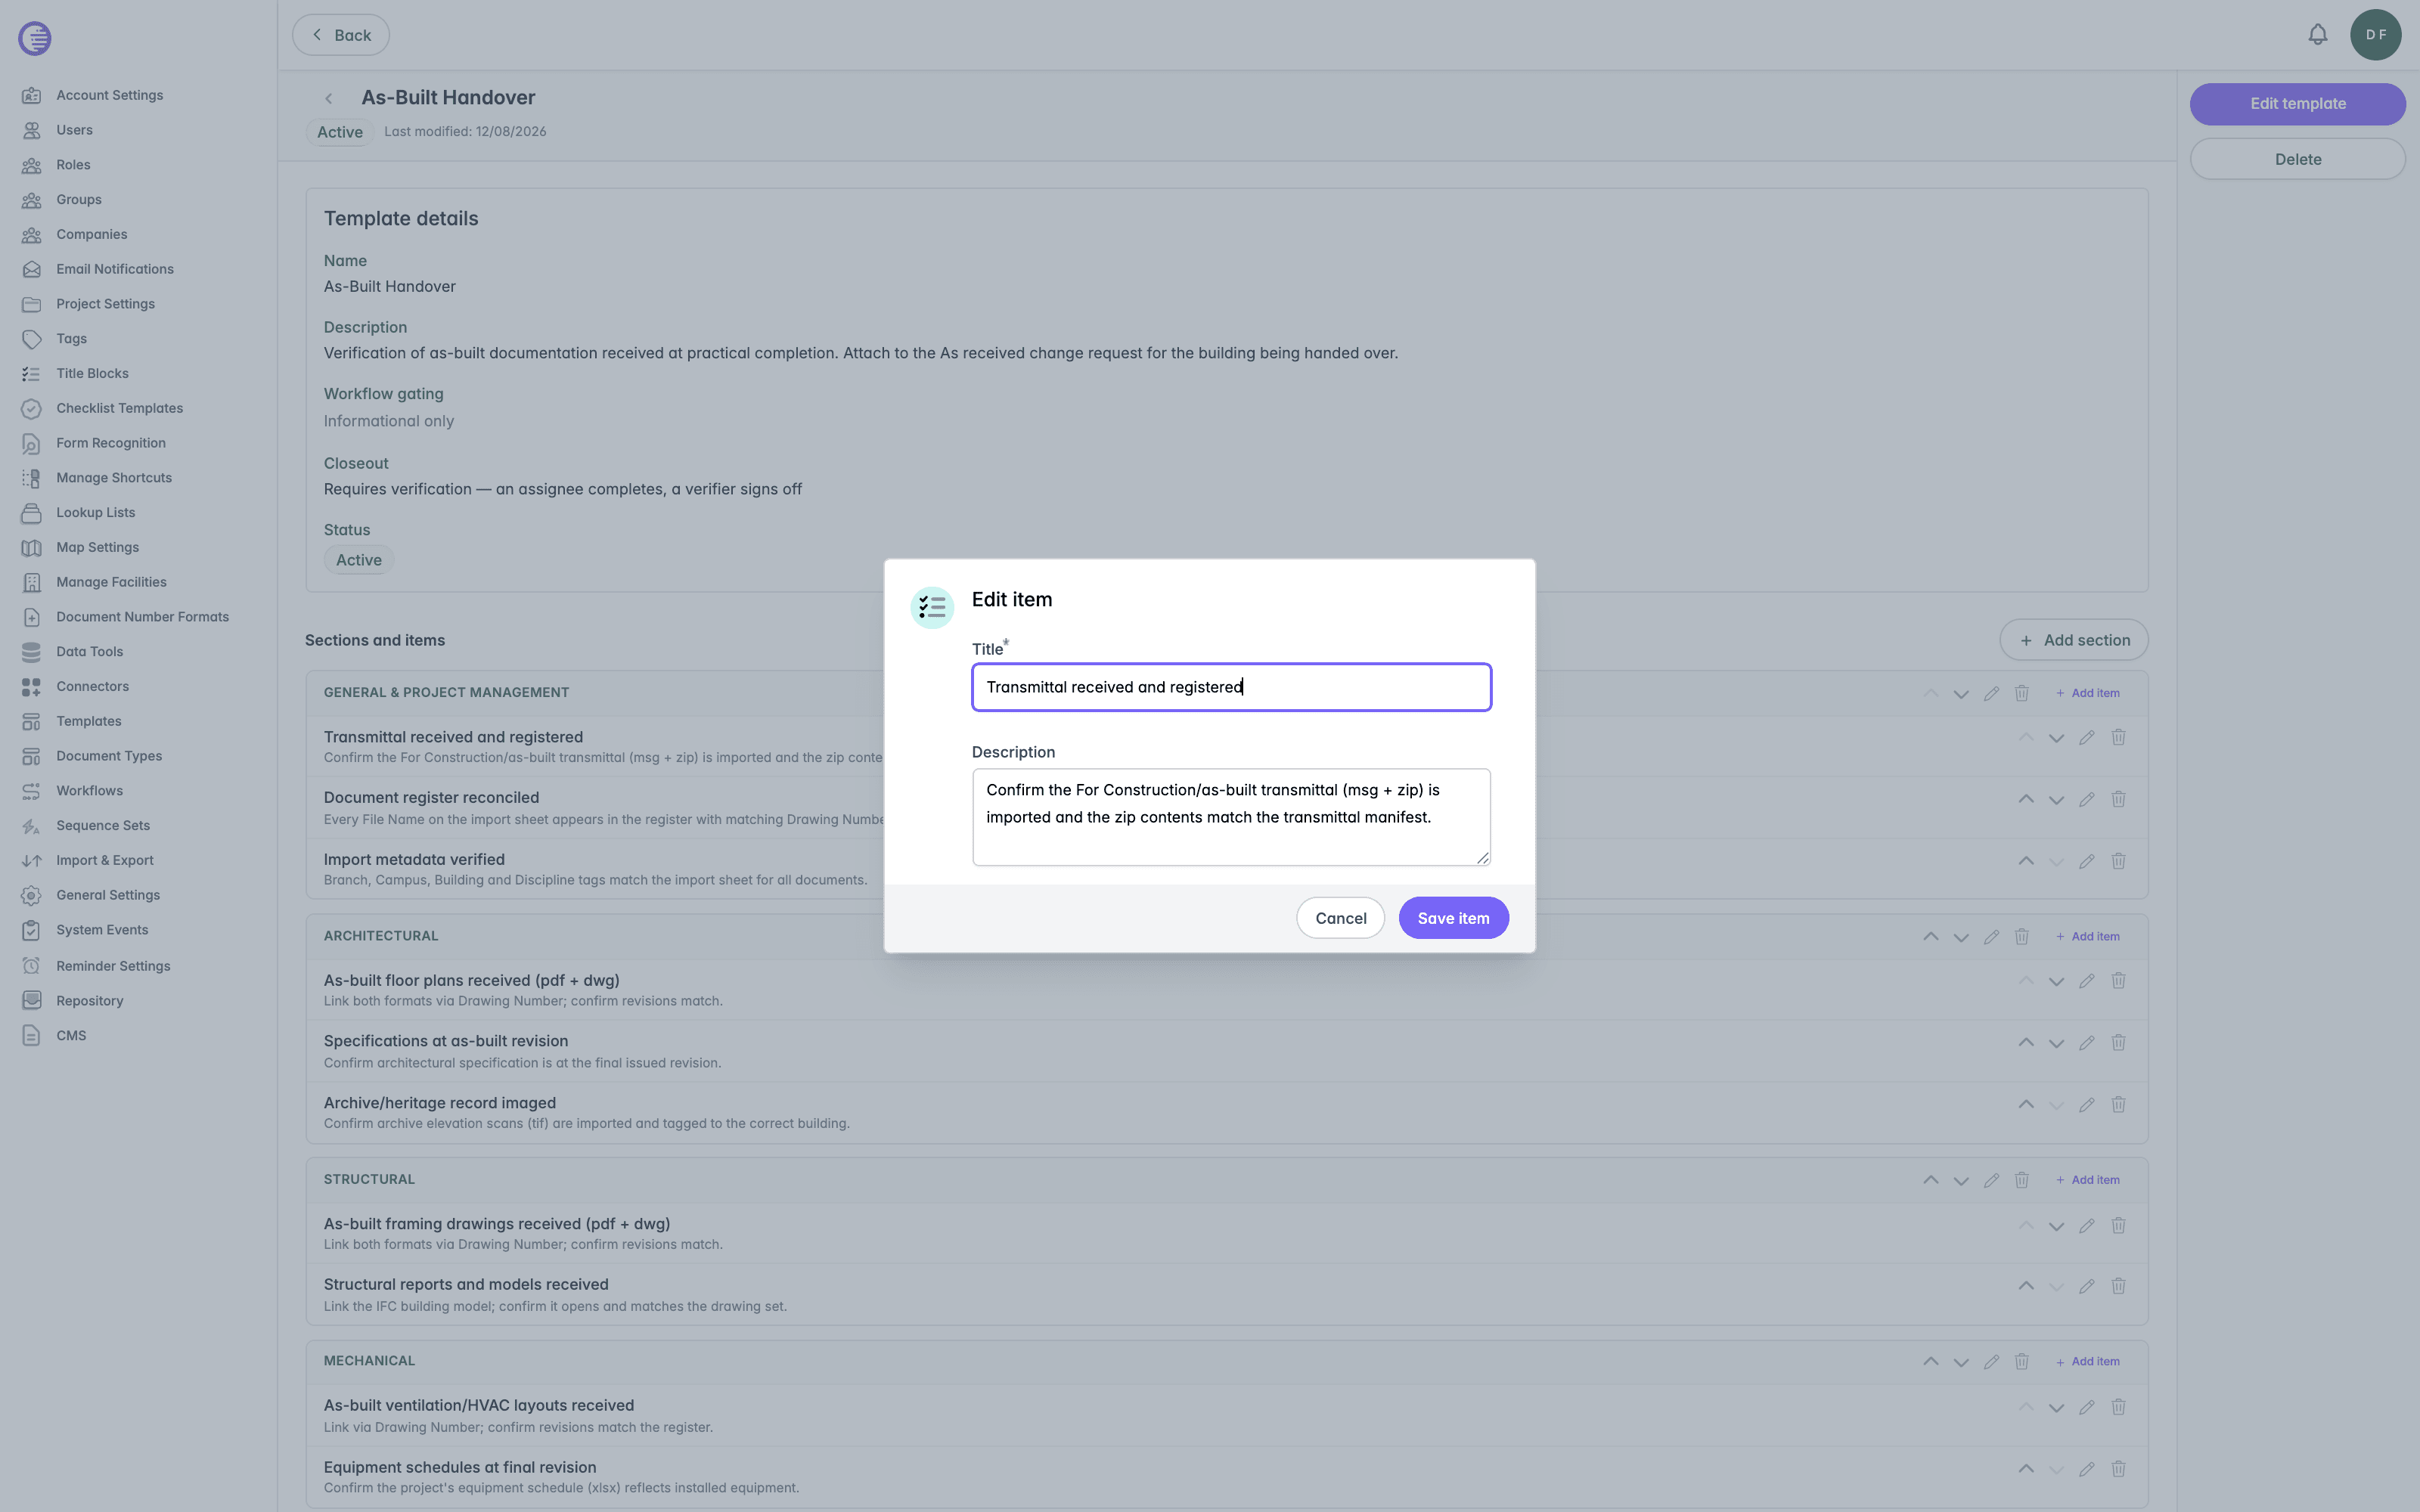
Each item shows its Title and Description, with buttons to move it up or down within its section, edit it, or delete it. Adding or editing an item asks for a Title, which is required, and an optional Description.
Duplicating a Template
Select Duplicate from a row's context menu on the list page to copy every section and item in that template into a new one. Enter a New template name, prefilled as the source template's name followed by "(2)", then confirm to create the copy.
The duplicate is always created as active, even when the source template is inactive, so you can use Duplicate to start drafting a replacement for a retired template.
Deleting a Template
Select Delete in the Action Pane on a template's details page, or Delete from a row's context menu on the list page. Both open a confirmation dialog warning that checklists already attached to a change request or project keep their own copy of the content, so deleting the template does not remove them. Deleting only clears those checklists' link back to the template they came from; the checklists themselves, and their sections and items, are left exactly as they were.
Workflow Editor
Build and edit a workflow's diagram of states and transitions on the canvas reached from a workflow's Editor tab, with panels for the available state types and the tags, groups, repositories, and projects a diagram can reference.
Document Number Formats
Lunr uses configurable document number formats and sequence sets to automatically generate unique document numbers, ensuring consistency, reducing manual effort, and preventing duplicate numbering.