Title Blocks
Synchronise data between a drawing's title block and the equivalent Lunr tags, so tags are populated automatically when a matching drawing is uploaded.
Overview
The Lunr title block feature allows data to be synchronised between a drawing's title block and the equivalent Lunr tags.
When a new drawing is uploaded with a matching title block, Lunr saves time by reading and populating the tags automatically.
Title blocks therefore depend on the tags they map to, so define your Tags before setting up the mapping.
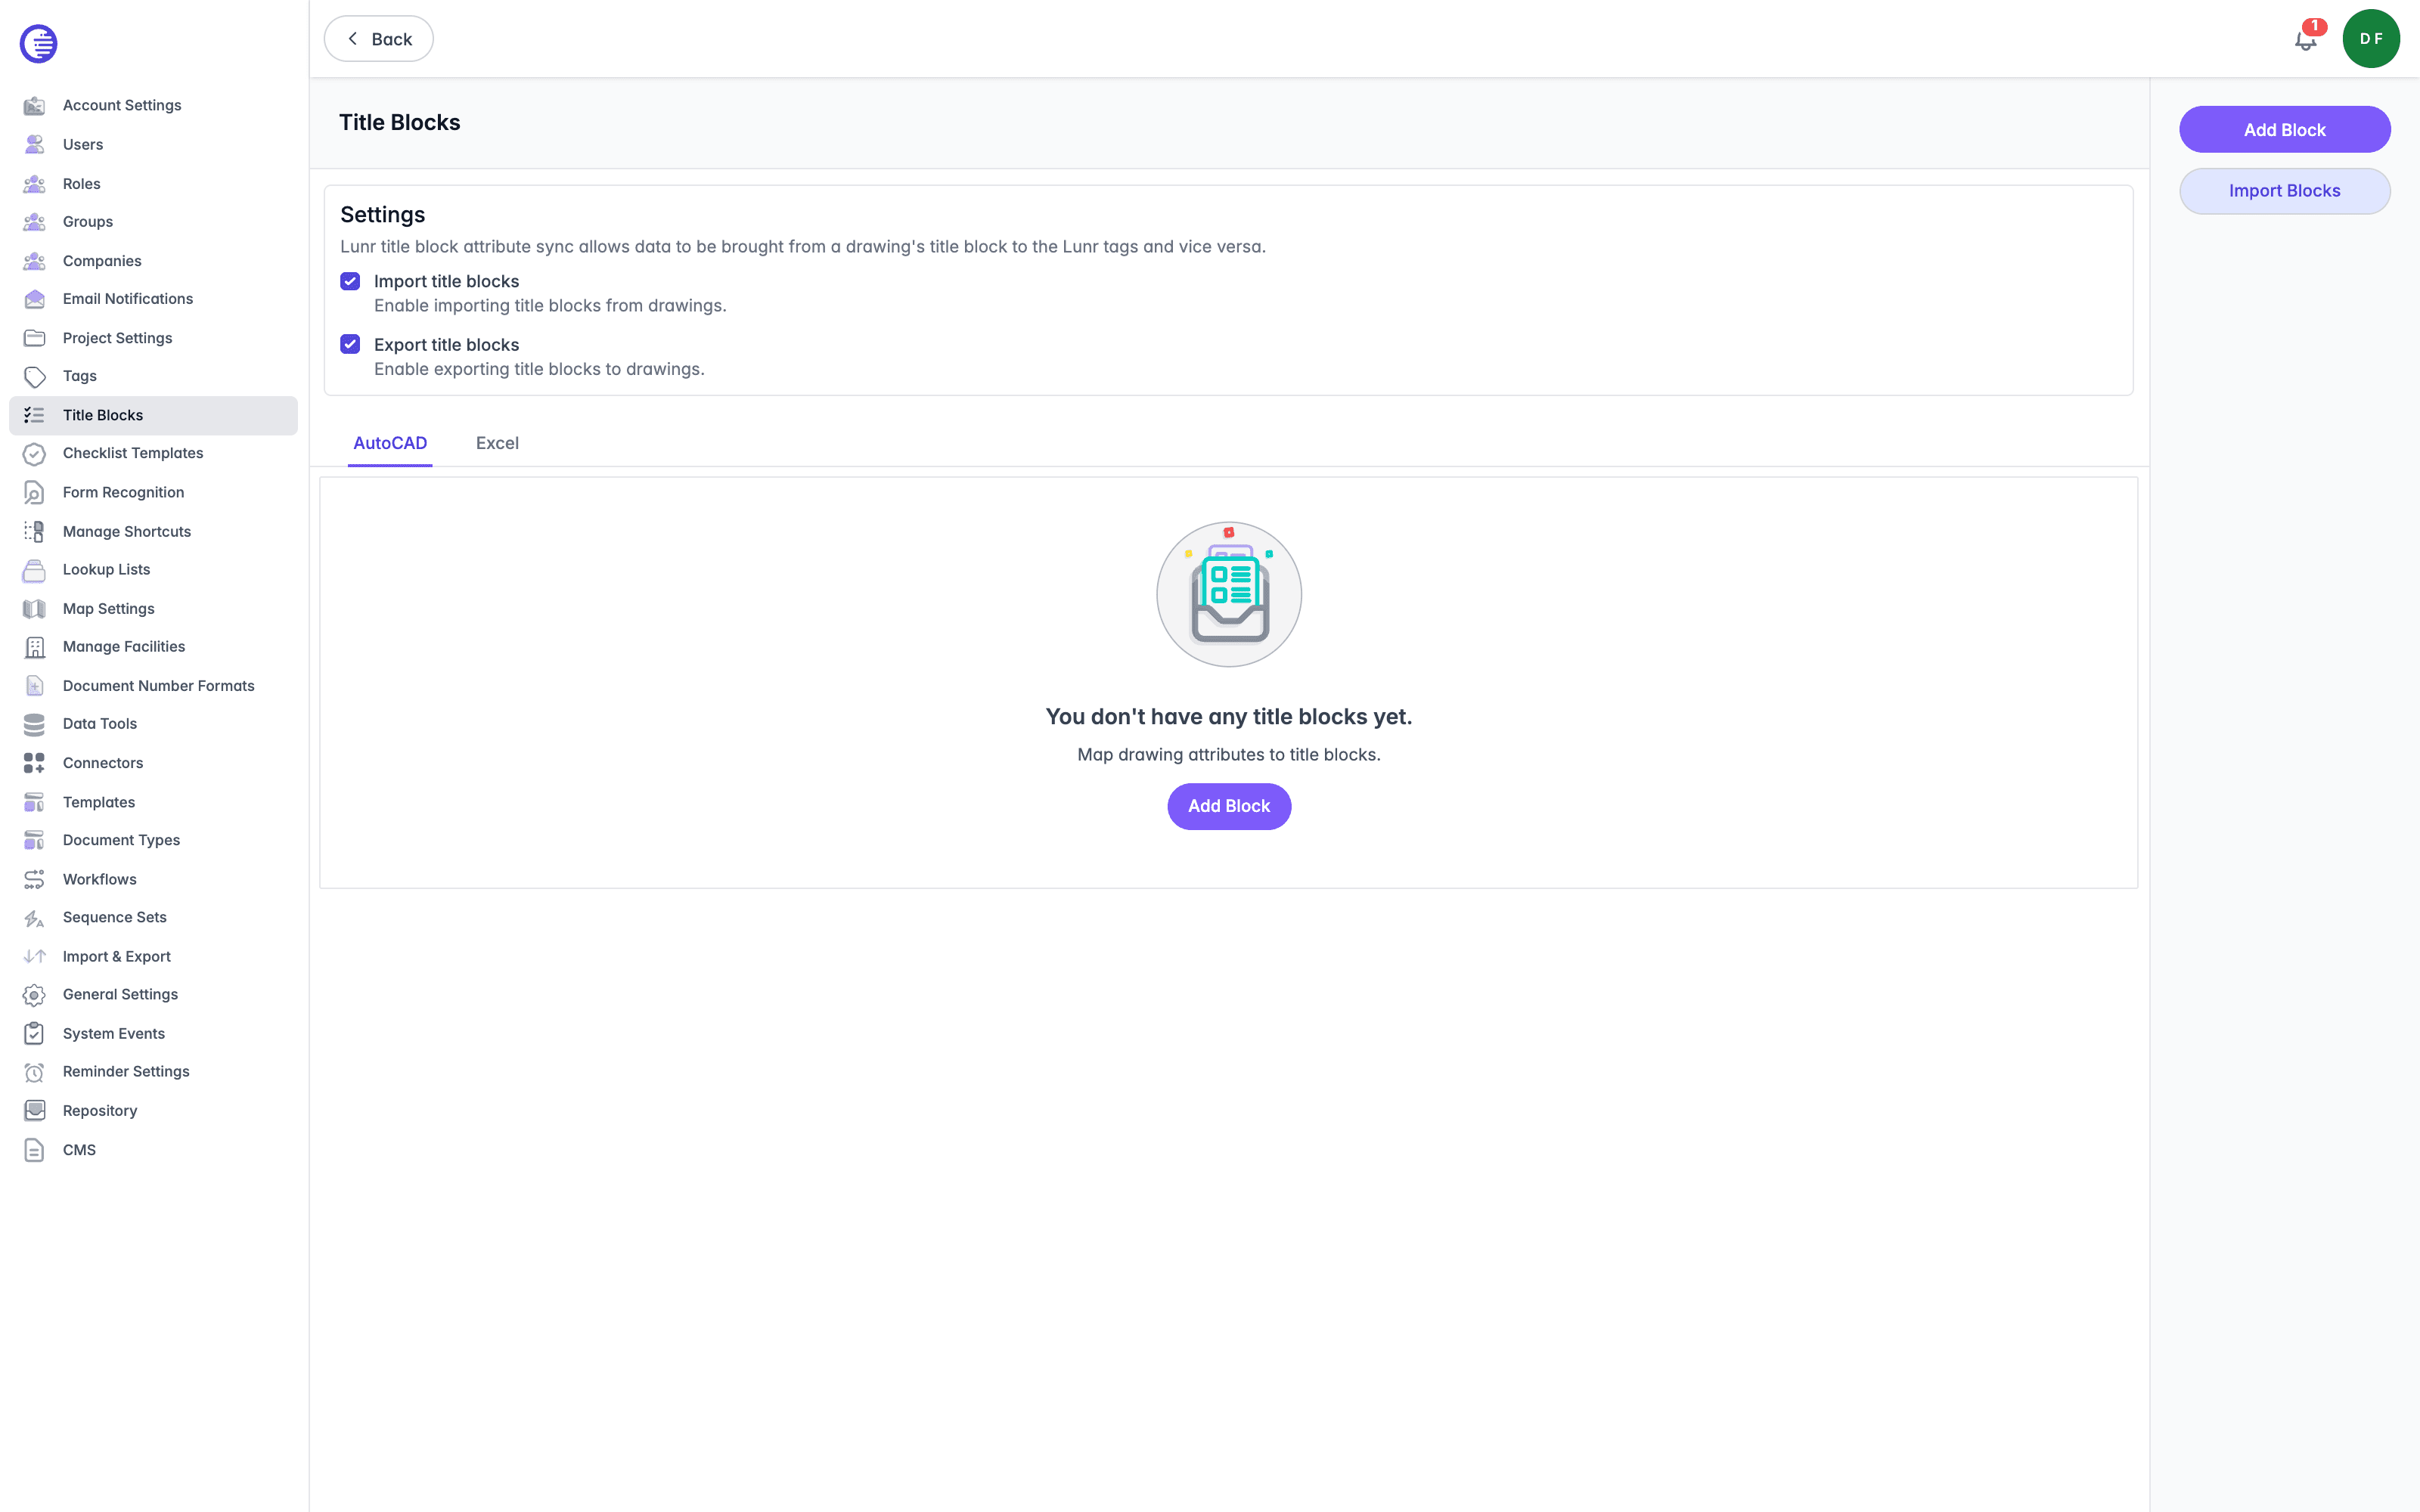
Select Title Blocks in the admin main menu. Reaching the page requires the Administration Pages or Manage Title Blocks access right. The page has two tabs, AutoCAD (the default) and Excel, which each list title blocks of that type.
Import and Export Settings
Two checkboxes above the list control the whole import and export mechanism, tenant-wide: Import title blocks enables importing title blocks from drawings, and Export title blocks enables exporting title blocks to drawings. Disabling either one turns off that half of the feature for every title block, regardless of the individual block's own settings.
Managing Title Blocks
Each row lists its Block Name, an Active or Inactive status, and, on the Excel tab, whether it is the Default set used when a project does not choose one explicitly.
Open a row's context menu, by selecting the three dots at the end of the row, for these actions:
- Edit opens the block for editing.
- Set to AutoCAD or Set to Excel moves the block to the other tab.
- Export, on an AutoCAD block only, downloads the block as an
.inifile. - Activate or Deactivate toggles whether the block is currently applied.
- Set as Default, on an Excel block only, makes it the set applied when a project does not choose one. It is hidden once a block is already the default.
- Delete removes the block, after asking for confirmation.
Select the checkbox on one or more rows to reveal bulk actions: Export to Ini (available only when every selected block is an AutoCAD block), Toggle Active, and Delete, each with its own confirmation dialog.
Deleting a title block set is not blocked while it is still used for rendering. If you delete the tenant's default Excel set, Lunr reassigns the default to another remaining Excel set, or clears it to none if no Excel set remains, and rendition title-block extraction silently stops populating tags with no warning.
Adding a New Title Block
To add a new title block,
-
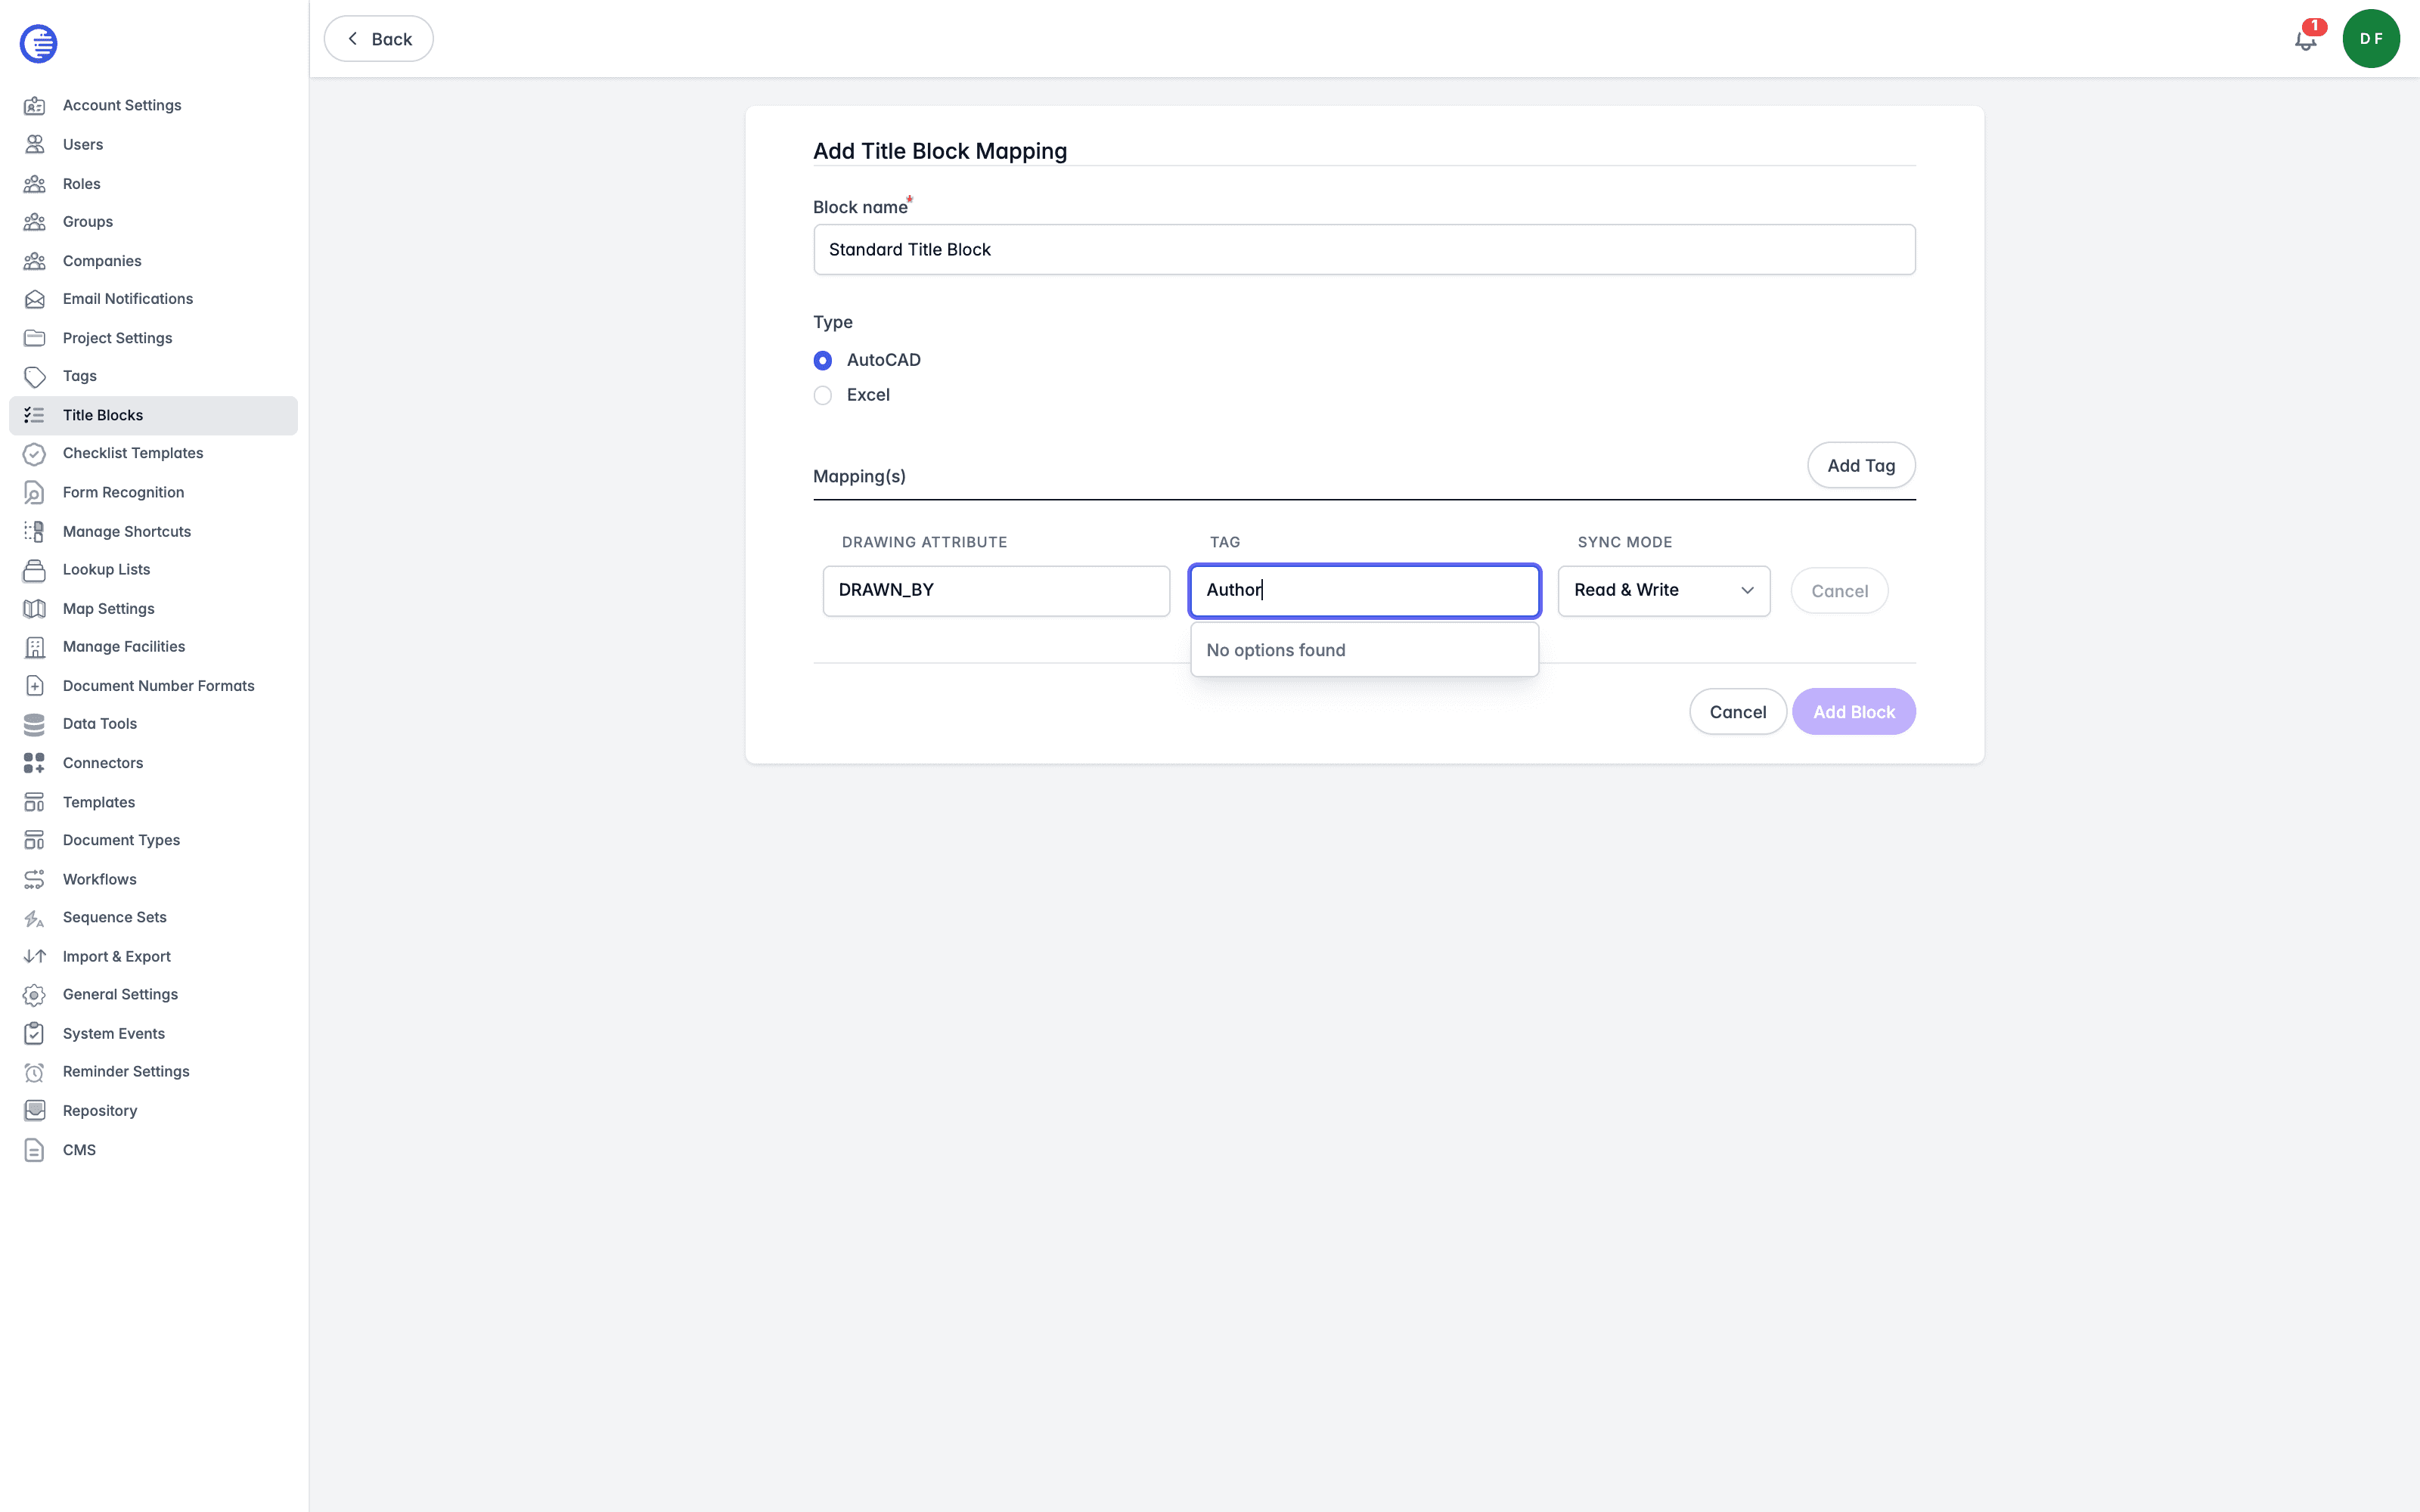
Select the Add Block button.
-
Enter a Block name. For ease of updating, give it the same name as the default title block in your drawing template.
-
Select the Type, AutoCAD or Excel, matching the kind of file the block applies to.
-
Enter the attribute from your drawing template, select the equivalent Lunr tag from the Tag box, and choose a Sync Mode of Read & Write, Read Only, or Write Only. Select the Add Tag button to add additional attribute matches.
-
When you have finished, select the Add Block button to save the settings.
A block name must not already be in use by another title block; Lunr rejects a duplicate. Drawing attribute names must also be unique within the set.
Bulk import from a file
Select Import Blocks to bring in title blocks from an .ini file rather than adding them individually. Lunr accepts only .ini files. If an imported block maps to a tag that does not exist, Lunr opens a Resolve Invalid Mappings dialog listing each missing tag, with a searchable dropdown so you can remap it to an existing tag before the import completes.
Editing a Title Block
To edit an existing title block,
-
Open the context menu by selecting the three dots at the end of the row, then select Edit.
-
Make any required changes and select the Save button.
Saving replaces the whole set of attribute-to-tag associations rather than merging your changes with the existing ones. Any association removed from the form while editing is deleted, not merely left unset.
Maps
Lunr's map feature uses document metadata and geospatial data to provide location-based document discovery, while allowing administrators to configure map display settings, default views, and external GIS integrations such as Esri feature services.
Message Templates
The Templates tab of Email Notifications, where you edit the Liquid subject and HTML body of every notification email the tenant sends.