Message Templates
The Templates tab of Email Notifications, where you edit the Liquid subject and HTML body of every notification email the tenant sends.
Overview
Select Email Notifications in the admin main menu, then select the Templates tab. The other tab, Messages, is the email log covered in Email Log.
Templates tab dependency
The Templates tab only appears once Enable editable email templates (Liquid) is enabled under Notification on the General Settings page, and only from the next time you open Email Notifications. If you already have that page open, navigate away and back to see it. Disabling the setting returns every email to the built-in templates and hides this tab again, without discarding any edits you made while it was on.
Reaching the Templates tab requires the Administration Pages access right. Opening a template to view or edit its subject and body additionally requires the Manage Users access right; without it, a row in the table cannot be opened, since the underlying request would return nothing.
The Message Templates Page
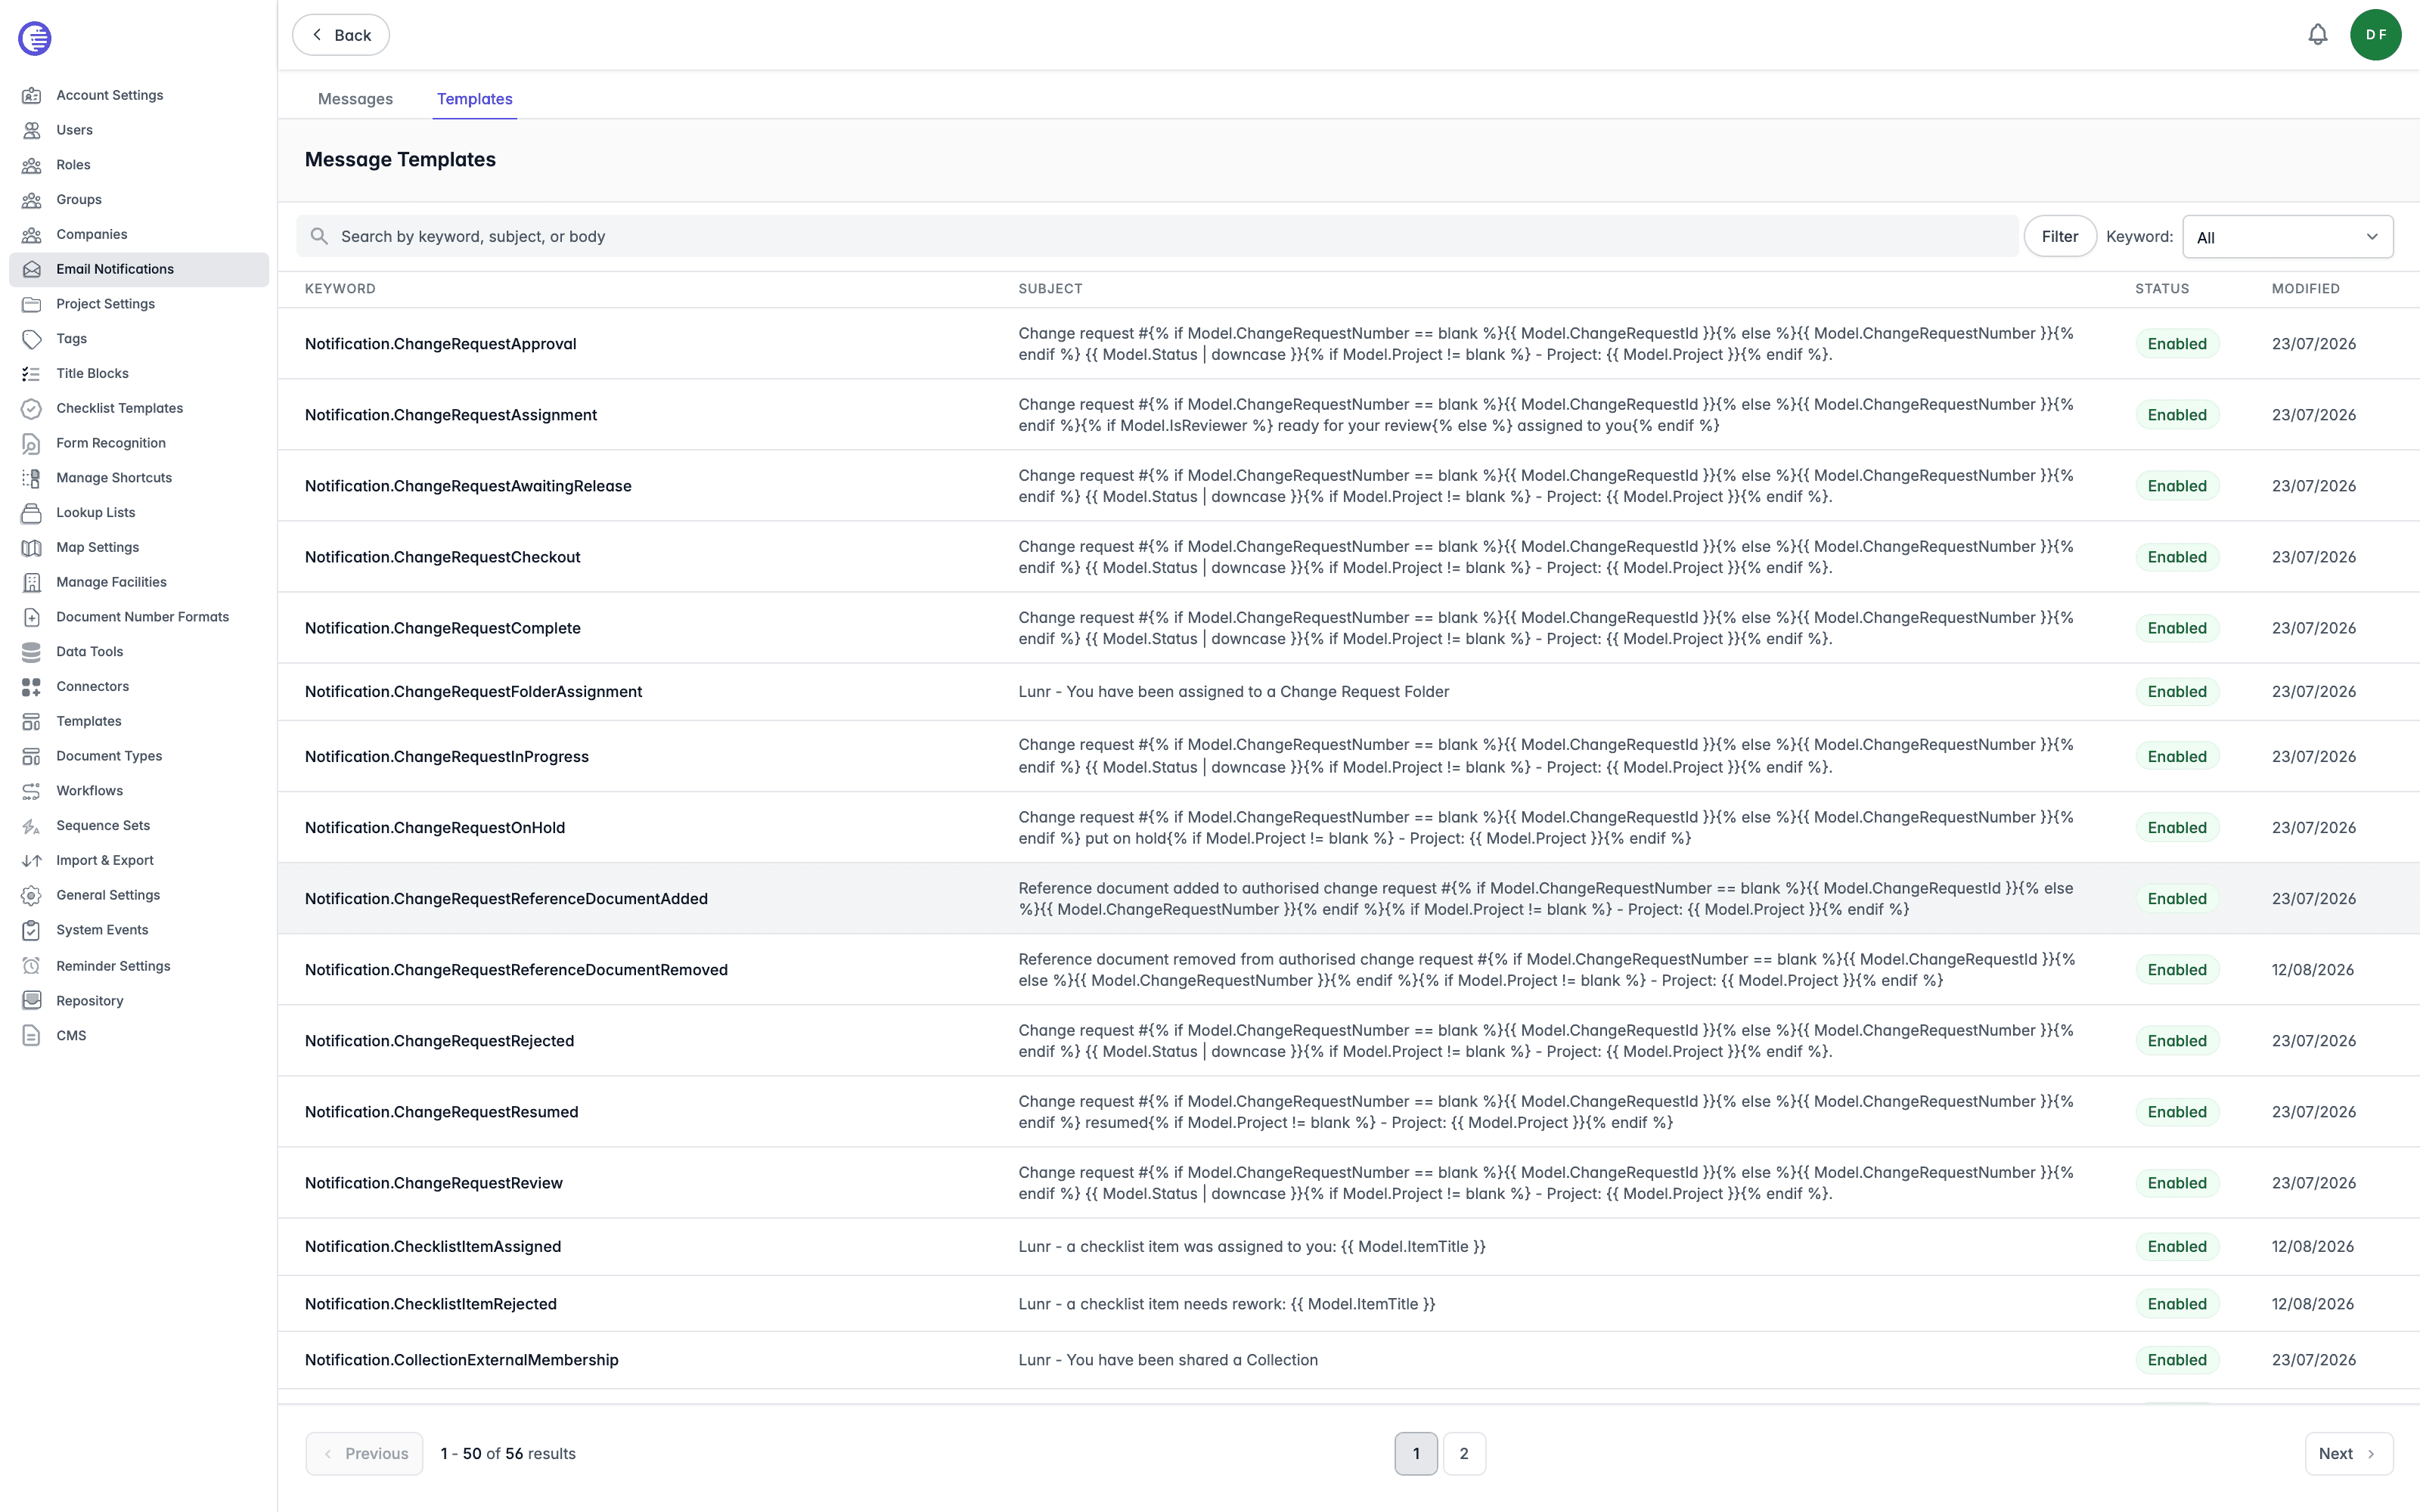
The page lists every notification template with the following columns.
| Column | What it shows |
|---|---|
| Keyword | The name of the notification the template renders, for example Notification.ChangeRequestApproval. |
| Subject | The template's subject line, shown as stored, including any Liquid it contains. |
| Status | Enabled or Disabled. |
| Modified | The date the template was last modified. |
Enter search text in the search field to search by keyword, subject, or body. The Keyword dropdown filters the table to a single keyword, but it only lists the keywords present in the page of results currently loaded; if the keyword you want is not in the dropdown, search for it or page forward first.
Editing a Template
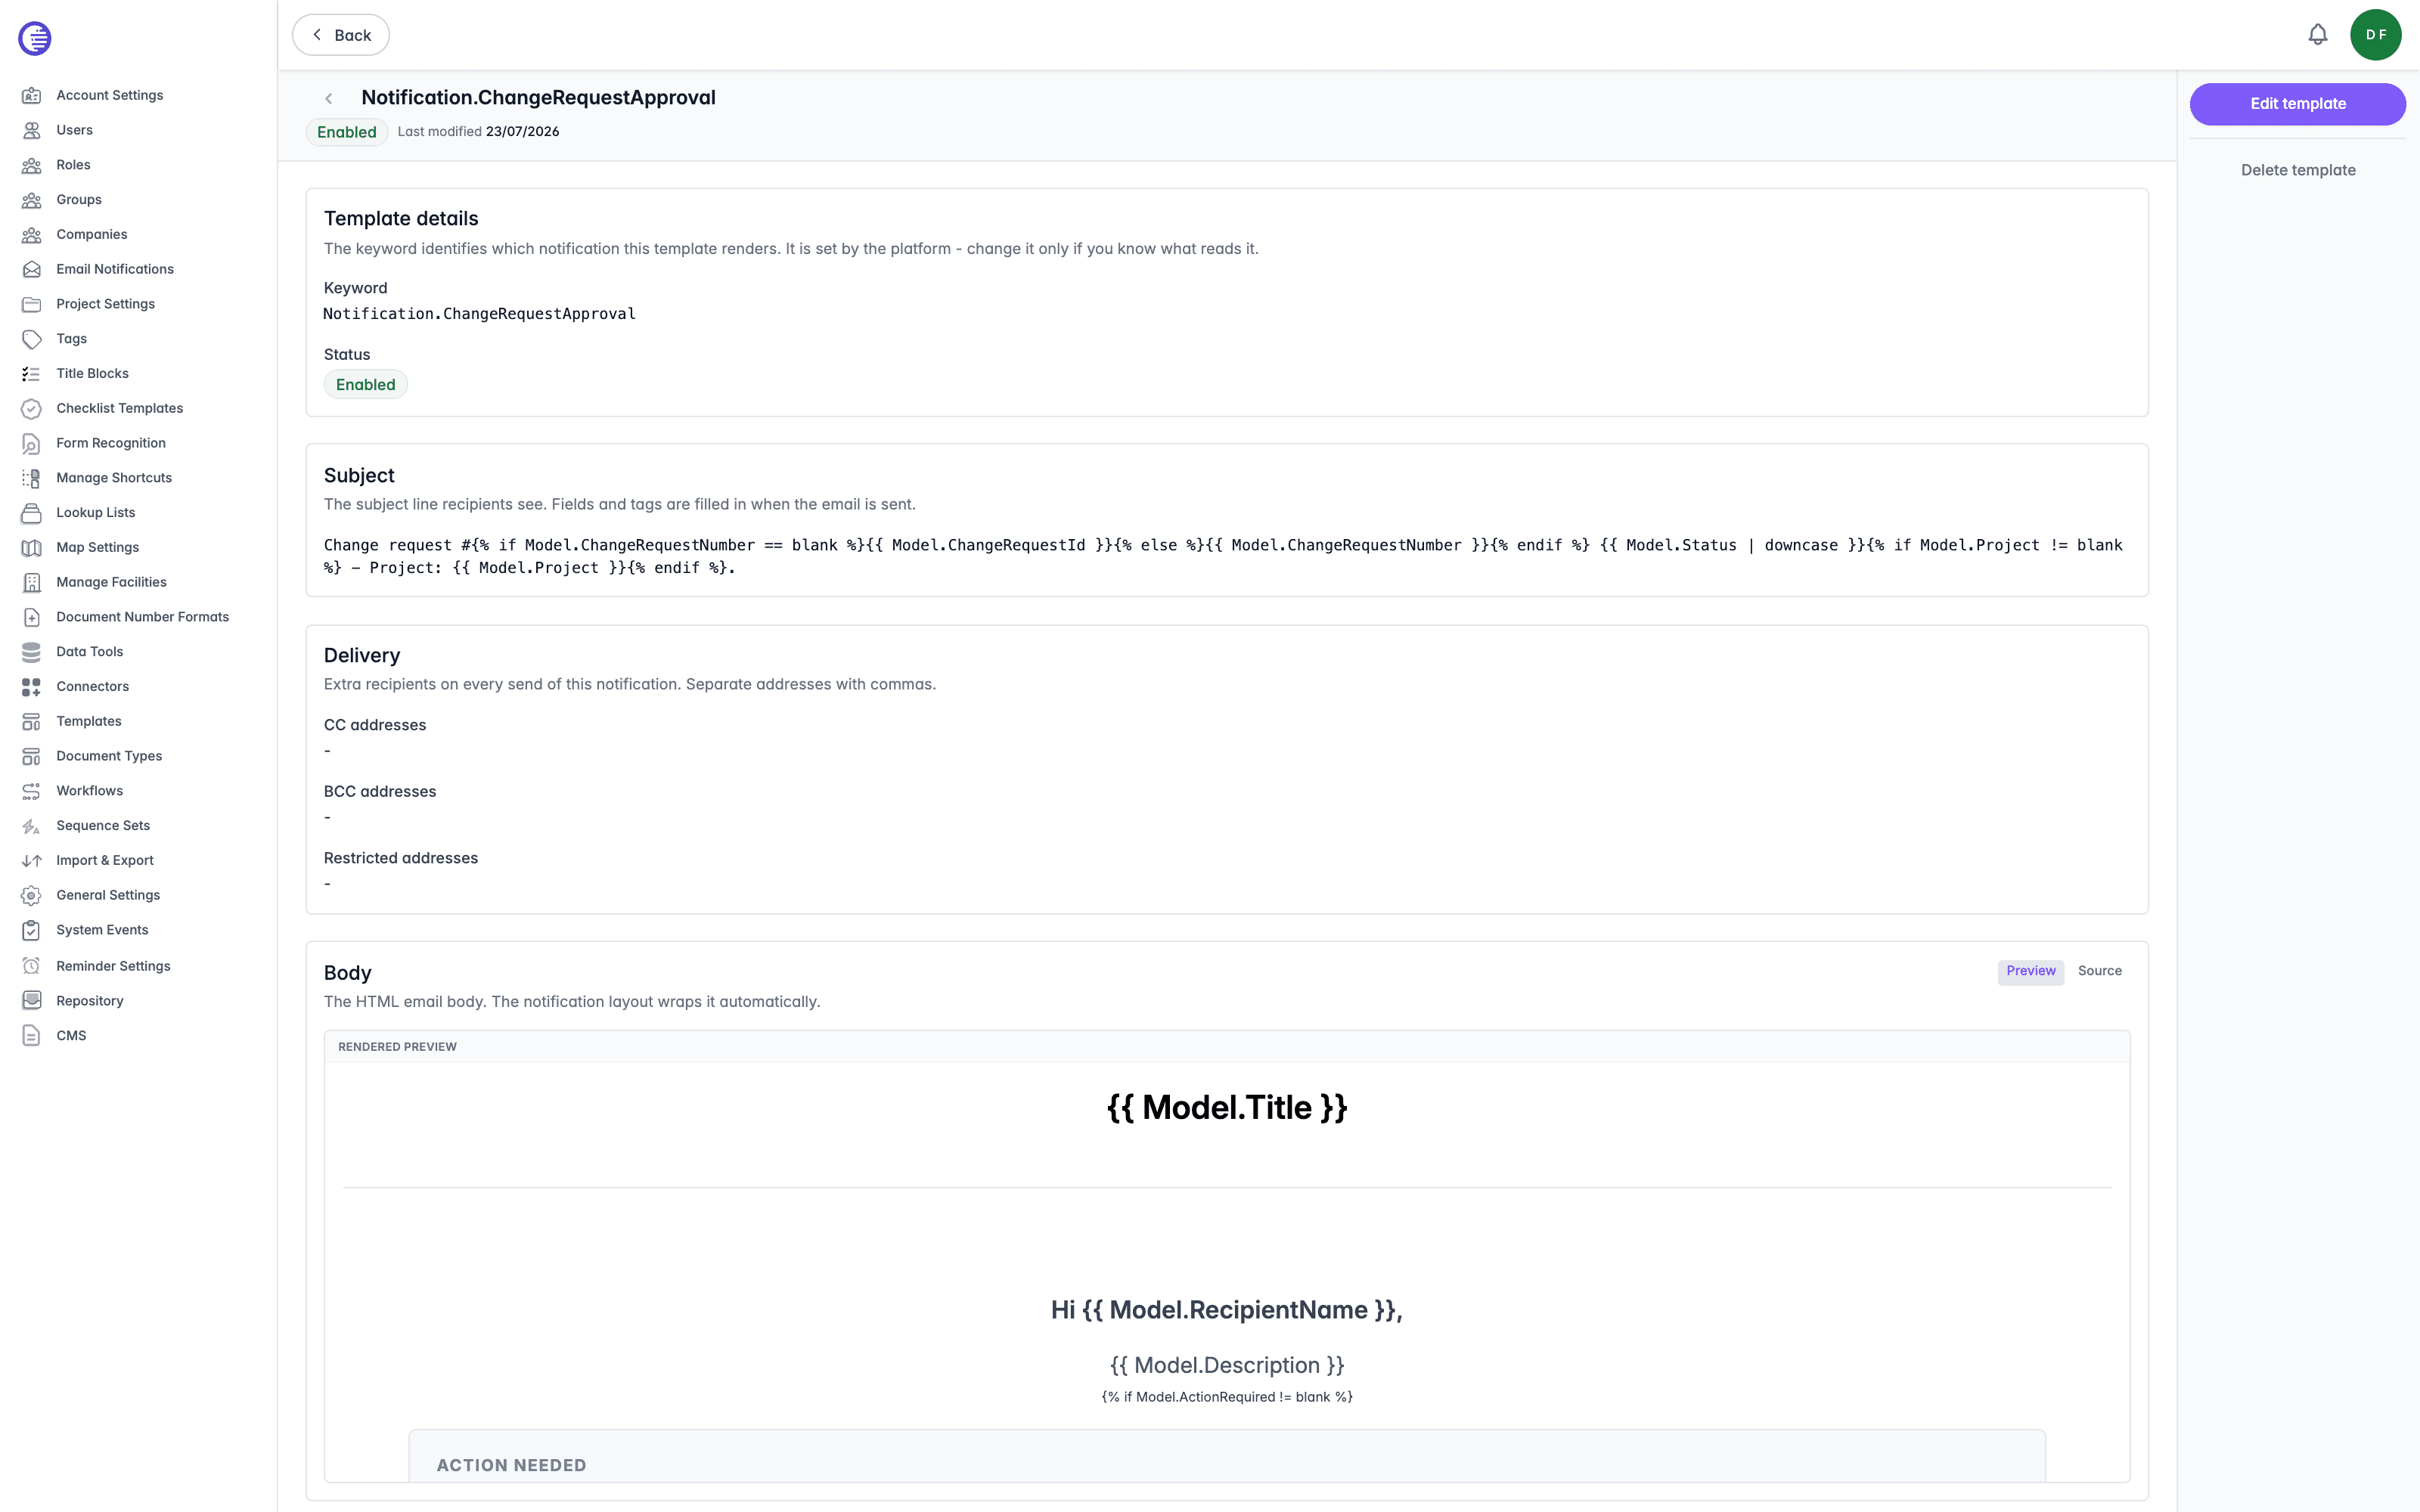
Select a template to open its details page, then select Edit template in the Action Pane.
Template Details
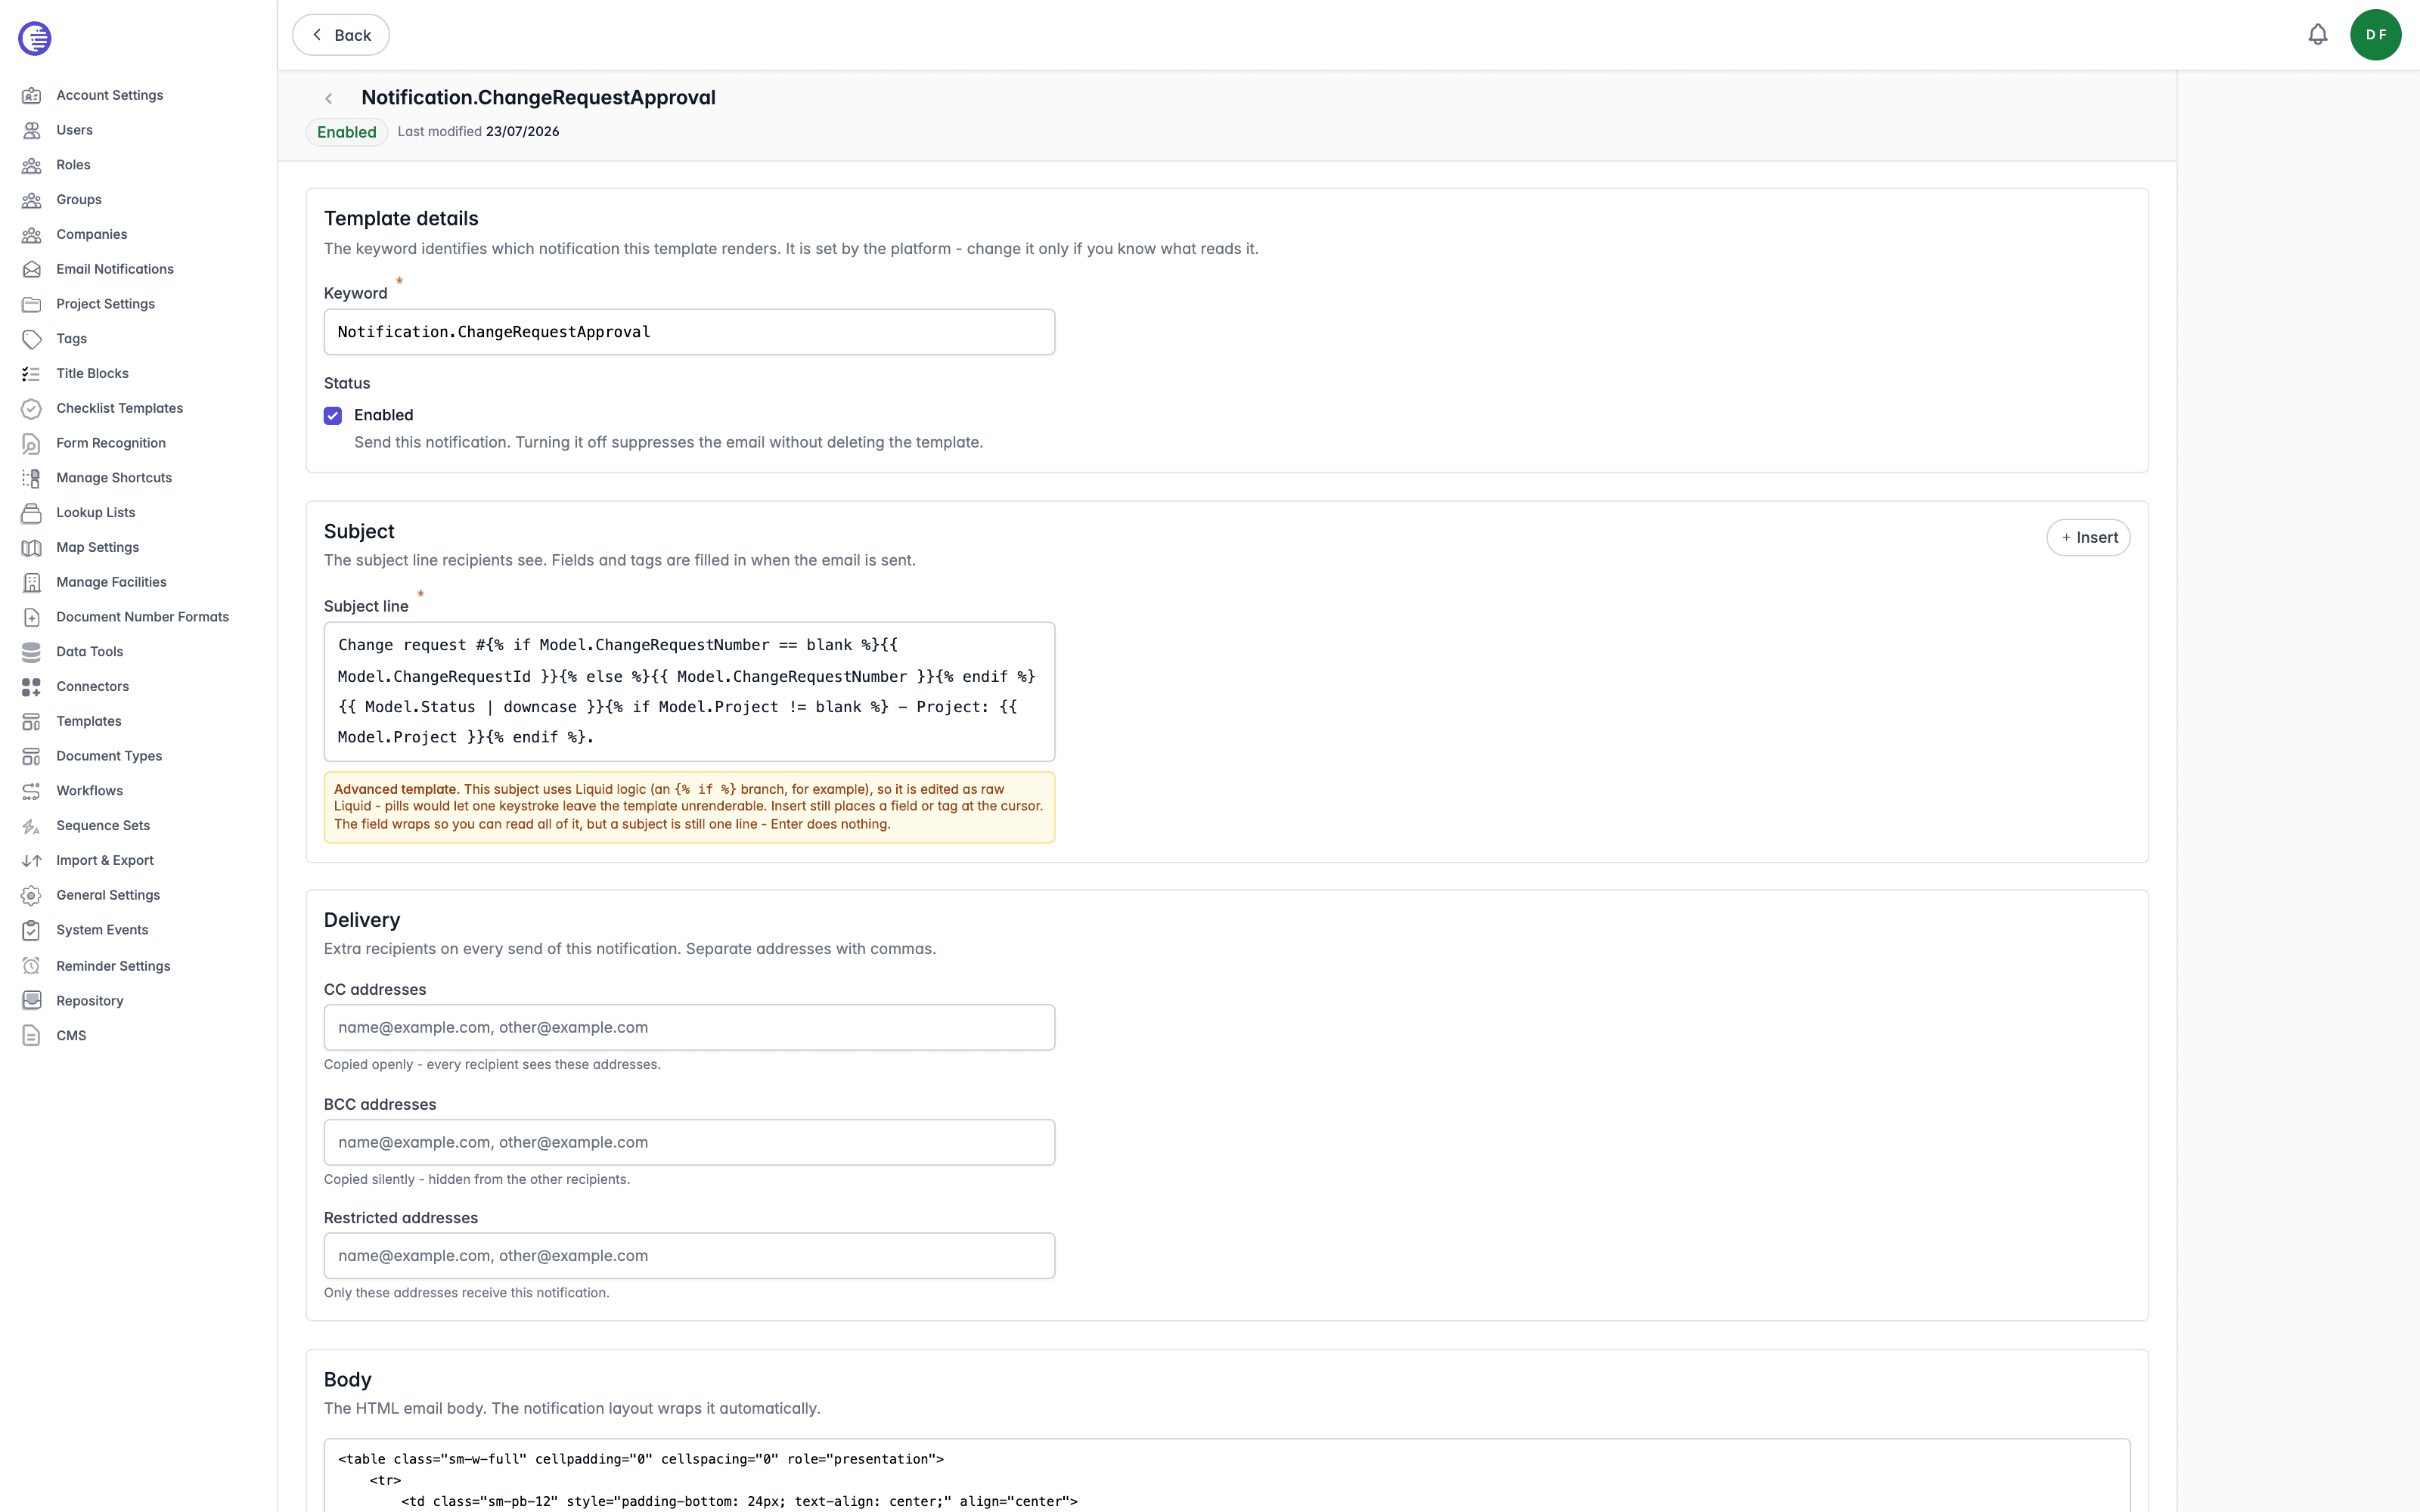
The Keyword identifies which notification this template renders. It is set by Lunr and is read-only; changing it would silently break the notification that sends against it. Enabled controls whether this notification is sent at all; turning it off suppresses the email without deleting the template.
Subject
The subject line recipients see, with fields and tags filled in when the email is sent. While editing, select + Insert to add a system field or a tenant tag at the cursor. The tag list mirrors every tag defined in the tenant, not a fixed subset, so a tag created after the template was last opened is available here immediately.
For some templates, + Insert offers no tags or fields at all, and the list reads empty. This happens for notifications marked confidential in the backend, since a confidential notification's subject is never rendered against the model. A token placed in that subject would silently fail to resolve, so treat an empty insert list as a sign to keep the subject plain text.
Most subjects edit as pills: each field or tag reads as a single block that can't be typed into by accident. A subject that already uses Liquid logic, such as an {% if %} branch, is instead edited as raw Liquid, since a pill editor would let a single keystroke leave the template unable to render; the page shows a note explaining this whenever it applies. A subject without any Liquid logic can still be switched to the raw editor manually with the Liquid source button, for example to enter a construct like {{ Model | tag: 'Case Number' }} directly. A subject is always a single line: pressing Enter does nothing, and a pasted or dropped line break is flattened to a space.
Delivery
Extra recipients on every send of this notification, entered as comma-separated addresses.
| Field | What it does |
|---|---|
| CC addresses | Copied openly; every recipient sees these addresses. |
| BCC addresses | Copied silently; hidden from the other recipients. |
| Restricted addresses | When set, only these addresses receive this notification. |
Body
The HTML email body; the notification layout wraps it automatically. Outside of edit mode, Preview and Source buttons switch between a rendered preview and the raw HTML. The rendered preview strips scripts and unsafe attributes before display, but this is a display safeguard only: while editing, the body is a plain HTML textarea, and whatever you type there is exactly what is stored.
Selecting Save changes validates both the subject and the body as Liquid markup. An invalid template, for example a mismatched {% if %} block, is rejected with a parse error describing the problem, rather than a generic save failure.
Select Save changes to save your edits, or Cancel to discard them. While editing, the Action Pane shows an unsaved changes note whenever any field differs from what was last saved. There is no option on this page to restore a template to its original wording, so copy the subject and body somewhere safe before making a large edit if you might want to revert.
Deleting a Template
Select Delete template in the Action Pane to open a confirmation dialog; this cannot be undone. The Notification.Layout template wraps every notification email and cannot be deleted.
Title Blocks
Synchronise data between a drawing's title block and the equivalent Lunr tags, so tags are populated automatically when a matching drawing is uploaded.
Email Log
Review every email Lunr has sent, including welcomes, login attempts, workflow changes, and project assignments, with the recipient, date, and time of each message.